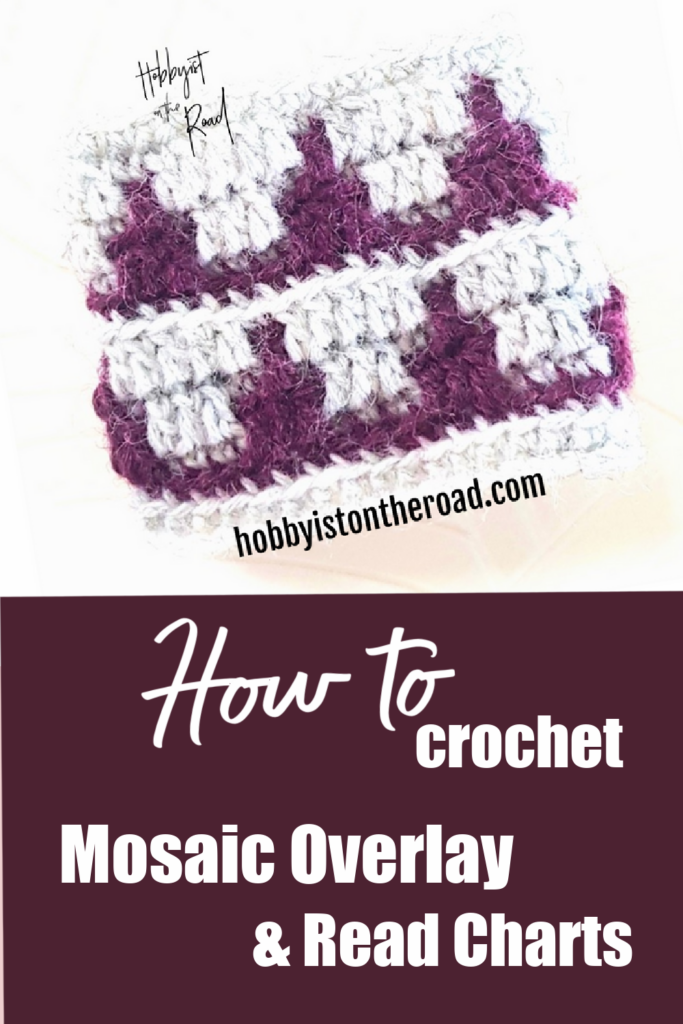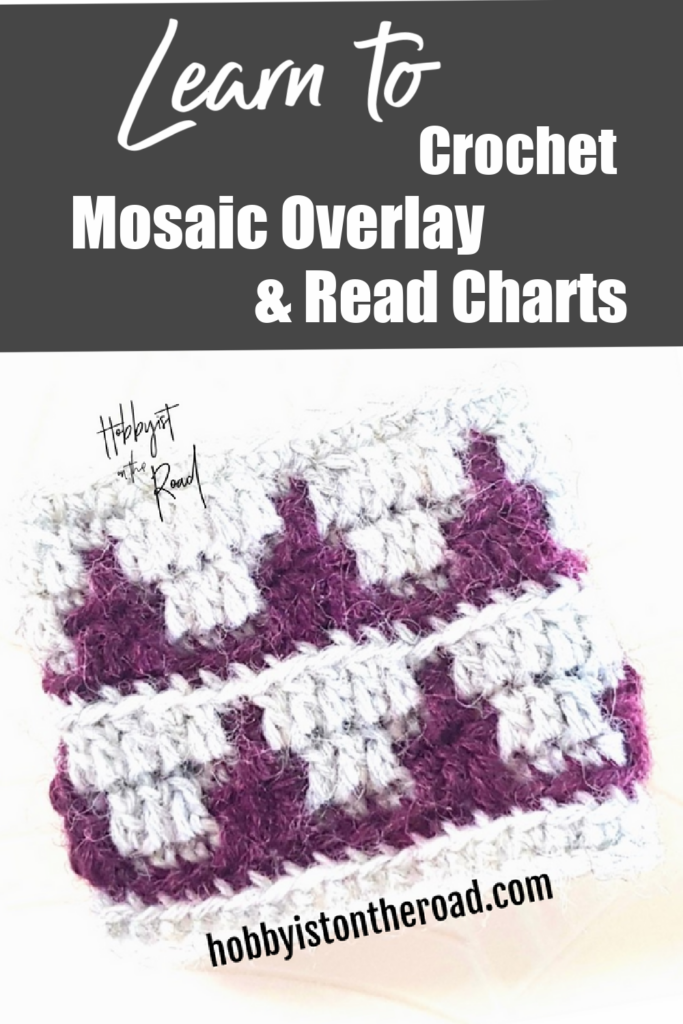
Today I am going to show you how to crochet Mosaic Overlay in the round, plus how to read Mosaic Overlay chart.
After following through with this tutorial, you will be able to confidently crochet any Mosaic Overlay project in the round.
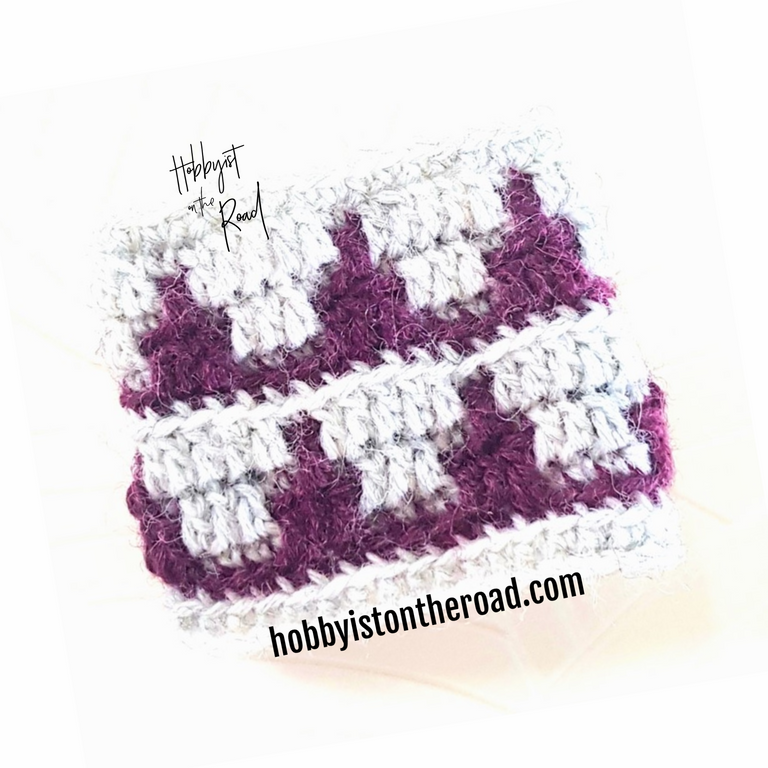
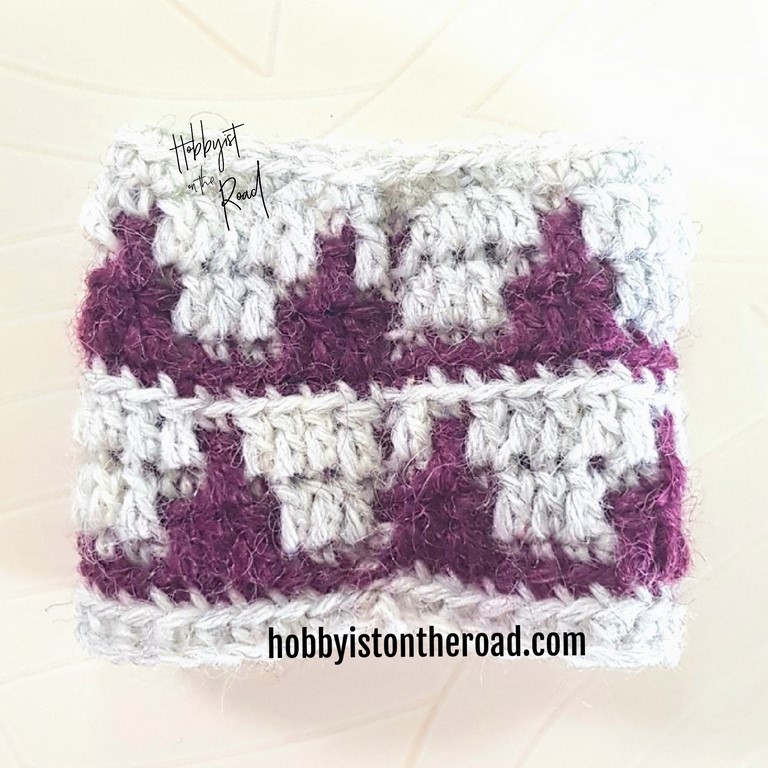
For this tutorial, I will show you how to crochet a small swatch like the one in the picture below following a chart.
If you want to receive this tutorial as a FREE downloadable PDF, go HERE
If you have never crocheted using Mosaic Overlay technique, here’s what you need to know:
- For mosaic crochet you need to know only the most basic crochet stitches – single crochet (sc), double crochet (dc), chain(ch) and slip stitch (sl st).
2. The patterns are created using only sc and dc stitches. Sl st and ch are used for starting the project, connecting the rounds and finishing the project.
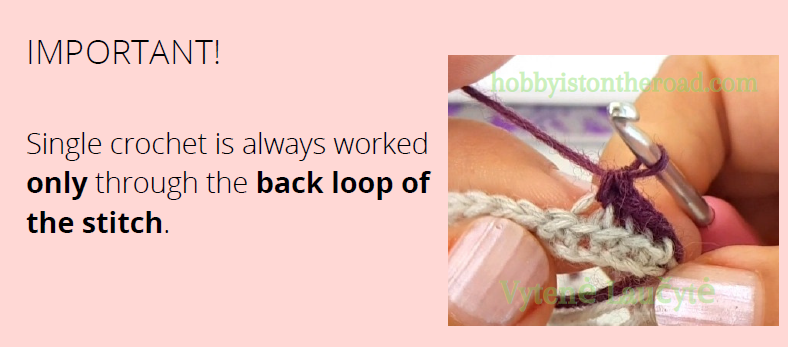
3. Sc is always worked ONLY through the back loop of the stitch.
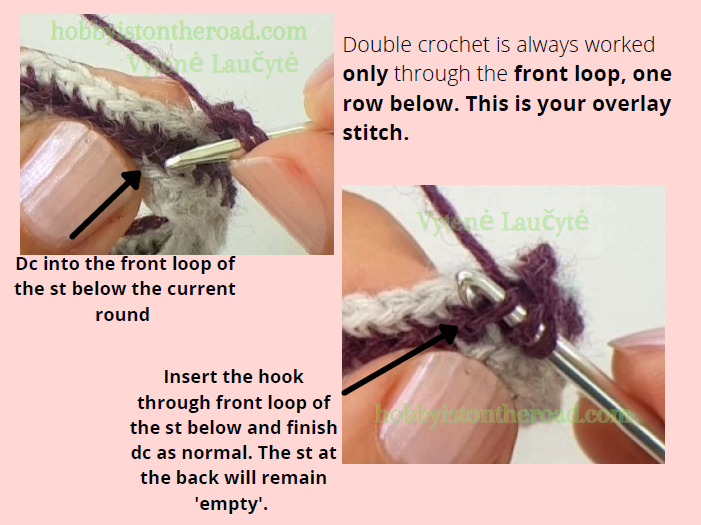
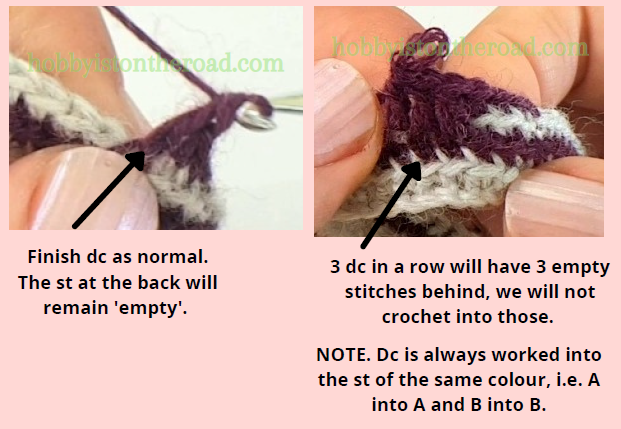
4. Dc is always worked ONLY through the front loop of the stitch one row below. It is also worked only into the stitch of the same colour, e.g. dc in colour A will always be worked into the stitch of colour A below.
If you want to receive this tutorial as a FREE downloadable PDF, go HERE
- Mosaic crochet projects are typically worked using two colours, marked as A or B.
- Each round is worked with 1 colour only. IMPORTANT. We do not change colours in the middle of the round.
- When we crochet in the round, we do not cut the yarn.
Mosaic Overlay Chart
Your mosaic overlay project chart tells you everything you need to know in order to crochet a picture.
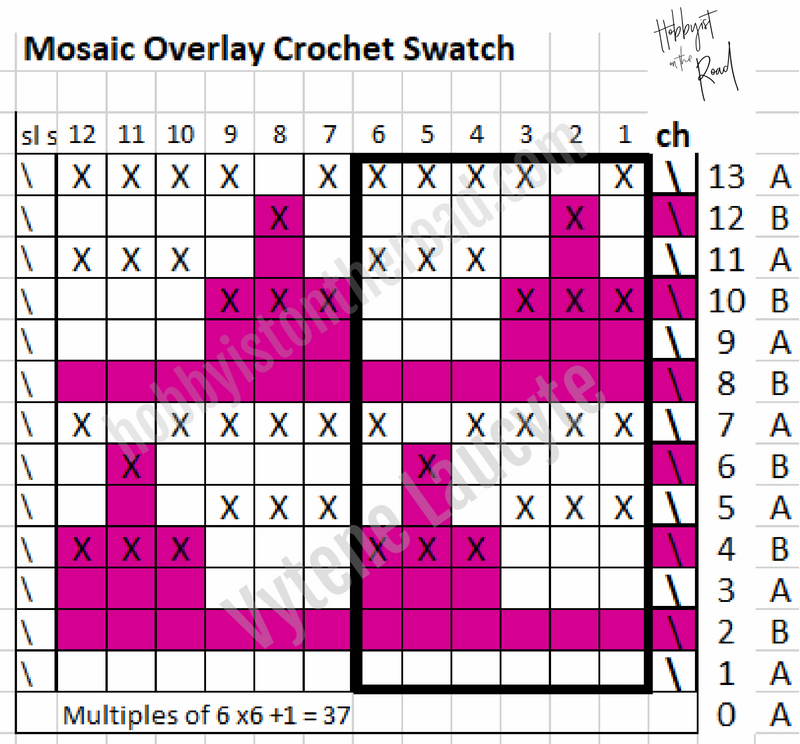
Start reading the chart at the bottom right corner.
A, B – the colour for the round. In my swatch tutorial, colour A is light grey and colour B is purple.
Numbers on the right hand side – round numbers. Number 0 is the foundation chain.
Numbers on the top – stitch numbers. Each box of the chart corresponds to one stitch.
Boxes with symbol \ on the right means ch, and on the left means sl st. In other words, we will finish each round with a sl st and ch 1. These stitches are not part of the picture, they are seam stitches.
Boxes with no symbol in them (either white or pink) – single crochet (sc).
Boxes with X (either white or pink) – double crochet (dc).
Foundational chain stitch calculations:
As you can see in the chart, one picture panel is 6 sts wide. The second half of the chart is the exact repeat of the first (I normally include it so as to have an idea of how the pattern will look like).
You need to decide how many times you will repeat this picture panel for your project.
In the case of my swatch, I will repeat the picture panel 6 times.
Which means I have to ch multiples of 6 x 6 times + 1chain for turning (6×6+1 =37).
So the swatch pattern will start:
R0(A) (foundations ch round colour A) ch 37
NOTE. When you work on bigger projects, a longer chain will twist a lot at this stage. Therefore, don’t connect the two ends at this stage, because it is easier to connect the ends after you’ve done the next row.
R1 (A) 36 sc
At this stage we will connect the ends and change the colour.
If you want to receive this tutorial as a FREE downloadable PDF, go HERE
How to connect the rounds and change the colour?
When you arrive at the end of your round.
Insert your hook into the ch where you started the round.
Using the next colour yarn (not the one you’ve just worked with), sl st and ch 1.
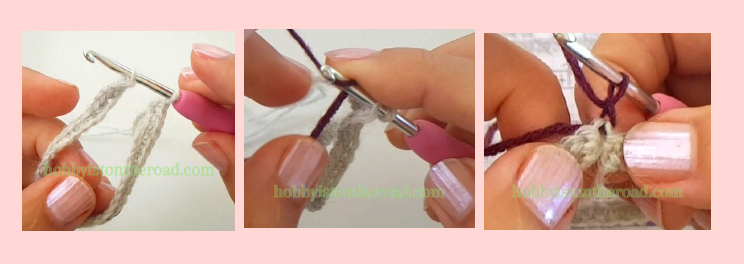
Do NOT cut the yarn. Simply leave the yarn you are not working with hanging at the seam, you will pick it up in the next round.
Make sure your sl st and ch are as tight as possible. You will not have to work into that sl st when you next come around. Working into the tight ch will be a bit difficult, but that’s ok because a tight ch will make your seam tidy and going straight up.
IMPORTANT
As you work through this swatch pattern, you will see that I start each round with a sl st and ch. This is because we connect the round using the next colour coming up, so it is not logical to mark sl st and ch at the end of a round, but rather at the start of the next colour round.
If you want to receive this tutorial as a FREE downloadable PDF, go HERE
Continue…
Looking at the chart, from bottom right to left, let’s continue:
We’ve done R0 and R1 above.
I will now divide the chart round by round and write the pattern underneath for each round.

R2 (B) sl st, ch 1, 36 sc (through the back loop only, as per explanation above)

R3 (A) sl st, ch 1, 36 sc (NOTE although the colour seems to change on the chart, as mentioned above, we will NOT change the colour in the middle of the round, continue sc through the back loop only with colour A as you have started).

R4 (B) sl st, ch 1, [3sc, 3 dc] x 6 times ( dc stitch is marked with X in the chart. Please see above how to do dc in overlay mosaic. This is your overlay stitch which will ‘colour in’ the picture).
NOTE. At this stage you know everything there is to know about reading overlay mosaic crochet chart as well as crocheting Mosaic in the round. Let’s continue with reading the chart and crocheting each round.

R5 (A) sl st, ch 1, [3 dc, 3sc] x 6 times

R6 (B) sl st, ch 1, [4 sc, 1dc,1sc] x 6 times

R7 (A) sl st, ch 1, [4 dc, 1sc, 1dc] x 6times

R8 (B) sl st, ch 1, 36 sc,

R9 (A) sl st, ch 1, 36 sc

R10 (B) sl st, ch 1, [3dc, 3sc] x 6 times

R11 (A) sl st, ch 1, [3sc, 3dc] x 6 times

R12 (B) sl st, ch 1, [1sc, 1dc, 4sc] x 6 times

R13 (A) sl st, ch 1, [1dc, 1sc, 4dc] x 6 times
I finished the swatch with a round of sc through BOTH loops, sl st, tie off and cut.
Congratulations! You now know how to crochet Overlay Mosaic technique in the round!
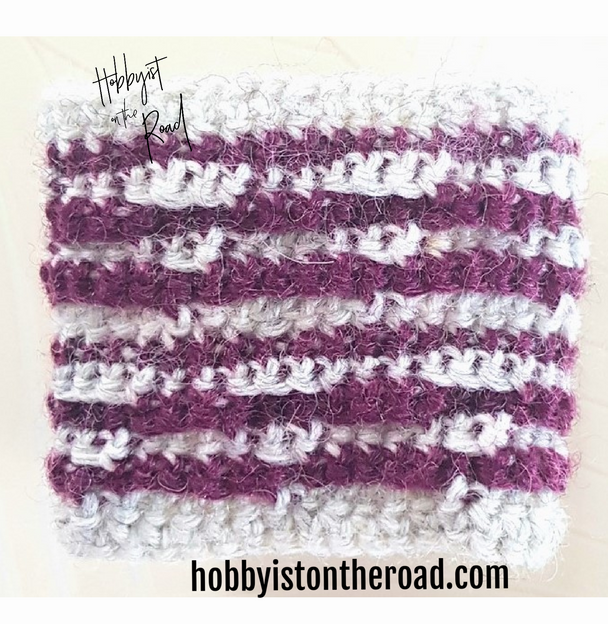
If you turn your swatch inside out, you will see that the back of it is striped.
You can now crochet any Overlay Mosaic technique pattern.
For example, you can confidently crochet this Baltic Flowers Cowl.
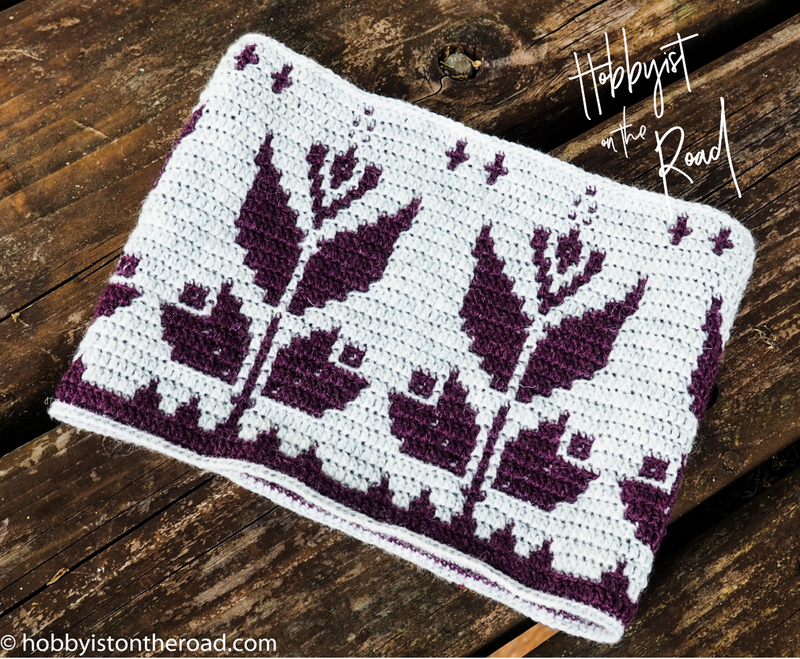
It will make a beautiful accessory for your outfits or a unique gift for anyone who appreciates handmade items.
Get it on:


Create beauty one stitch at a time!
Liked this post?
Pin it for later!