Unlike other crochet projects, Irish crochet dress design is a fluid process even if you’ve got a handbook with instructions at hand.
There are no hard and fast rules, just general guiding principles.
I am now at the stage where I have finished crocheting all separate elements for the dress – flowers, leaves, stems, etc., you can see all of them HERE .
Now I have to lay the design of the dress out and start crocheting the lace.
How does Irish crochet dress design process work?
Normally, according to all the Irish crochet experts, I am supposed to cut separate parts of the dress from a fabric in order to create a sort of platform for modeling the crochet dress, so as the finished product would suit the wearer perfectly.
I decided I wasn’t going to bother with that and used an old, well-fitting dress for modeling.
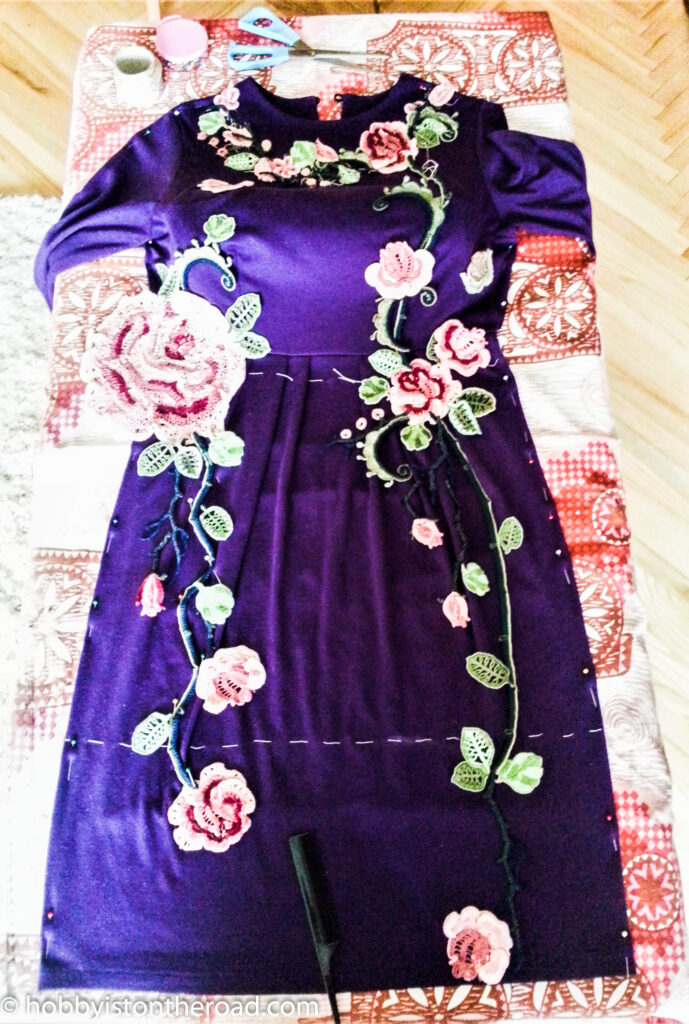
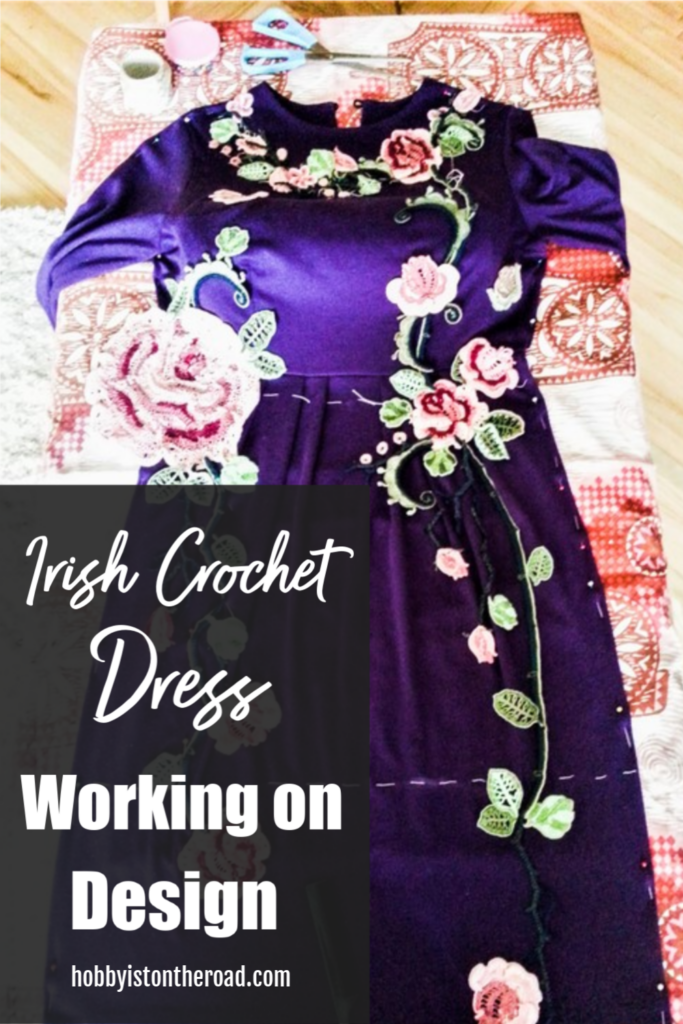
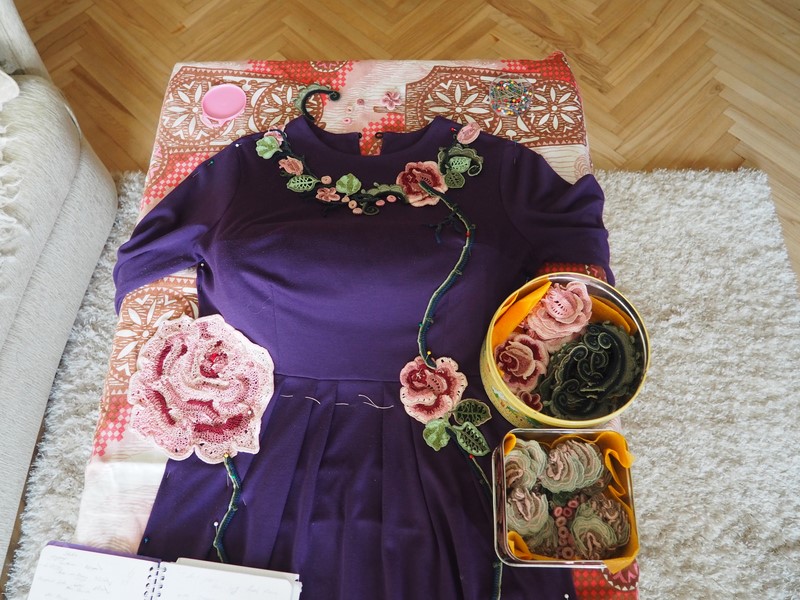
So first of all, I have to lay out the ‘picture’ using the brightest elements (roses, branches, leaves, scrolls).
The challenge here is to place these elements in such a way so as to avoid an undesirable optical effect. For example, if the bright roses are placed too much on the sides, they will visually expand my waist. So I have placed them slightly towards the middle.
Frankly, I thought this will be the easiest and the most fun part of the whole project, especially considering the fact that I have bought the instructions and know, how the finished dress design is supposed to look like.
… but…
… when I started laying out the picture, I realized it’s not as easy as it seems…
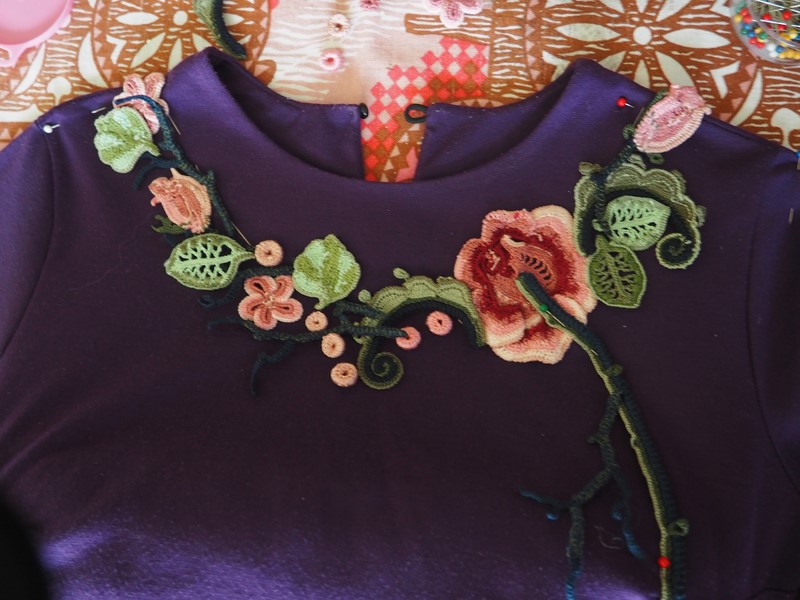
For example, when it turns out my elements are larger than those of the master crocheter in the handbook. It’s because I used a slightly larger hook (0.6mm and 0.75mm) instead of 0.5mm and 0.6mm.
What does it mean for me?
It simply means I need fewer of the elements for the main picture, which in turn means I have to rethink the design at least in part.
Size and Type of the Dress
Another thing I had to consider is the size and type of the dress.
The dress in the handbook was a mini sleeveless dress made for a very slim young lady.
As I am a much curvier woman than the girl in the handbook, I had to make even more adjustments:
- rearrange the design for a knee-length dress;
- incorporate 3/4 sleeves.
What does this mean in terms of dress design?
Again, I have to make even more adjustments:
- If I don’t want the picture to make me look larger, I have to distribute the main dress elements vertically, using full length of the dress and avoiding horizontal distribution as much as possible.
- I decided I will use only background elements for the sleeves, in order to avoid the widening effect.
- I may have to crochet additional elements for the sleeves.
- I am hoping I have enough yarn left…
Someone suggested I should go for a full-length, long sleeve dress. I think a dress like this would be absolutely amazing but, unfortunately, would present me with very few opportunities to wear it.
Plus, I haven’t got enough yarn and the price I’ve paid for what I already have is eye-watering…
So, this time, friends, it will be a knee-length dress 🙂
After I lay out the most conspicuous elements to create the ‘picture’, I fill in the rest of the space with less noticeable background flowers, leaves and cords. All the while remembering to distribute elements vertically.
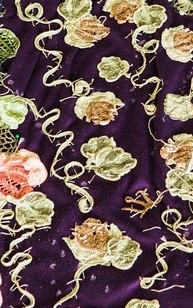
Then when I am satisfied with the picture, I have to turn all the elements around and pin them on the modeling dress. This way they won’t dislodge during the lacing process.
After a week of walking around the dress, I am somewhat satisfied with the design and will start crocheting lace.
Strangely, I find myself feeling somewhat anxious…
Create beauty one stitch at a time!
Liked this post?
Pin it for later!
