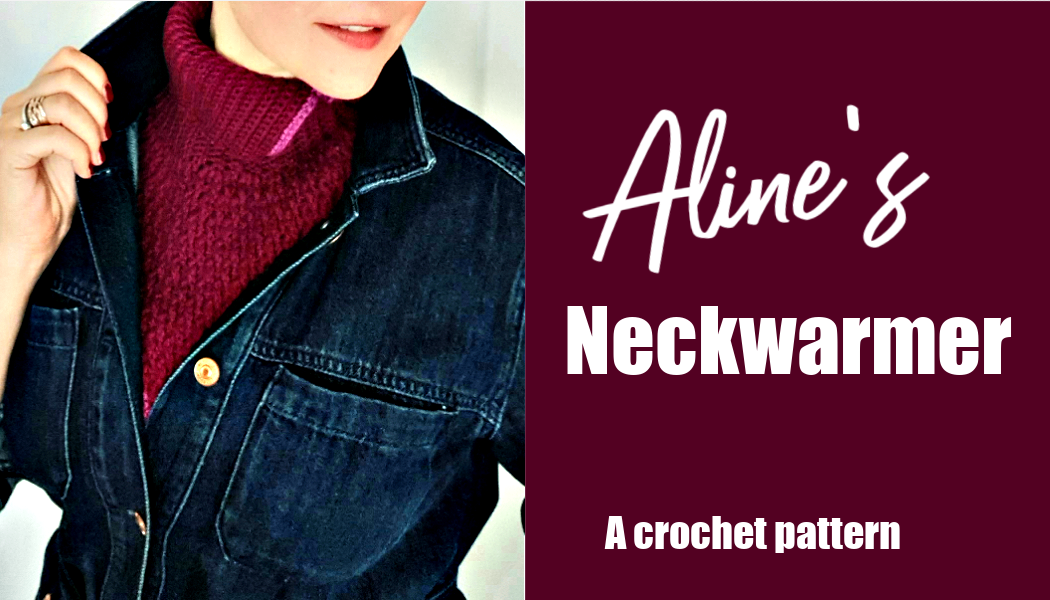
While I love a straightforward cowl like this one, and wear mine very often, I found that whenever I have a V-neck top on, my chest gets somewhat chilly.
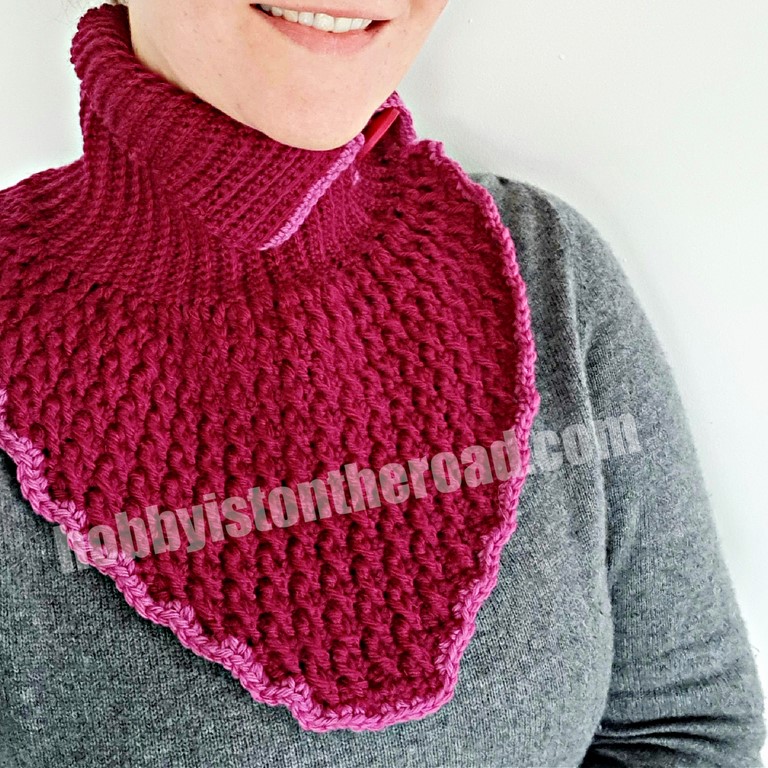
So to solve this problem, I simply created a dicky-like Aline’s neck warmer, with a triangular bib in the front, which will cover the chest without adding any bulk to an outfit.
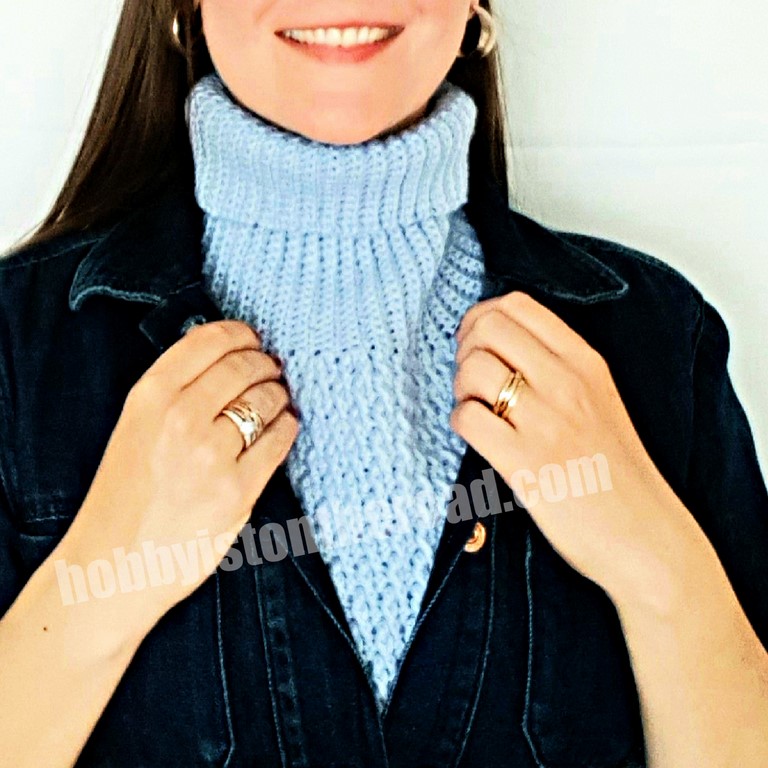
I intended this dicky-like neckwarmer to be worn only under other garments. I am wearing it on top of my sweater in the above picture only for demonstration purposes.
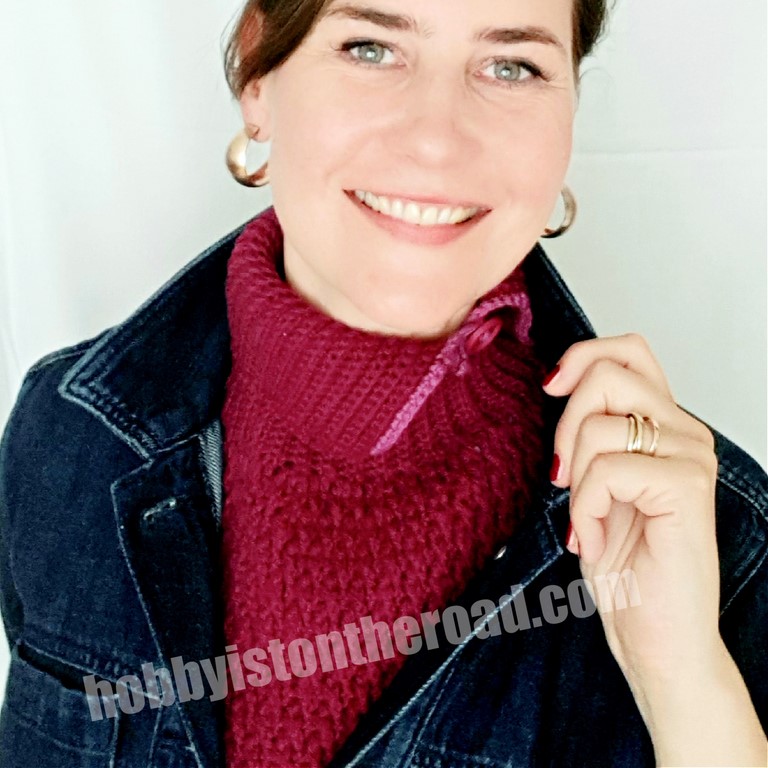
This very soft and luxurious-looking Aline’s neck warmer can be worn instead of a scarf under a coat, a jacket or a blazer or as a pullover imitation paired with V-neck tops.
I like wearing mine under my jeans or leather jackets, because I normally keep the first few buttons open and need my chest to stay cosy.
Quick project
This is a very quick project worked with 5mm and 6mm hooks.
I chose superwash classic wool 3.52oz (100g)/ 219yds (200m) yarn.
I used soft, machine washable Ella Rae yarn, but any equivalent will do (check that the yardage is the same or similar).
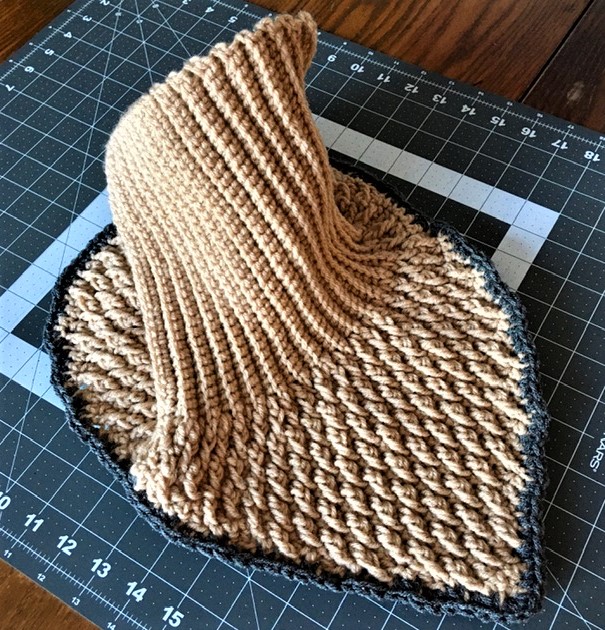
You can easily adjust the pattern even if you do not have the right weight yarn. If you decide to go for a chunkier yarn, you will simply reduce number of stitches.
One of my pattern testers did exactly that, see image below. I love how a thicker yarn shows off that Alpine stitch!
Gayla’s chunky neckwarmer.
With a finer yarn you will have to increase the number of stitches to achieve the size you want.
I included size increase/decrease explanations in the downloadable pattern, tehy are very easy to follow.
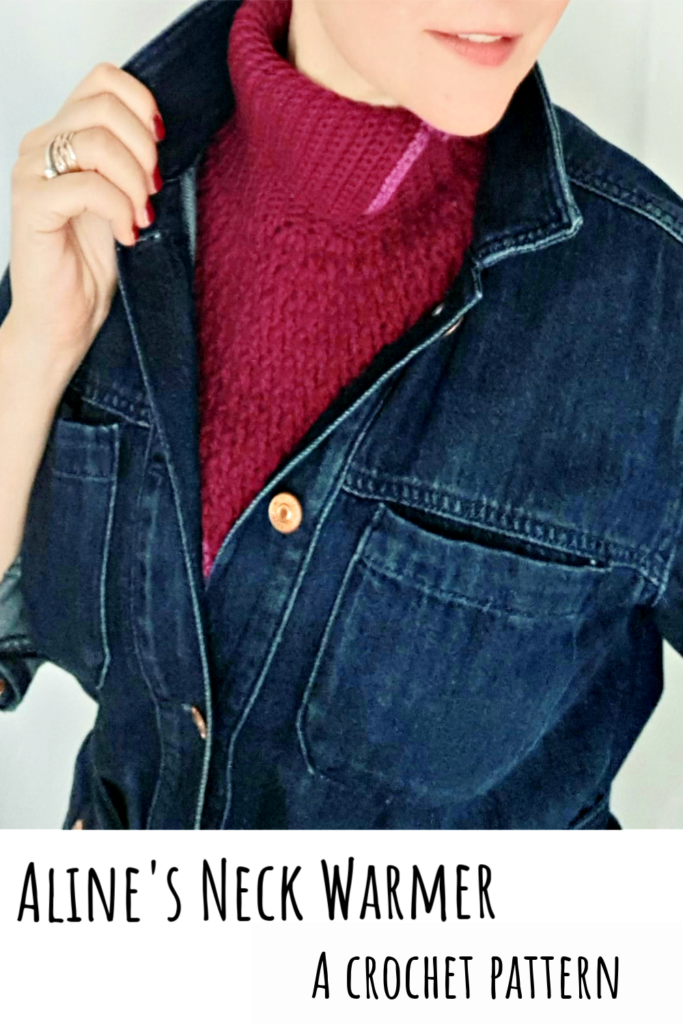
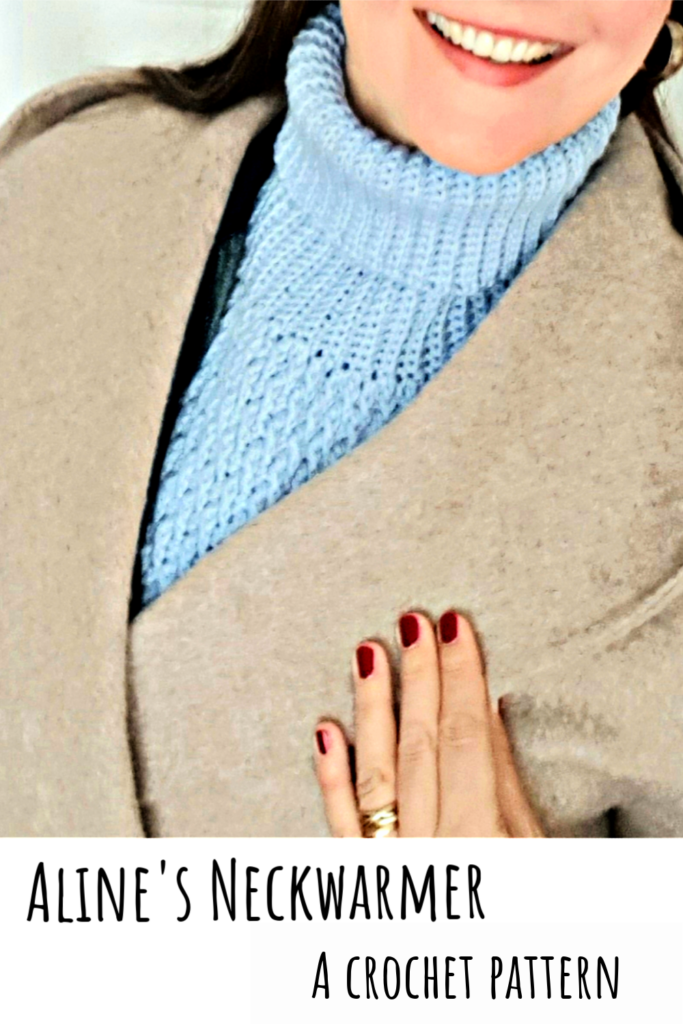
I originally created Aline’s Neck Warmer with a slit in the turtle neck and a button fastening. But it seems a lot of people prefer a full turtle neck without a slit. A family member asked me for a cowl like this, but with a full turtle neck. I really love how it turned out in this light blue colour (see picture below).
You can see that it is a bit loose on me as it is a larger size than the cherry one above.
Get instantly downloadable Aline’s Neck Warmer Pattern HERE:
Most of those who tested the pattern for me went for completely different colour combinations.
As you can see in the photos below, the colour totally changes the look and feel of a design.
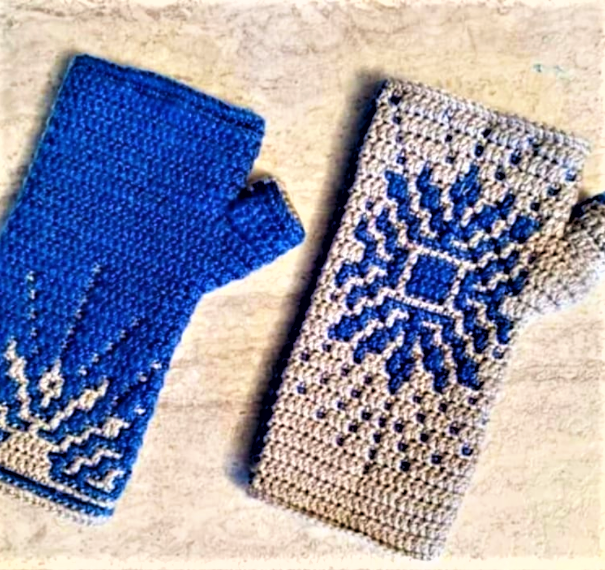
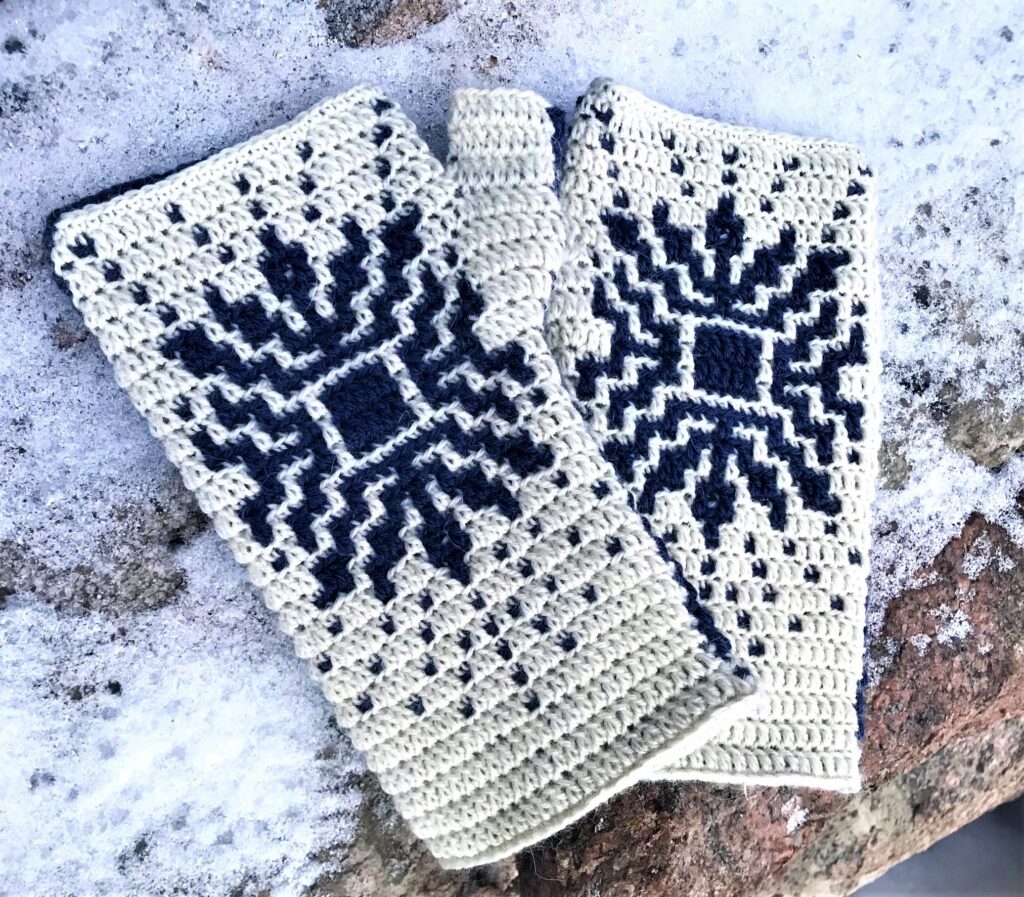
Royal Blue – Cream
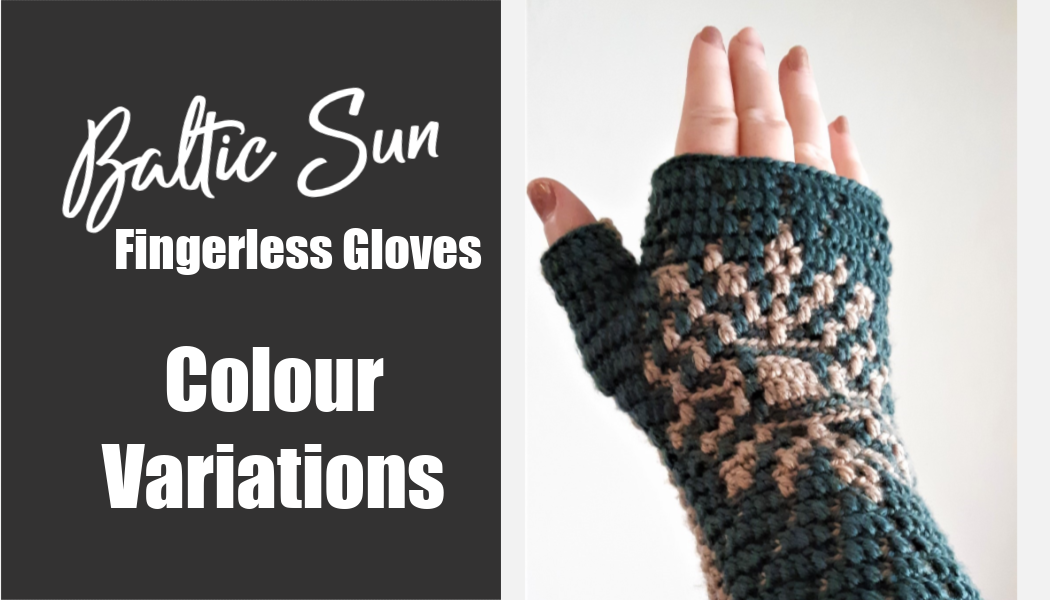
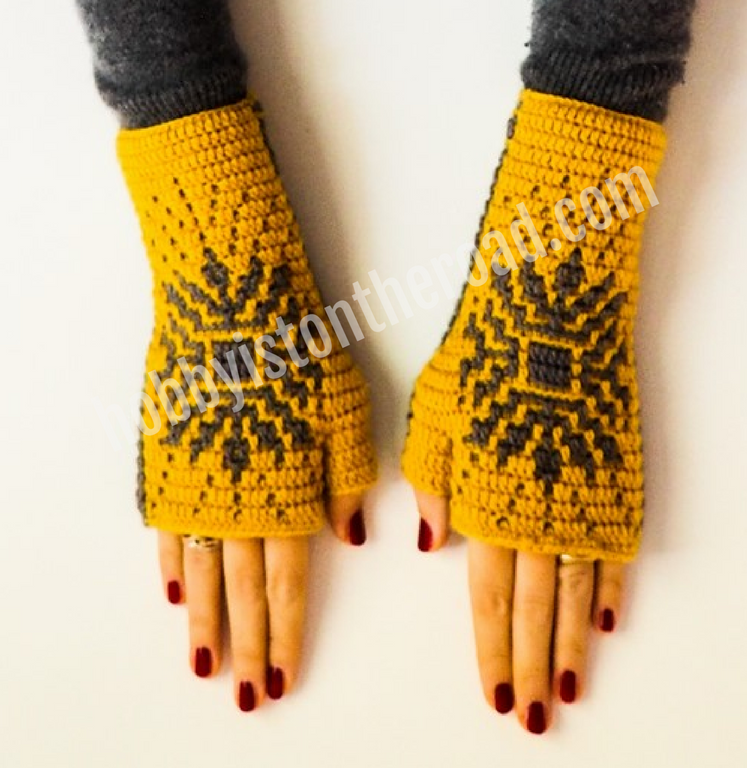
@gayla_bjork chose this beautiful royal blue for the sun and palm-side background elements of the design. She matched it with a cream colour to finish the classy look. It seems that these fingerless mitts will go with so many outfits!
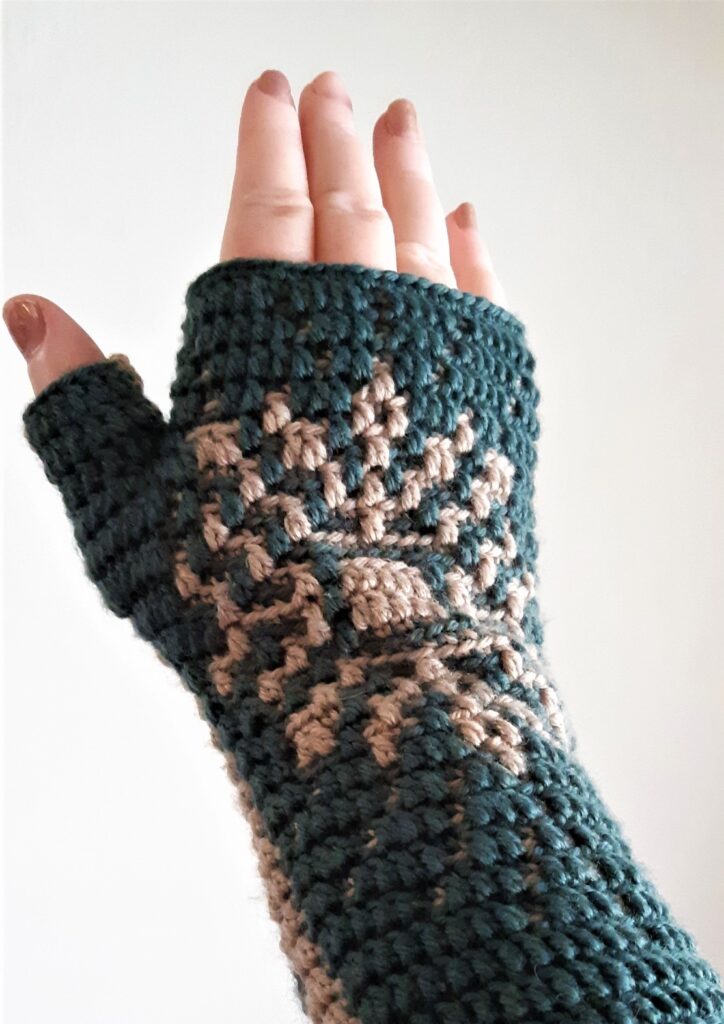
Sage green – sand
For her gloves Louise picked this beautiful sage green colour and paired it with the neutral sand/cream shade. Sage is also one of those colours that can be easily paired with almost any colour.
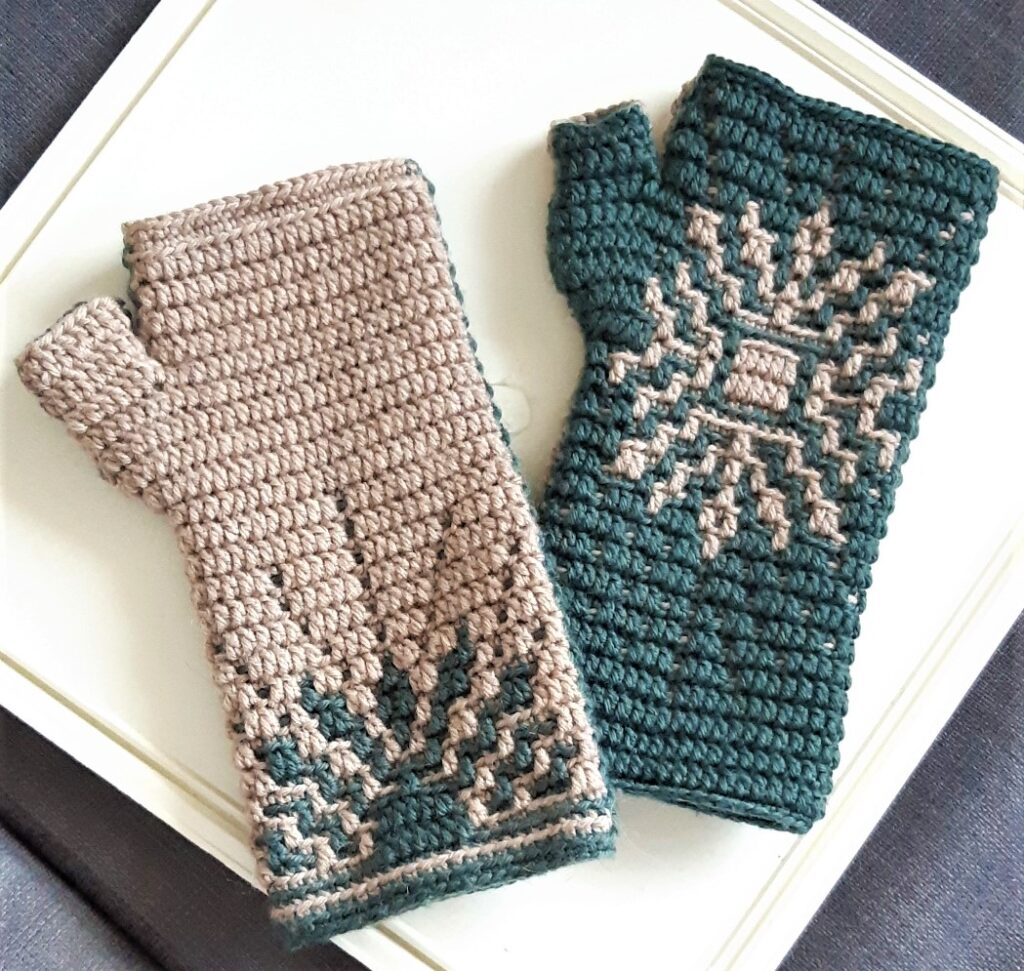
Navy Blue – White
@kylli_s chose to crochet the gloves using the timeless navy blue/white colour combination.
I think this colour combination never goes out of fashion, and, it makes a lot of sense to have a few blue-white accessories (or maybe even clothes) in our wardrobes.
It seems to me that the design benefits a lot from reversing the colours on the top and the palm-side.
I personally love this technique of reversing the colours because this gives the design versatility without overcomplicating it. Plus, when you use this colour reverse technique for the second accessory such as the earwarmer, the finished look feels less matchy-matchy and more effortlessly organic.
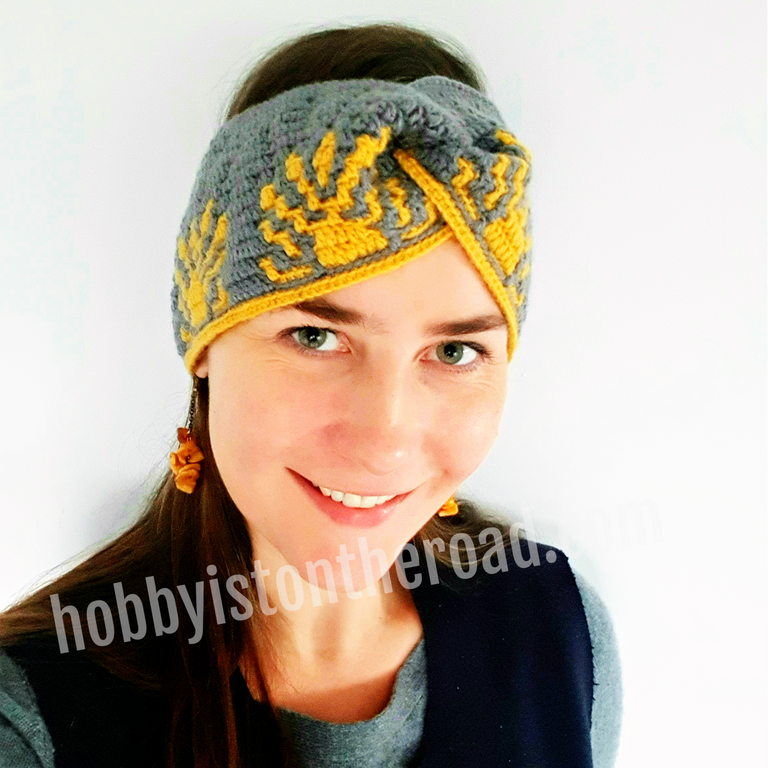
You can get the Baltic Sun Fingerless Gloves & Earwarmer Pattern HERE:
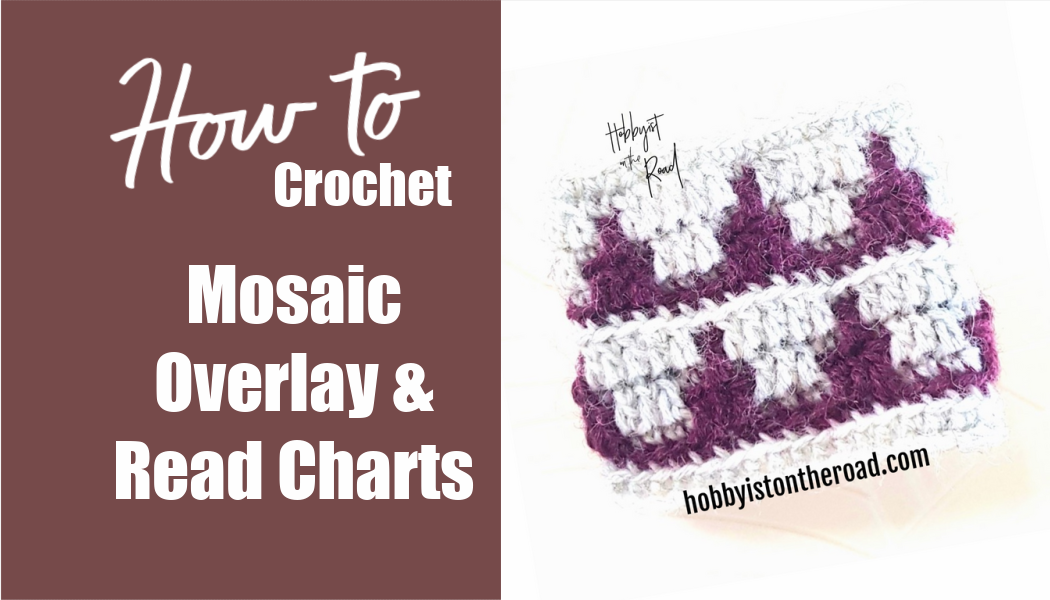
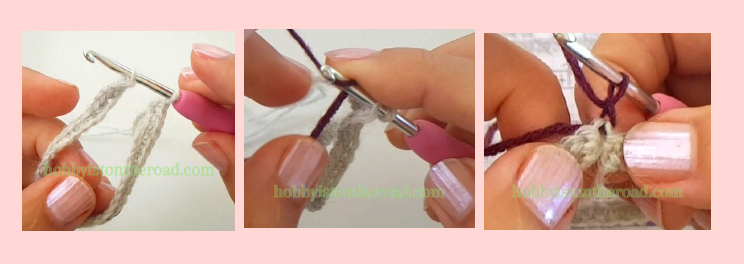
If you have never crocheted using Mosaic Overlay technique, here’s what you need to know:
For mosaic crochet you need to know only the most basic crochet stitches – single crochet (sc), double crochet (dc), chain(ch) and slip stitch (sl st).
2. The patterns are created using only sc and dc stitches. Sl st and ch are used for starting the project, connecting the rounds and finishing the project.
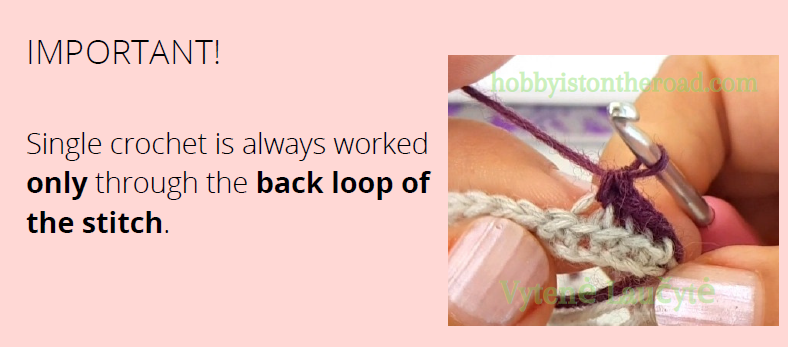
3. Sc is always worked ONLY through the back loop of the stitch.
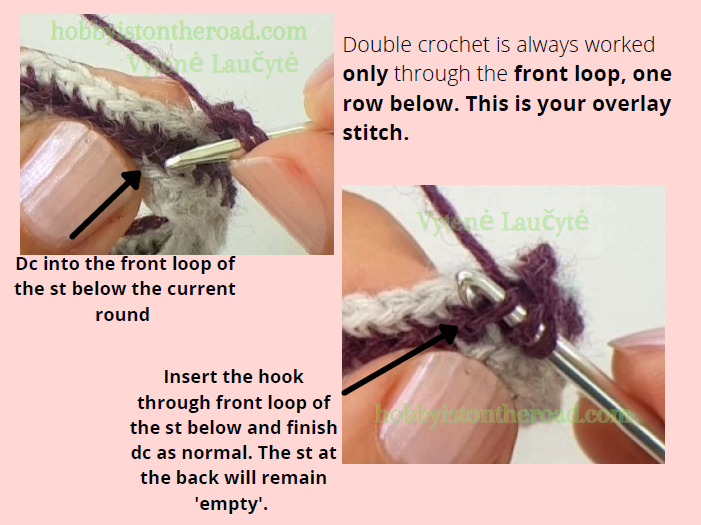
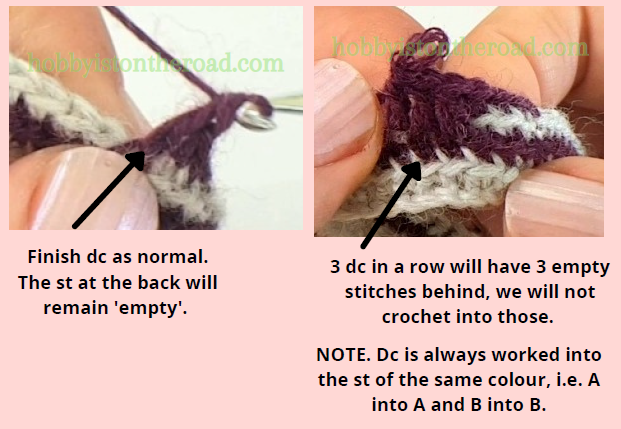
4. Dc is always worked ONLY through the front loop of the stitch one row below. It is also worked only into the stitch of the same colour, e.g. dc in colour A will always be worked into the stitch of colour A below.
Mosaic crochet projects are typically worked using two colours, marked as A or B.
Each round is worked with 1 colour only. IMPORTANT. We do not change colours in the middle of the round.
When we crochet in the round, we do not cut the yarn.
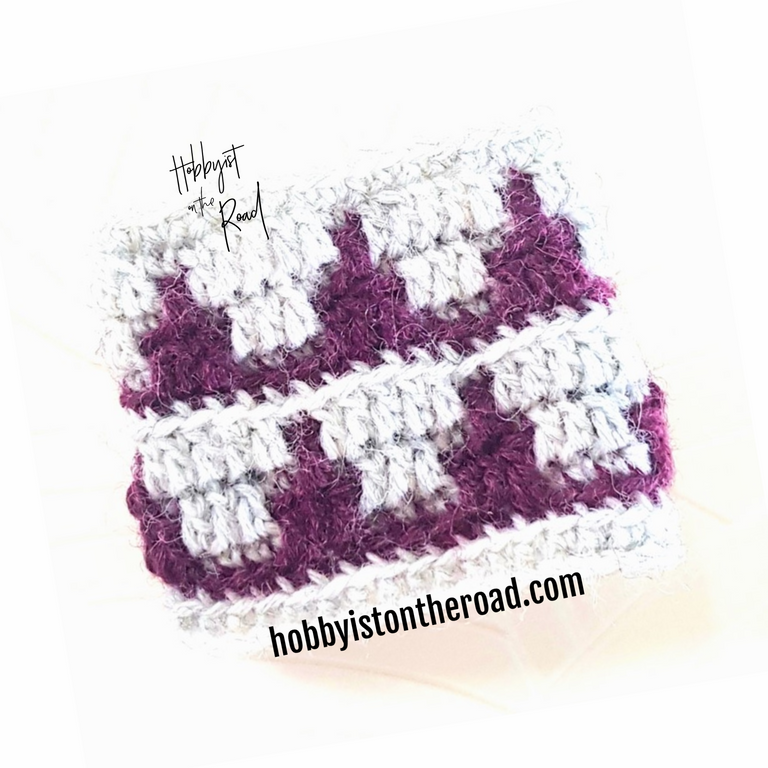
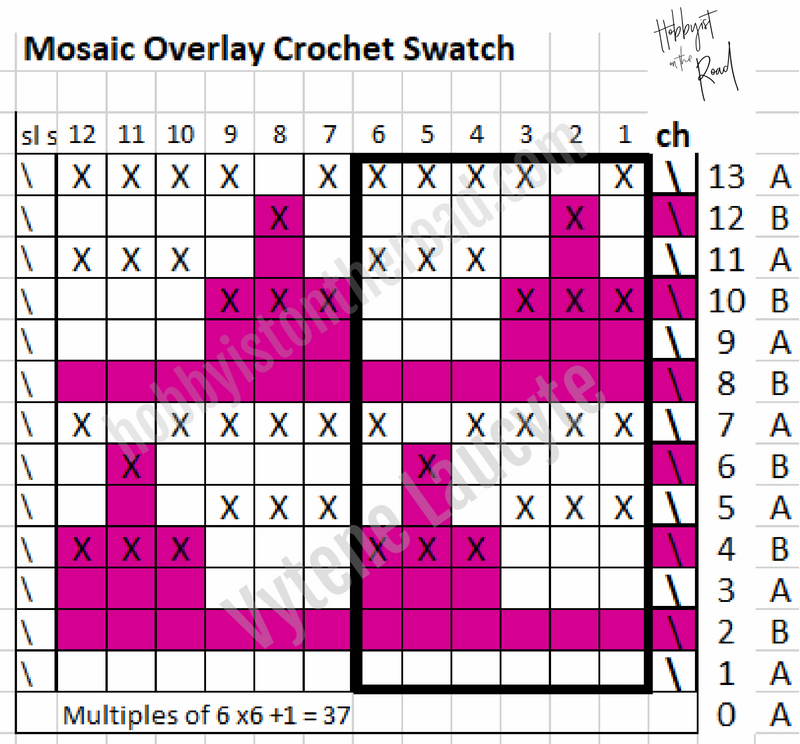
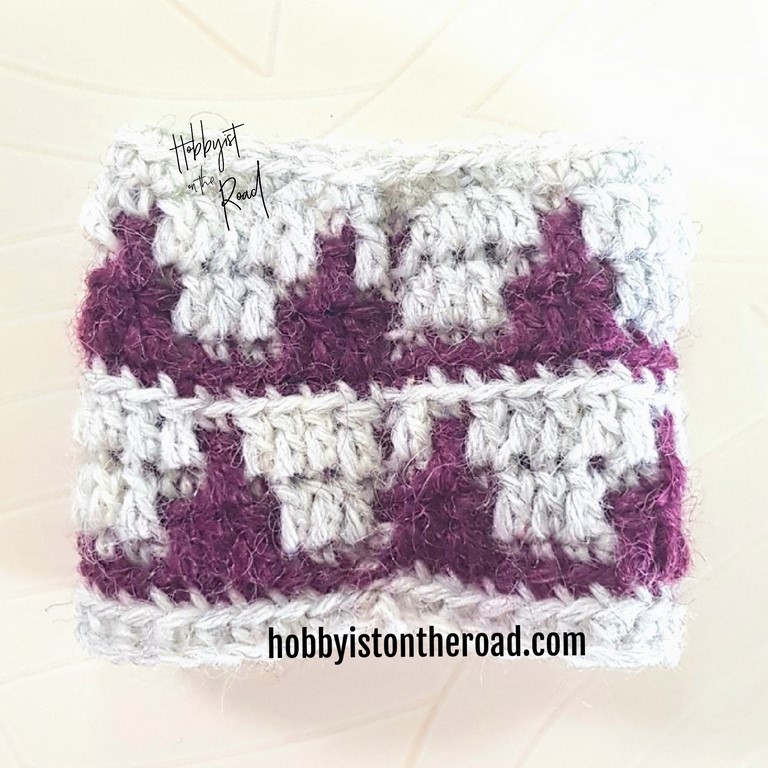
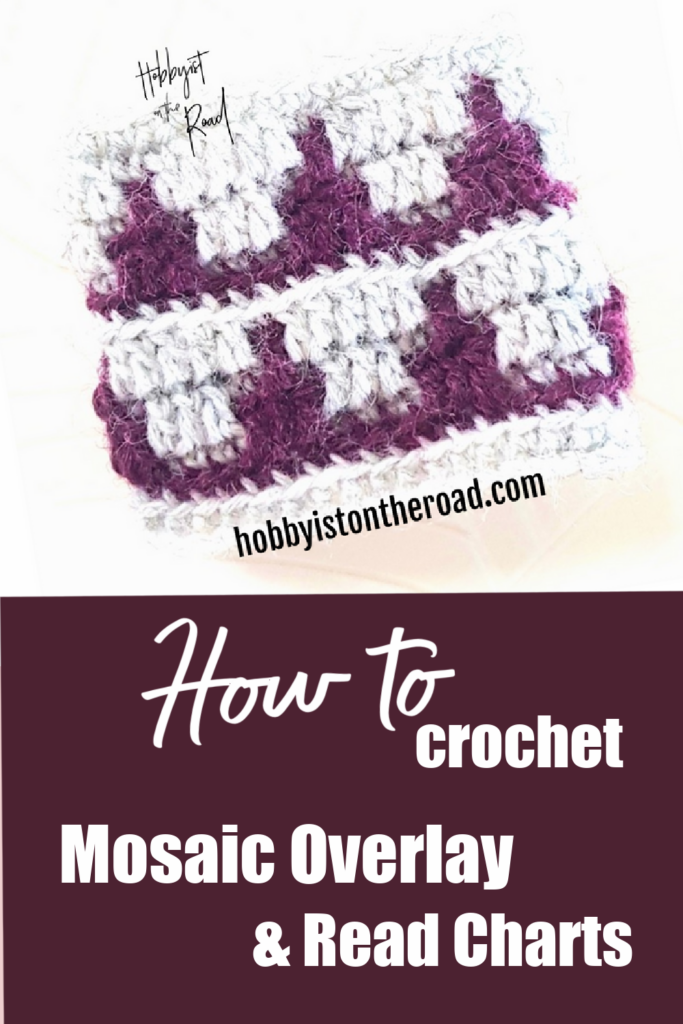
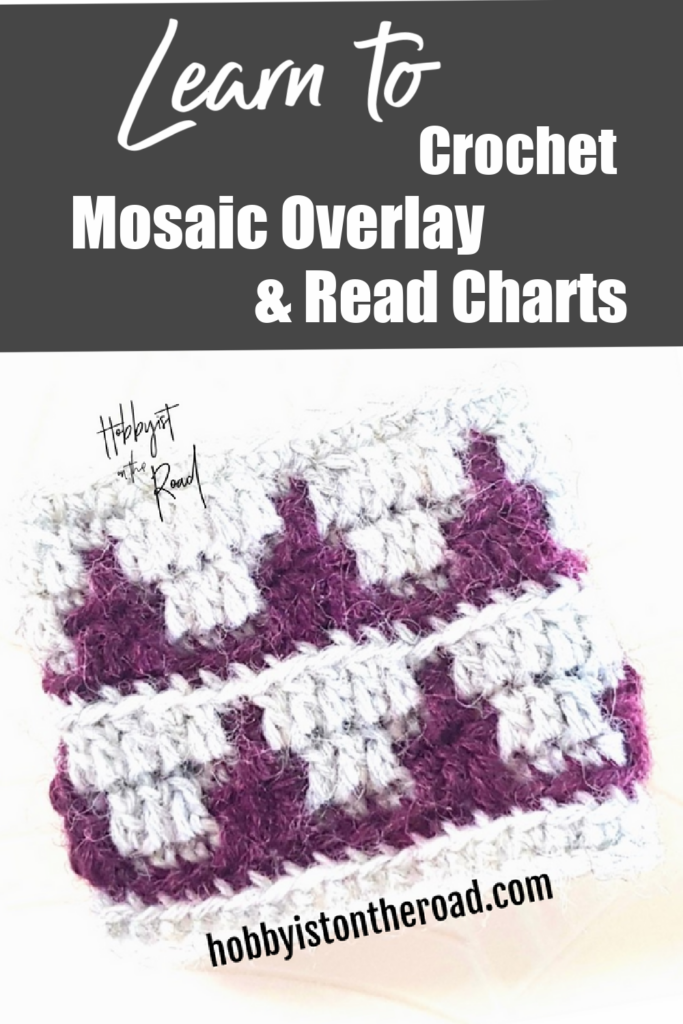
Mosaic Overlay Chart
Your mosaic overlay project chart tells you everything you need to know in order to crochet a picture.
Start reading the chart at the bottom right corner.
A, B – the colour for the round. In my swatch tutorial, colour A is light grey and colour B is purple.
Numbers on the right hand side – round numbers. Number 0 is the foundation chain.
Numbers on the top – stitch numbers. Each box of the chart corresponds to one stitch.
Boxes with symbol \ on the right means ch, and on the left means sl st. In other words, we will finish each round with a sl st and ch 1. These stitches are not part of the picture, they are seam stitches.
Boxes with no symbol in them (either white or pink) – single crochet (sc).
Boxes with X (either white or pink) – double crochet (dc).
Foundational chain stitch calculations:
As you can see in the chart, one picture panel is 6 sts wide. The second half of the chart is the exact repeat of the first (I normally include it so as to have an idea of how the pattern will look like).
You need to decide how many times you will repeat this picture panel for your project.
In the case of my swatch, I will repeat the picture panel 6 times.
Which means I have to ch multiples of 6 x 6 times + 1chain for turning (6×6+1 =37).
So the swatch pattern will start:
R0(A) (foundations ch round colour A) ch 37
NOTE. When you work on bigger projects, a longer chain will twist a lot at this stage. Therefore, don’t connect the two ends at this stage, because it is easier to connect the ends after you’ve done the next row.
R1 (A) 36 sc
At this stage we will connect the ends and change the colour.
Insert your hook into the ch where you started the round.
Using the next colour yarn (not the one you’ve just worked with), sl st and ch 1.
Do NOT cut the yarn. Simply leave the yarn you are not working with hanging at the seam, you will pick it up in the next round.
Make sure your sl st and ch are as tight as possible. You will not have to work into that sl st when you next come around. Working into the tight ch will be a bit difficult, but that’s ok because a tight ch will make your seam tidy and going straight up.
IMPORTANT
As you work through this swatch pattern, you will see that I start each round with a sl st and ch. This is because we connect the round using the next colour coming up, so it is not logical to mark sl st and ch at the end of a round, but rather at the start of the next colour round.
Looking at the chart, from bottom right to left, let’s continue:
We’ve done R0 and R1 above.
I will now divide the chart round by round and write the pattern underneath for each round.
R2 (B)sl st, ch 1, 36 sc (through the back loop only, as per explanation above)
R3 (A)sl st, ch 1, 36 sc (NOTE although the colour seems to change on the chart, as mentioned above, we will NOT change the colour in the middle of the round, continue sc through the back loop only with colour A as you have started).
R4 (B)sl st, ch 1, [3sc, 3 dc] x 6 times ( dc stitch is marked with X in the chart. Please see above how to do dc in overlay mosaic. This is your overlay stitch which will ‘colour in’ the picture).
NOTE. At this stage you know everything there is to know about reading overlay mosaic crochet chart as well as crocheting Mosaic in the round. Let’s continue with reading the chart and crocheting each round.
R5 (A)sl st, ch 1, [3 dc, 3sc] x 6 times
R6 (B)sl st, ch 1, [4 sc, 1dc,1sc] x 6 times
R7 (A)sl st, ch 1, [4 dc, 1sc, 1dc] x 6times
R8 (B)sl st, ch 1, 36 sc,
R9 (A)sl st, ch 1, 36 sc
R10 (B) sl st, ch 1, [3dc, 3sc] x 6 times
R11 (A)sl st, ch 1, [3sc, 3dc] x 6 times
R12 (B)sl st, ch 1, [1sc, 1dc, 4sc] x 6 times
R13 (A)sl st, ch 1, [1dc, 1sc, 4dc] x 6 times
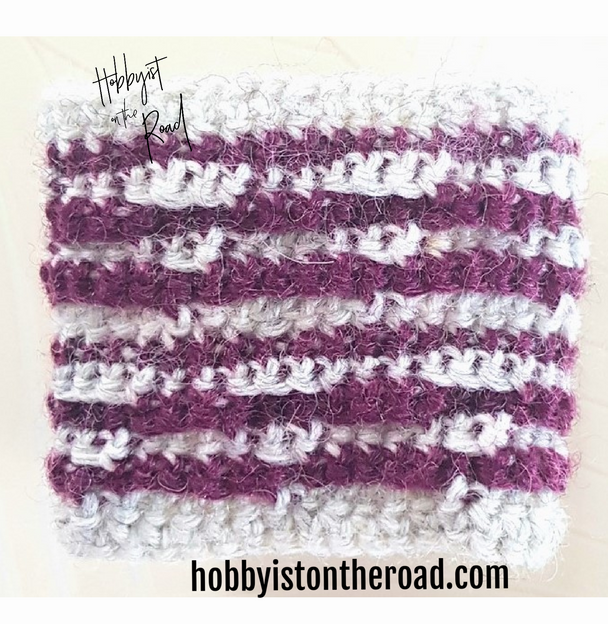
I finished the swatch with a round of sc through BOTH loops, sl st, tie off and cut.
Congratulations! You now know how to crochet Overlay Mosaic technique in the round!
If you turn your swatch inside out, you will see that the back of it is striped.
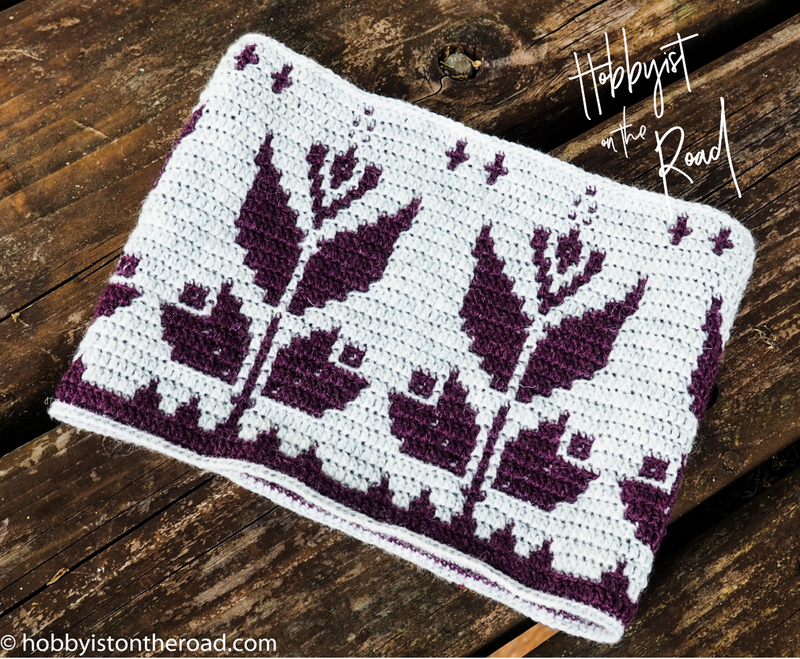
You can now crochet any Overlay Mosaic technique pattern.
For example, you can confidently crochet this Baltic Flowers Cowl.
It will make a beautiful accessory for your outfits or a unique gift for anyone who appreciates handmade items.
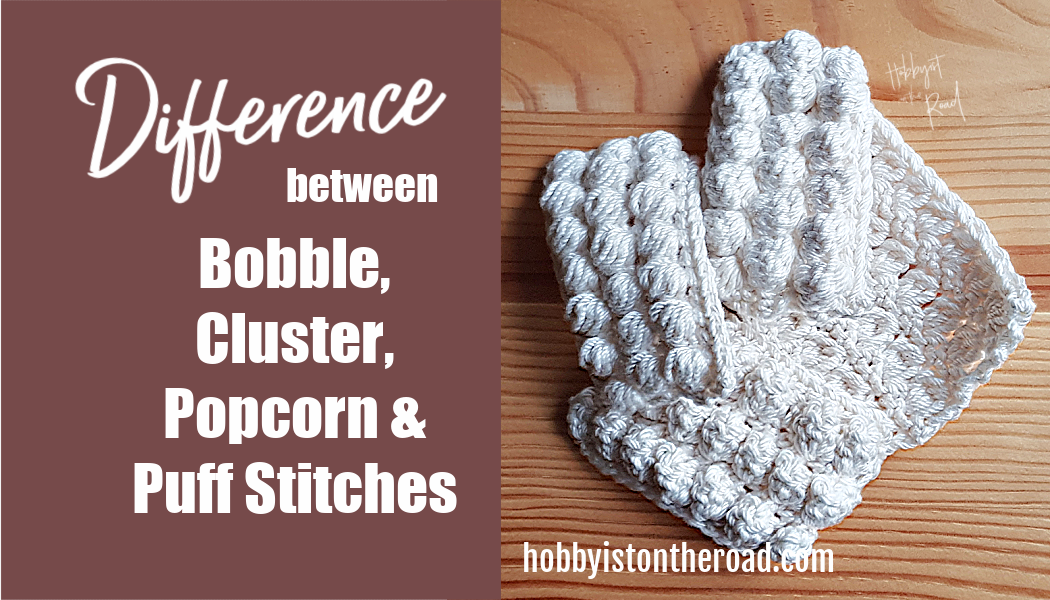
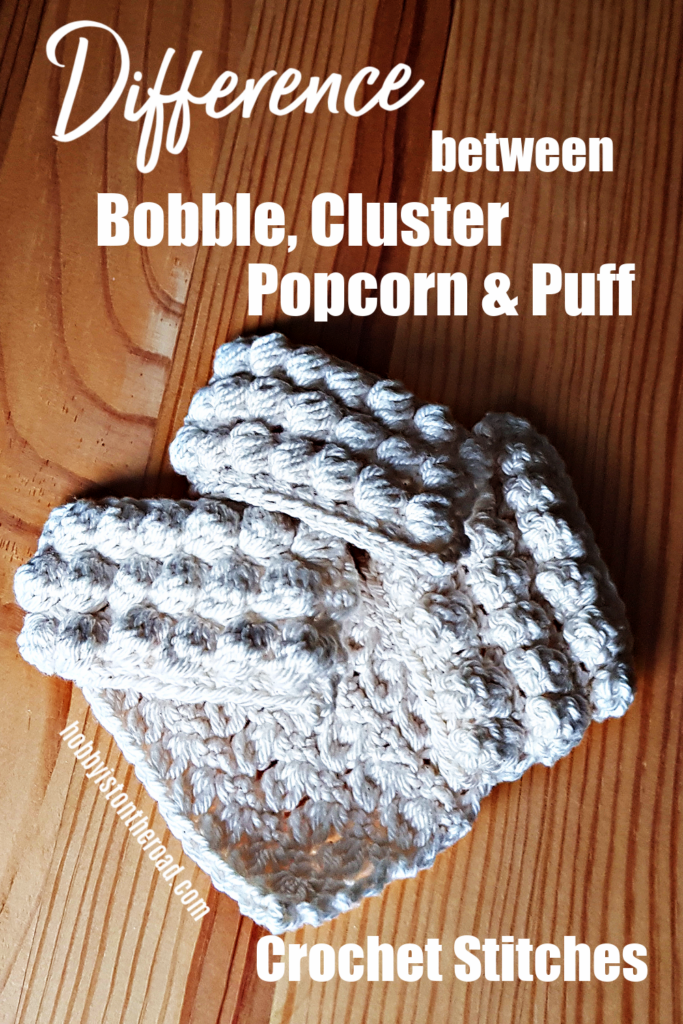
Bobble, cluster, popcorn and puff crochet stitches – are they the same or are they different crochet stitches?
There seems to be a bit of confusion around this selection of four very popular crochet stitches.
In short, the answer is:
No, they are not the same. Bobble, cluster, popcorn and puff crochet stitches are four different stitches.
Here’s a short video where I highlight the differences between bobble, cluster, popcorn and puff crochet stitches, showing you how each of them is worked and how they are marked in crochet charts and patterns.
I really hope this video will clear up some questions you may have about these four textured stitches.
I think it is important to be able to identify which stitch is which just by looking at it, because in charts and patterns I notice inaccuracies, where a stitch can be called are popcorn stitch, while in fact, the picture of a finished item is clearly crocheted using a bobble stitch.
If you need more practice, below I have uploaded four videos where I show you how to crochet each stitch separately.
Bobble Stitch
Cluster Stitch
Puff Stitch (2 Variations)
Popcorn Stitch
I hope you found these videos useful.
As with any crochet stitch, you might come across variations on these basic stitches, but I think if you know the basics, it will be so much easier to understand those variations and achieve desirable results.
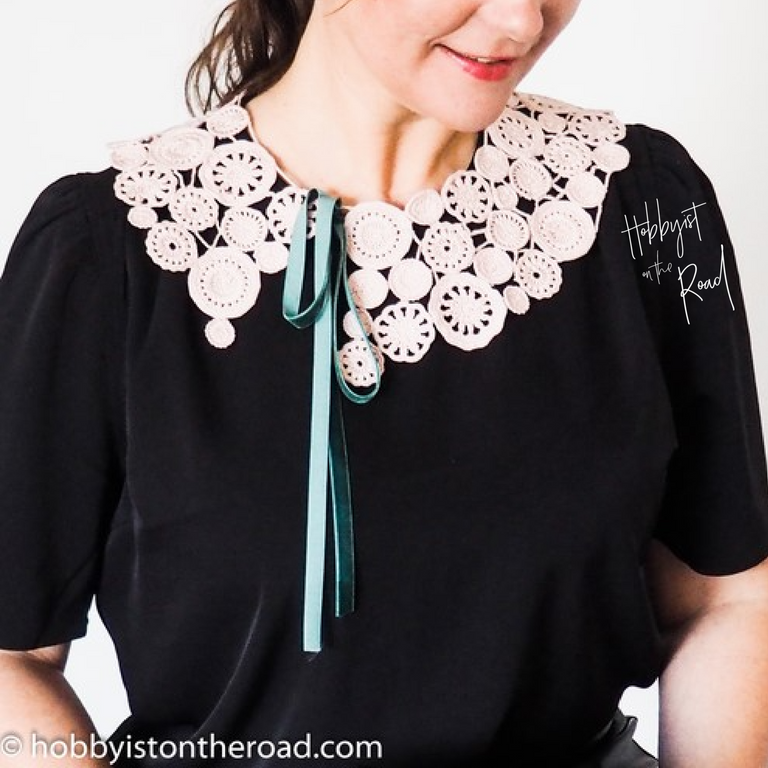
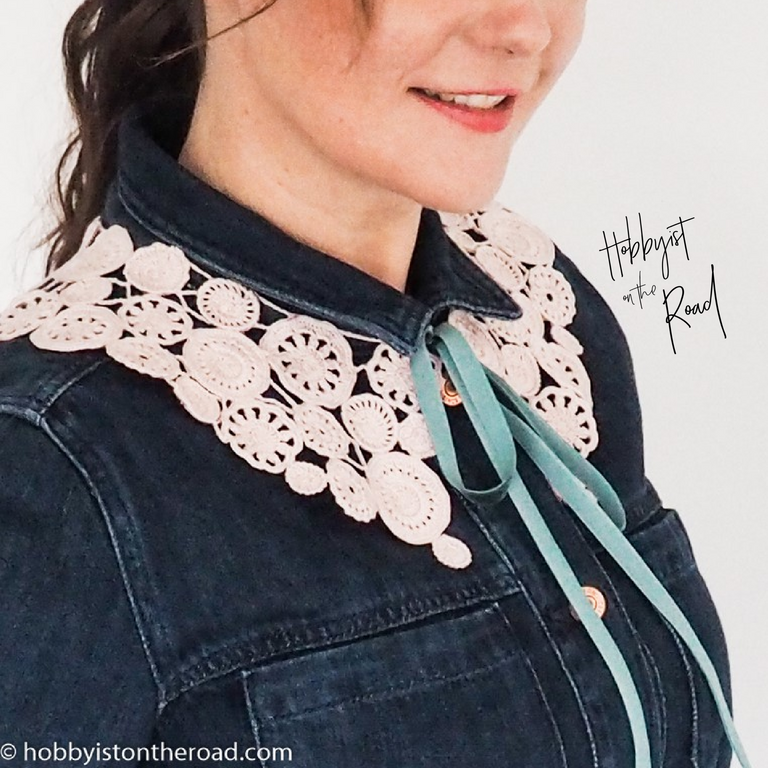
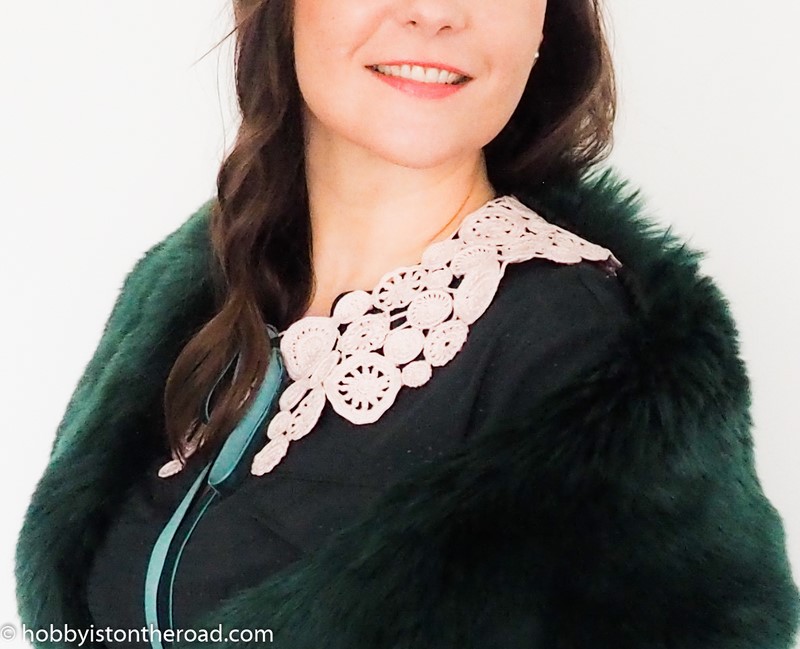
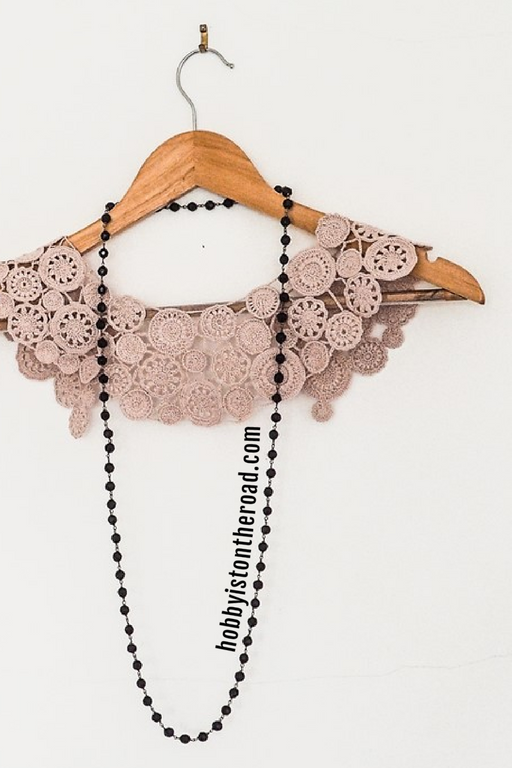
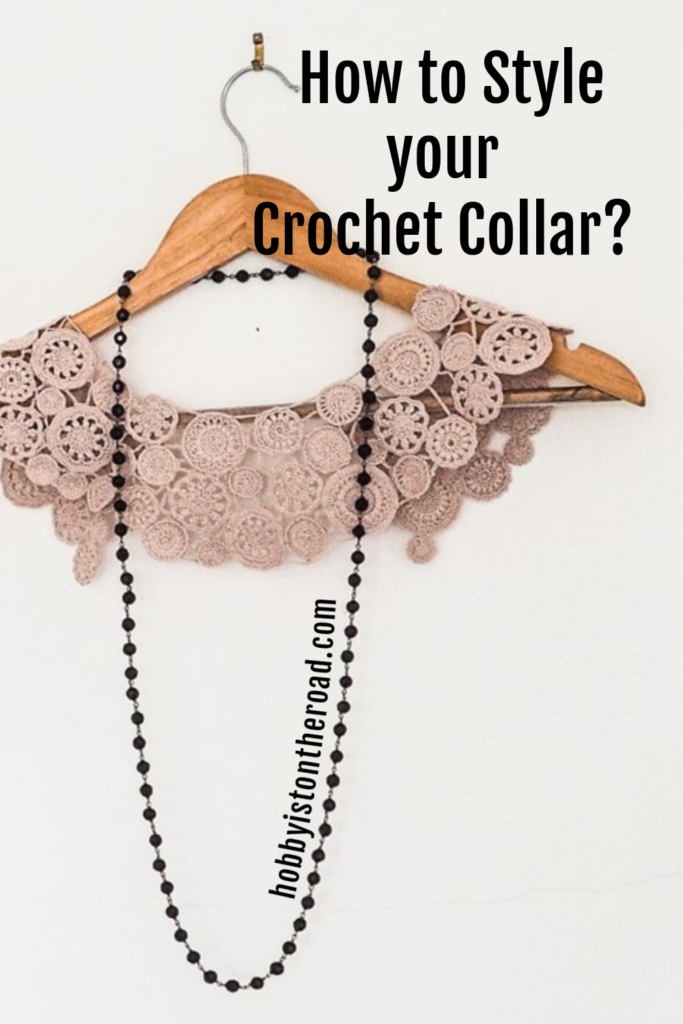
I thought I’ll show you some ways I am going to style it, so as to give you an idea of how it could be worn.
Did you know that removable collars like this are back in fashion in 2021? Although I don’t think they ever went out of fashion in the crochet world 🙂 🙂 🙂
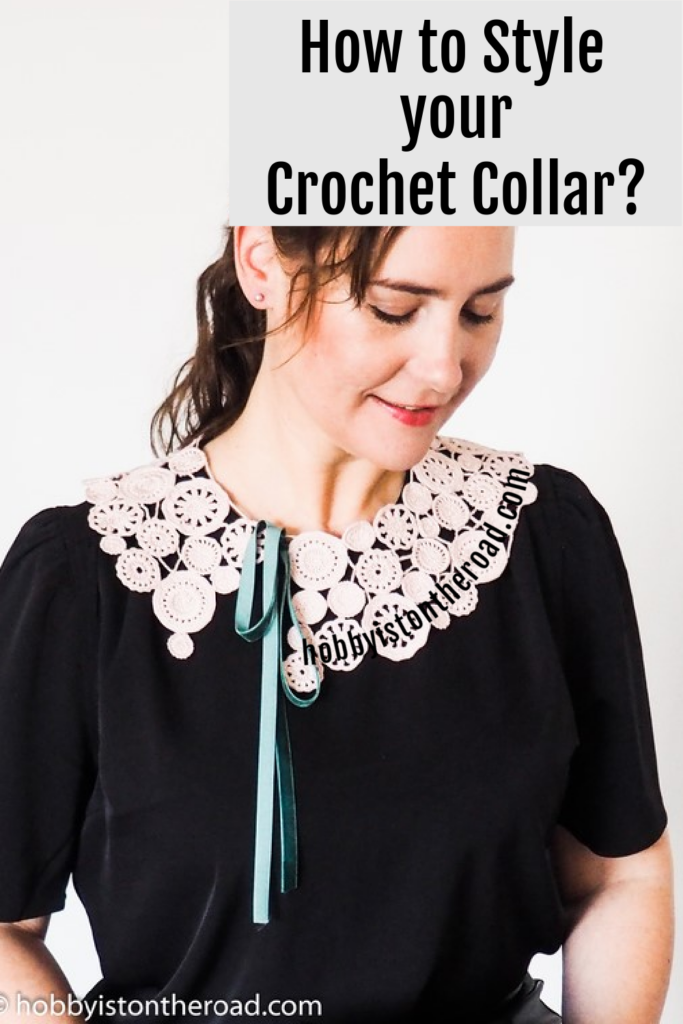
How to wear your Dreamy Collar.
Play with contrasting colours. If your collar is light, then wear it with a dark blouse or shirt.
You can tie the collar up on the side, like in the picture above, or centered in the front, like in the picture below.
2. Wear your Dreamy Collar on a matching colour background. If your collar is light, like mine, wear it with a cream shirt. The collar will give the whole outfit a very subtle finish and dress up even a very casual top.
3. The fashion now seems to turn around the idea of matching items that at first sight don’t match. I matched my Dreamy Collar with a leather jacket and keep thinking I should buy a leather shirt and wear it with that.
4. Wear it with other accessories such as a faux fur collar or a long necklace.
You can get a very detailed pattern CAL for this Dreamy Collar