If you’ve never crocheted in Irish lace technique before, you’ll discover that it’s a different process from the usual crochet or knitting projects.
As I described before, at first you have to crochet all separate decorative elements of the dress you are making.
After that, you have to cut separate parts of a dress from a piece of fabric or, in my case, use an old, well-fitting dress, and model your Irish lace design on that. I described the whole process HERE.
It’s only when you are happy with the layout of the design, you will start crocheting the lace and bring everything together.
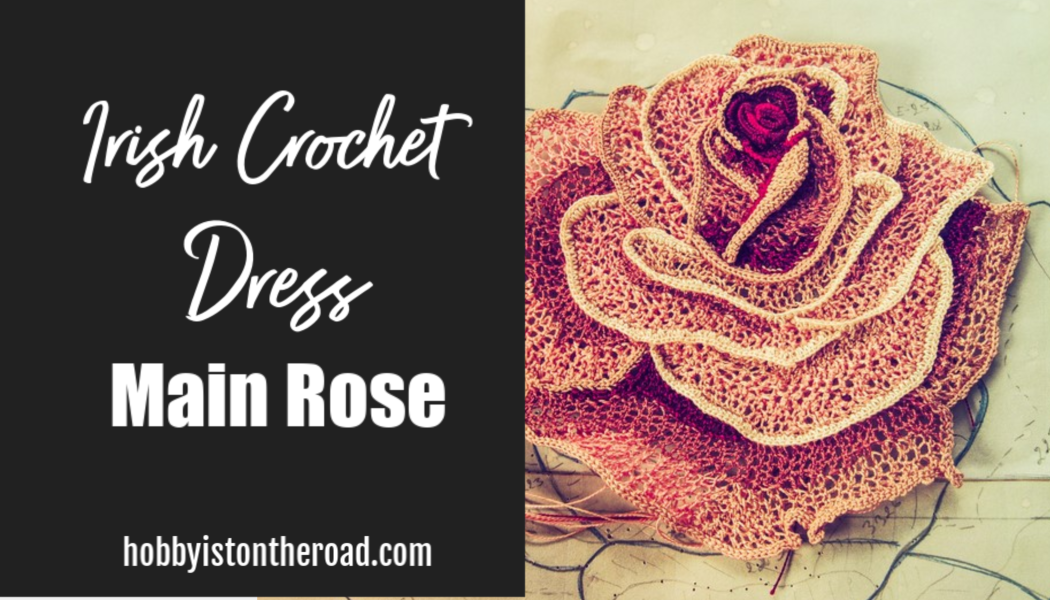
The process of crocheting Irish lace is similar to that which I told you about in post ‘Main Rose’.
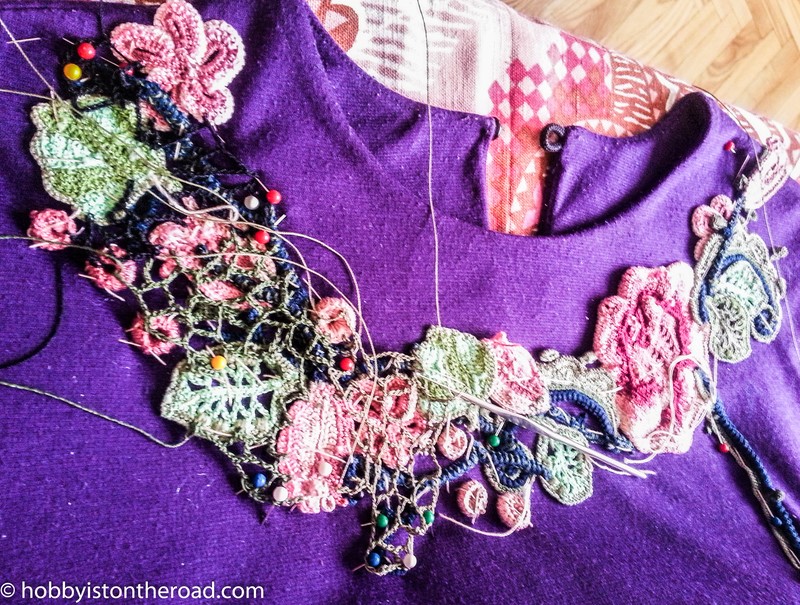
You have to work on a flat surface looking at the ‘wrong’ side of the dress.
Securely attach all separate elements to the surface so as not to displace them while crocheting.
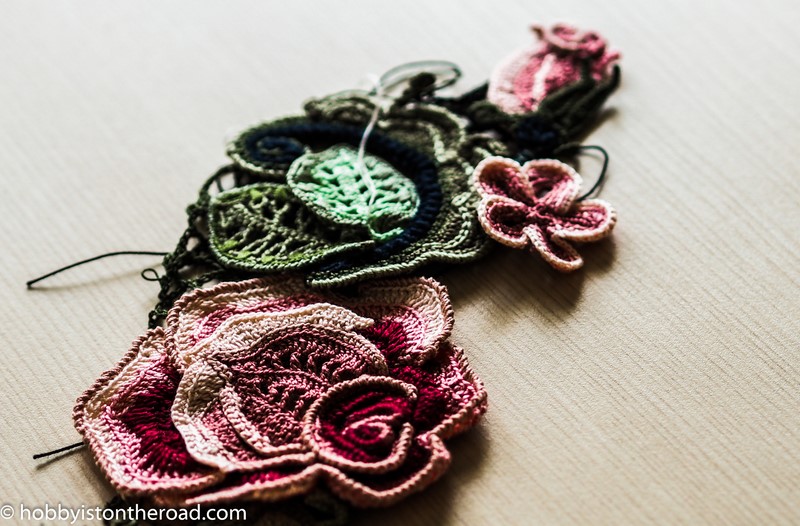
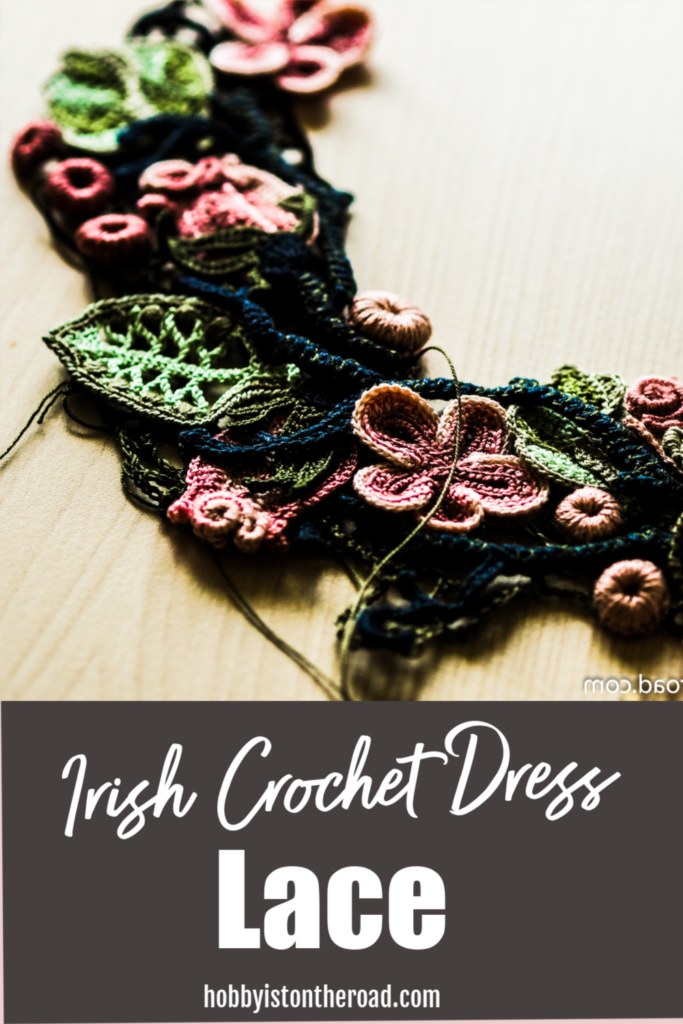
You can see here I stitched separate elements to the dress in order to keep them in the right places.
All of this makes the process of crocheting Irish lace really slow and tedious, as I realize now, although I honestly thought I will breeze through it…
When my mom saw me crouching over that dress laid out on a coffee table, she offered me money so as I would simply buy something like that instead of ‘killing myself making it’… 😀
Since this was my very first Irish lace crochet project, I found it difficult to imagine how the dress will come together.
Check out this fun crochet wine tumbler 🙂
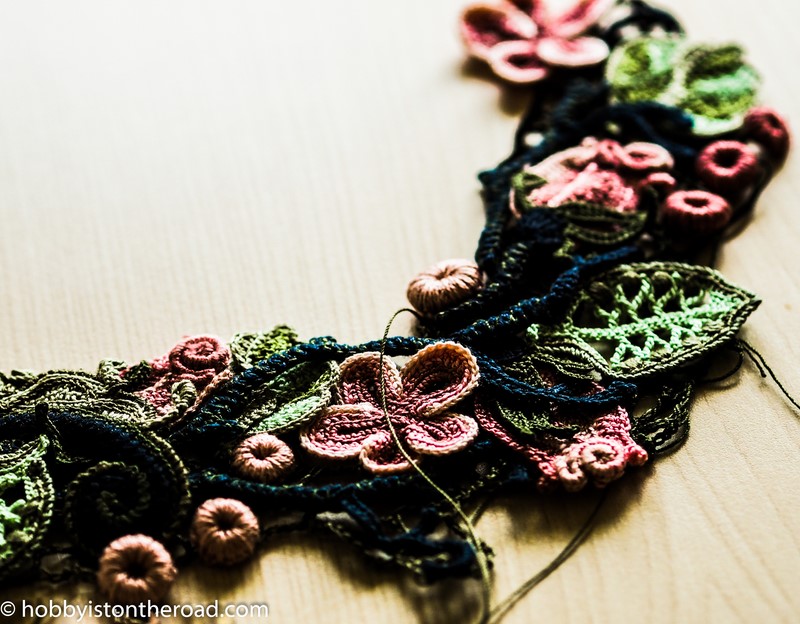
So every time I finished an important part of the lace dress, I simply unpinned it from the surface and turned it around so as to see…
…WHAT’S GOING ON!
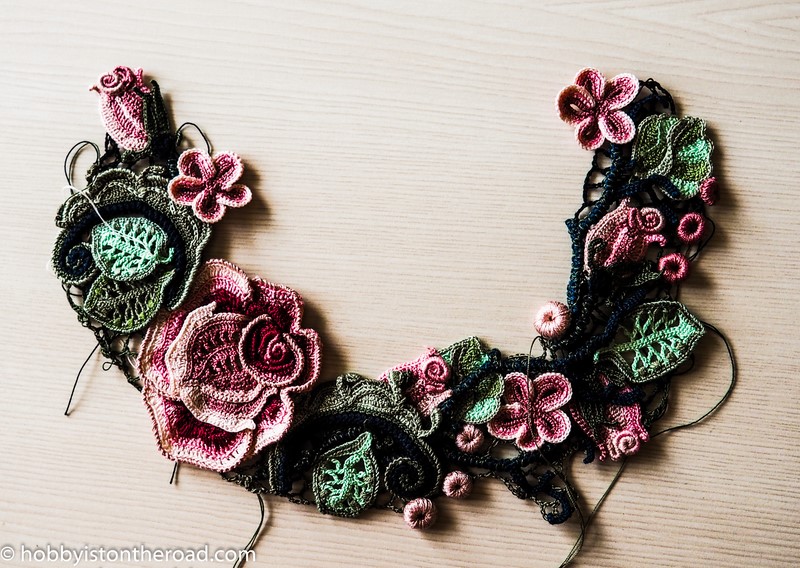
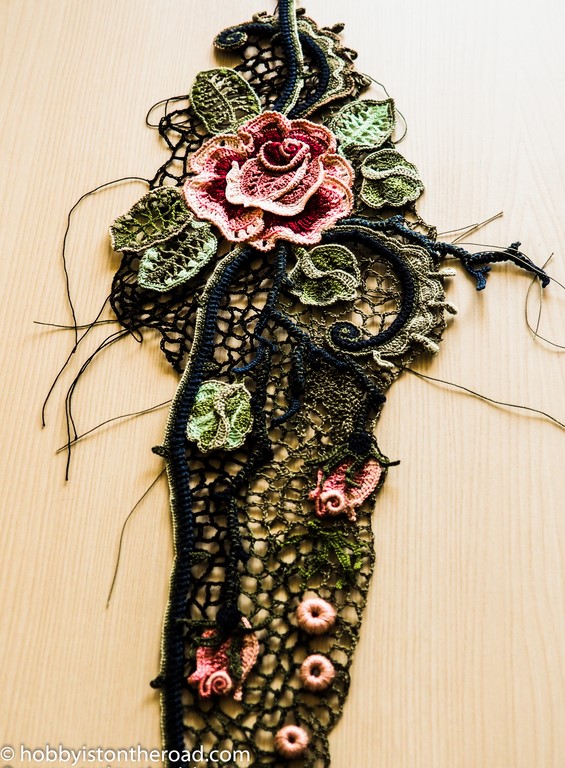
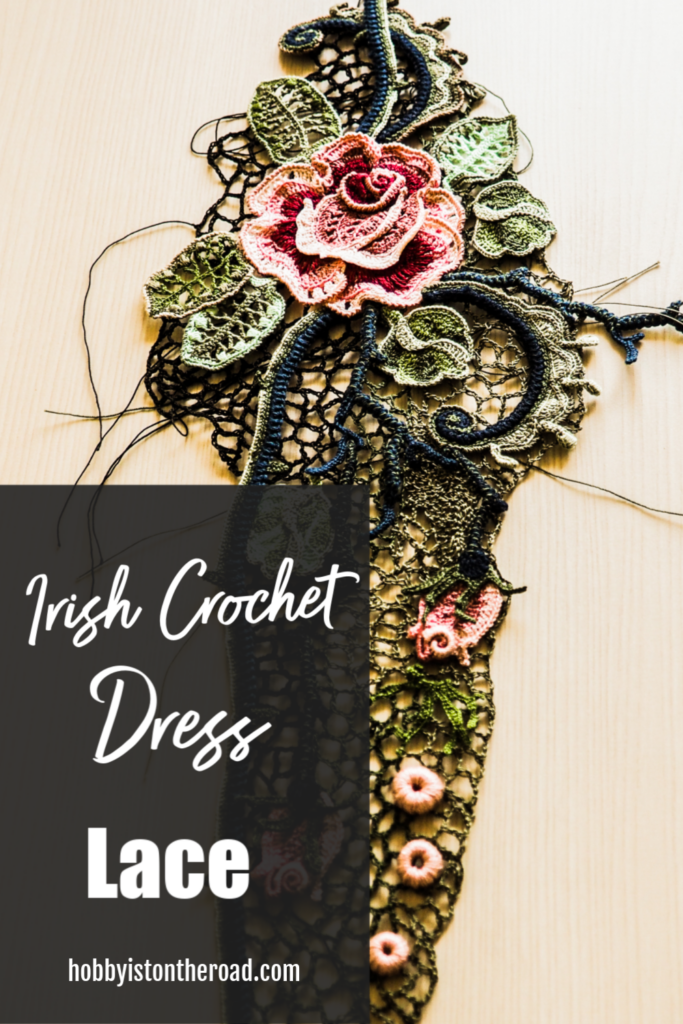
I started with the front neckline, as I had a clearer idea of how it should look.
And after a few hours (or maybe days) of working on it…
Tah-dah!
I am happy with the result!
Somehow those little flowers and leaves look really harmonious.
So back to the worktop, pin the neckline back on (wrong side up) and continue working…
…very sloooooowwwwwwllllyyyy…
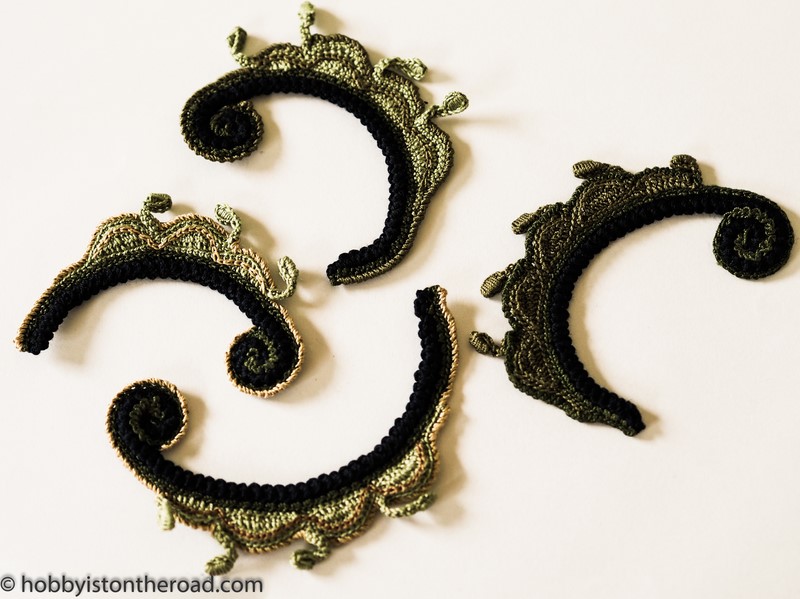
Here are a few more Irish lace fragments.
The process of crocheting Irish lace and all separate elements into one dress is painfully slow and inconvenient…
A fun gift mug for a crocheter. Click the image and check it out on Etsy!
…although now when I see a picture emerging, I am getting more and more excited and somewhat impatient 😀
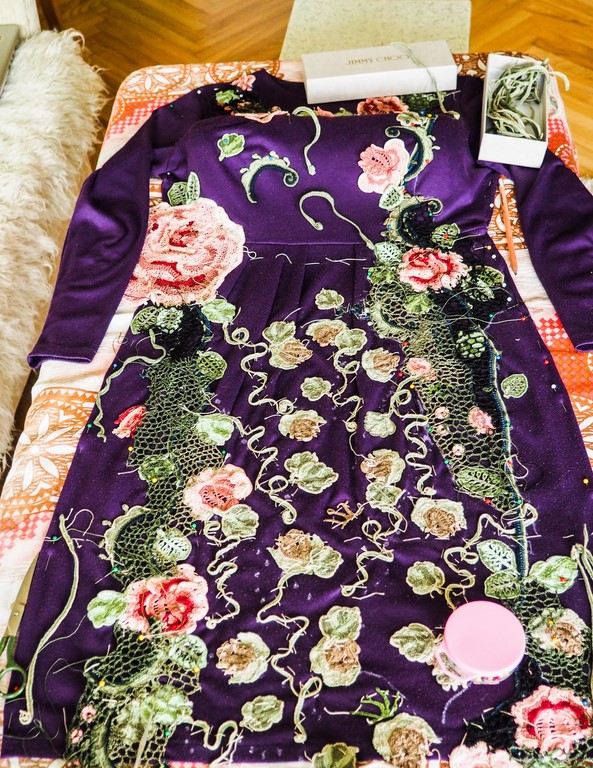
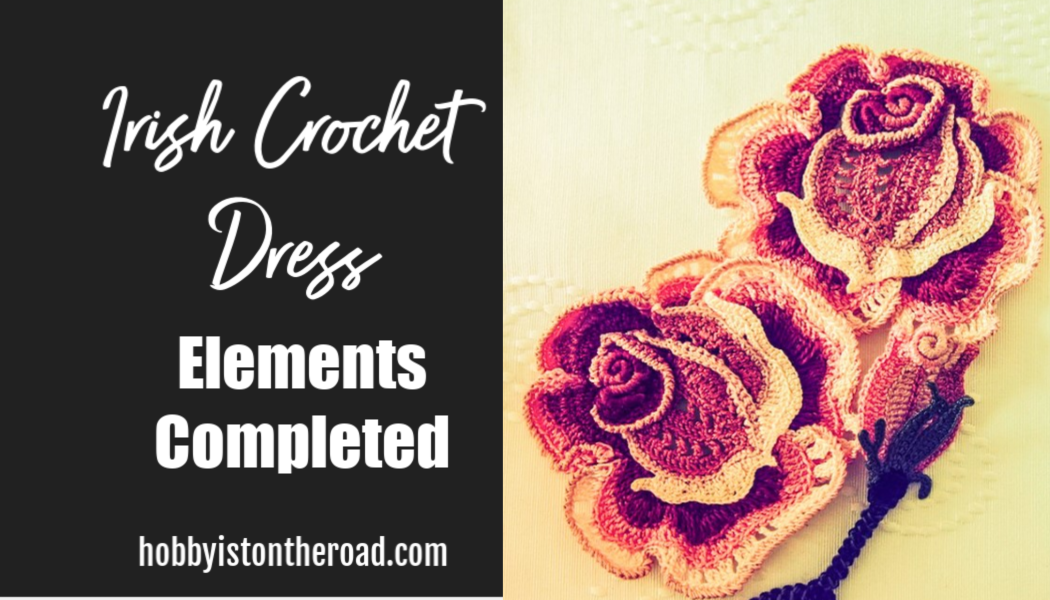
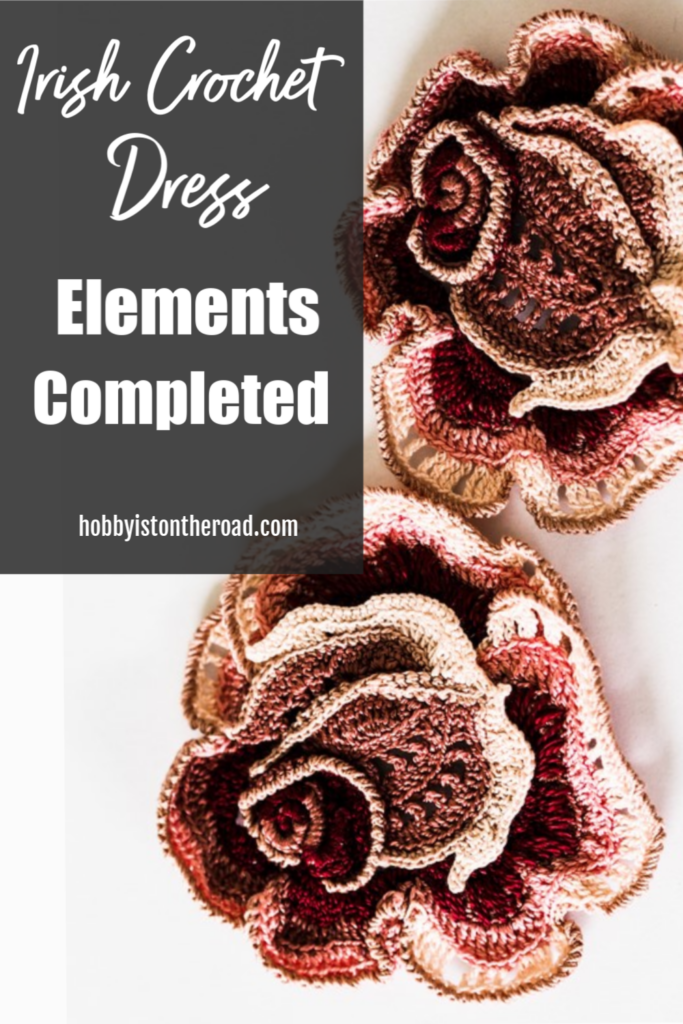
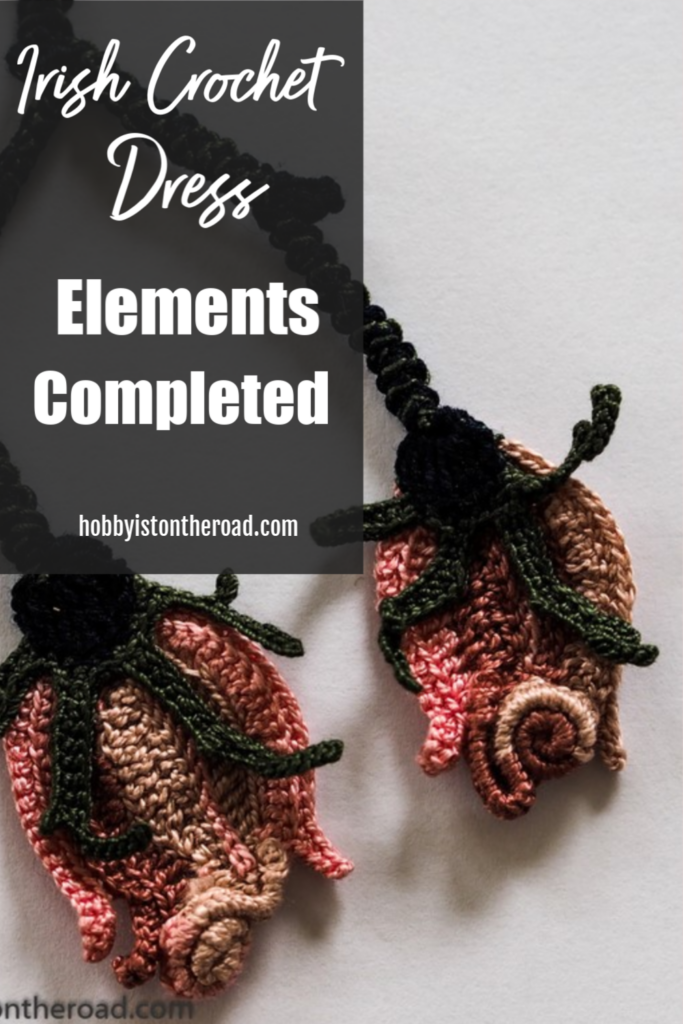
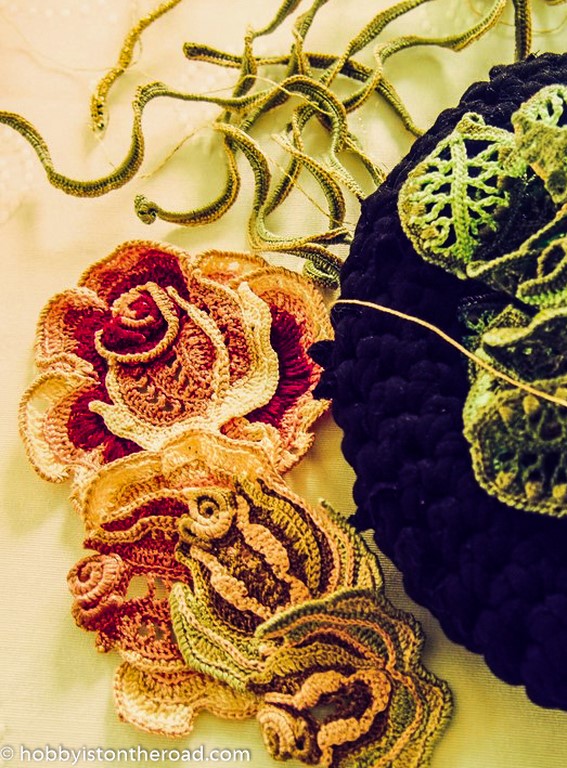
I have just reached a very exciting stage in my Irish crochet dress project: I have all Irish crochet elements completed for the dress.
The next stage will be laying them out into a dress shape and crocheting a lace in order to create the dress.
But at this point, I’d like to do a quick recap of all Irish crochet elements completed for this dress.
As you may remember from my previous posts, Irish Crochet technique requires each decor element to be crocheted separately and then assembled together by crocheting lace in between the elements.
A fun gift for a crocheter 🙂
So here are the elements I had to crochet for this dress:
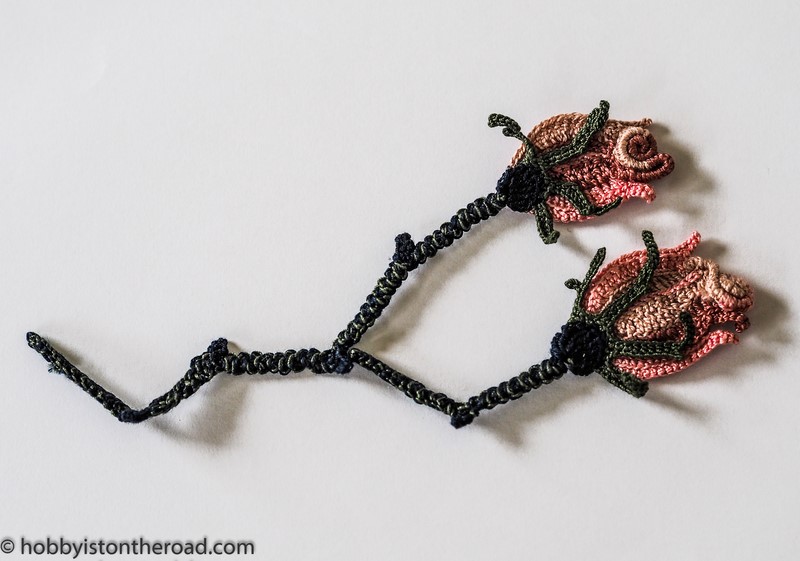
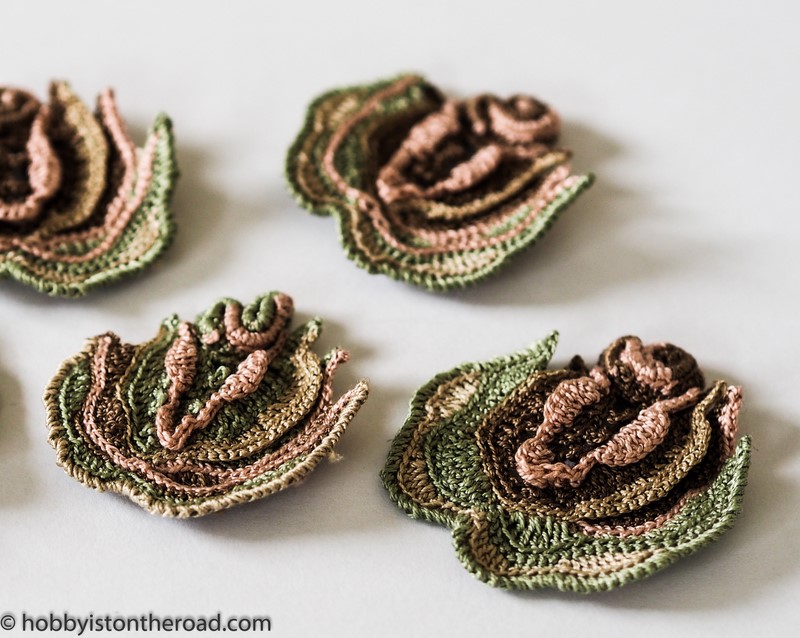
14 rosebuds on stems.
I started crocheting the dress from these rosebuds, which was a mistake as, at that first stage, I wasn’t very skilled in Irish crochet technique.
People were telling me my rosebuds looked more like pink snails…
So I stopped and came back to them after crocheting a number of other simpler elements first.
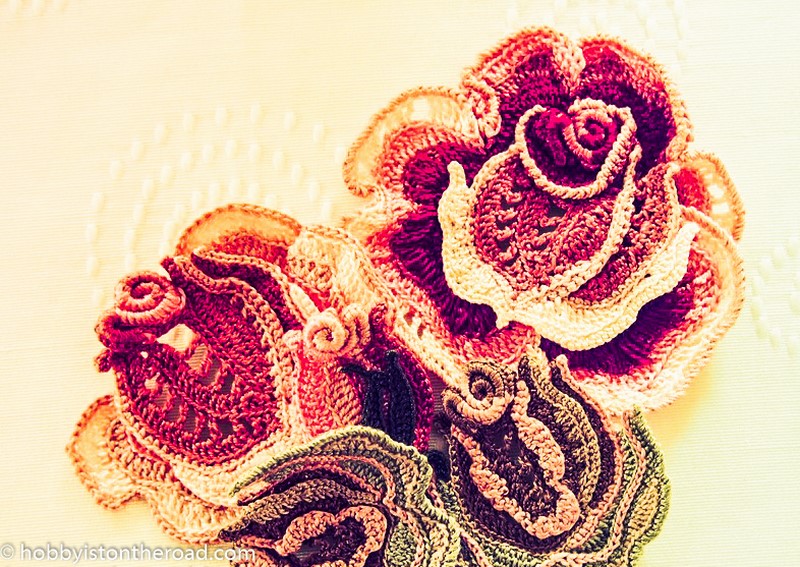
70 background roses.
These will be used to fill in spaces between the main picture, so they won’t be immediately noticeable.
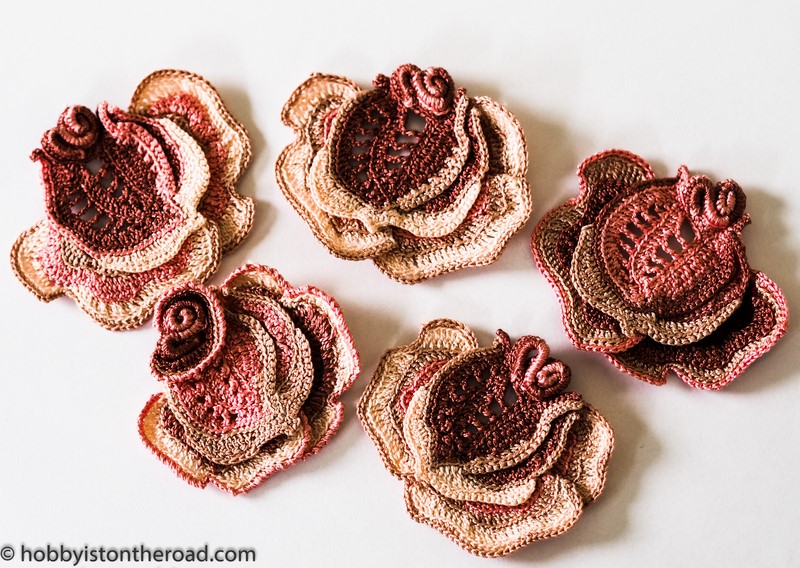
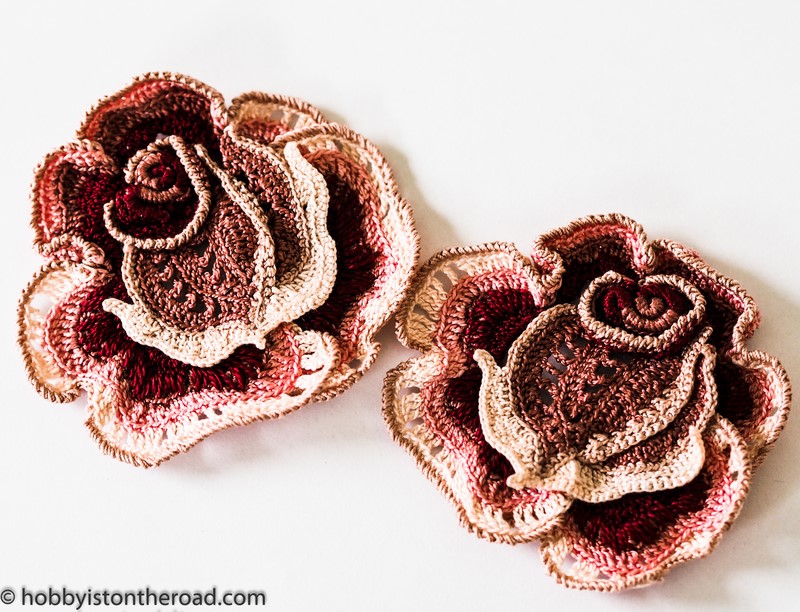
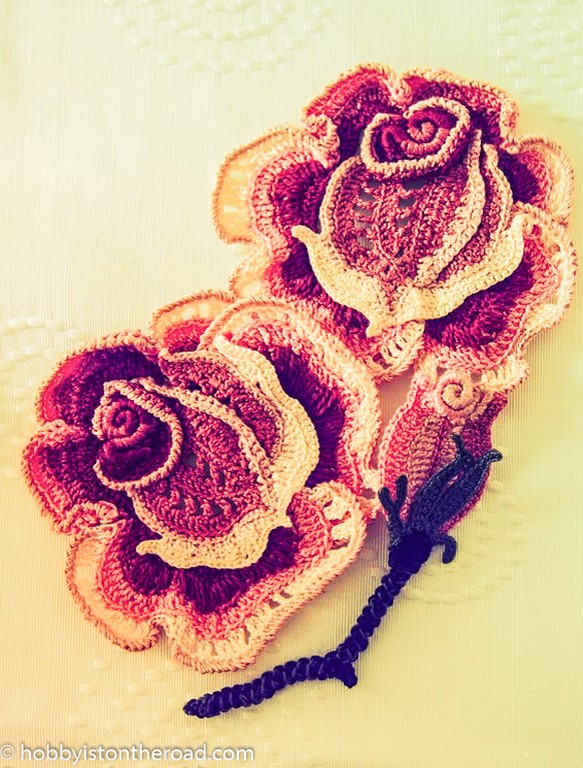
16 Medium sized roses.
6 Large roses.
I think these are the least successfully fulfilled elements.
Somehow the master’s roses in the instructions I bought are so much more precise. But I didn’t go re-crocheting them since when I laid them out with other elements the overall picture looked fine.
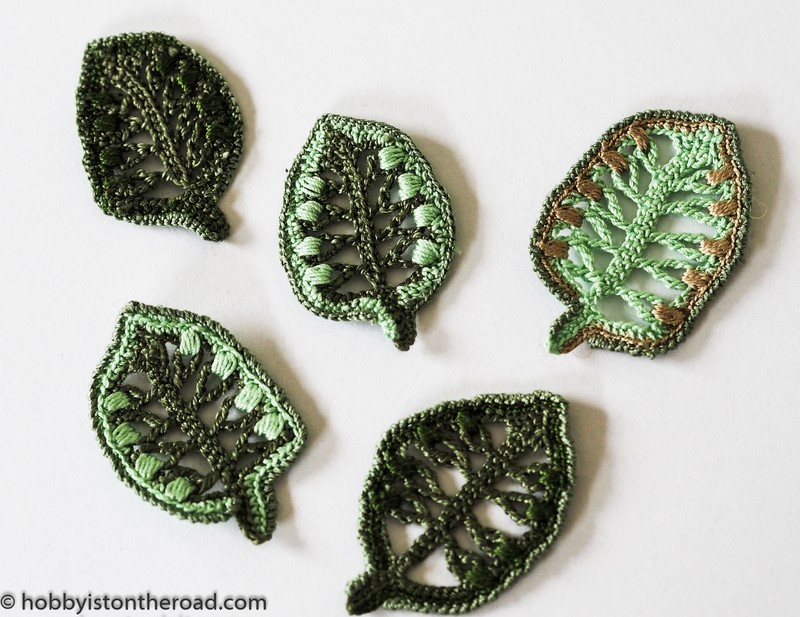
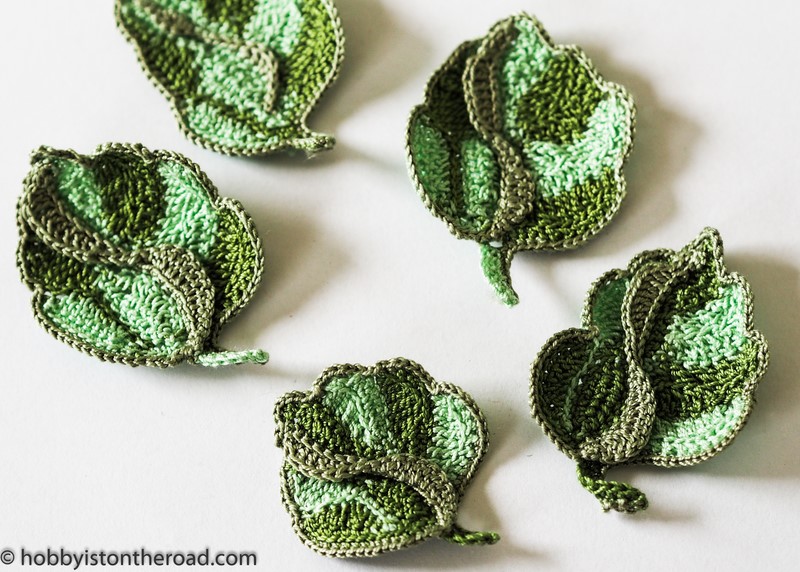
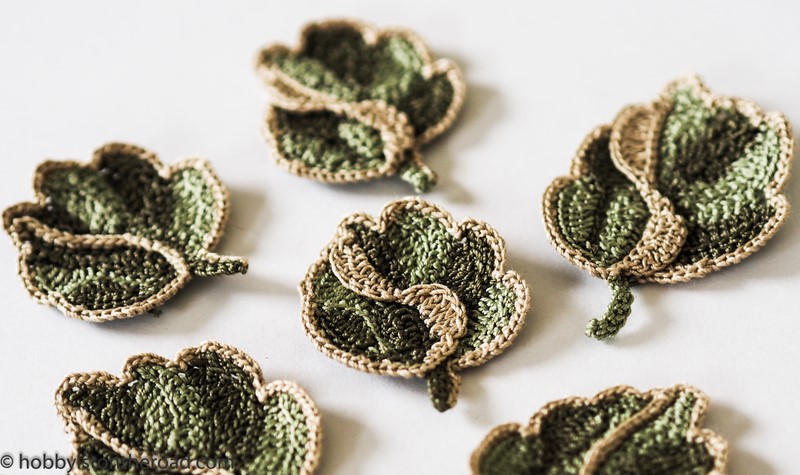
45 green leaves of various sizes and colour variations.
As you can see above, these did not come out as perfectly as I would have wanted…
…but then I thought that not every leaf in nature is perfectly symmetrical and identical, so again, I didn’t obsess over the imperfections too much and continued with other elements.
30 brighter leaves.
100 background leaves.
Similarly to background roses, these will be used as ‘fillers’.
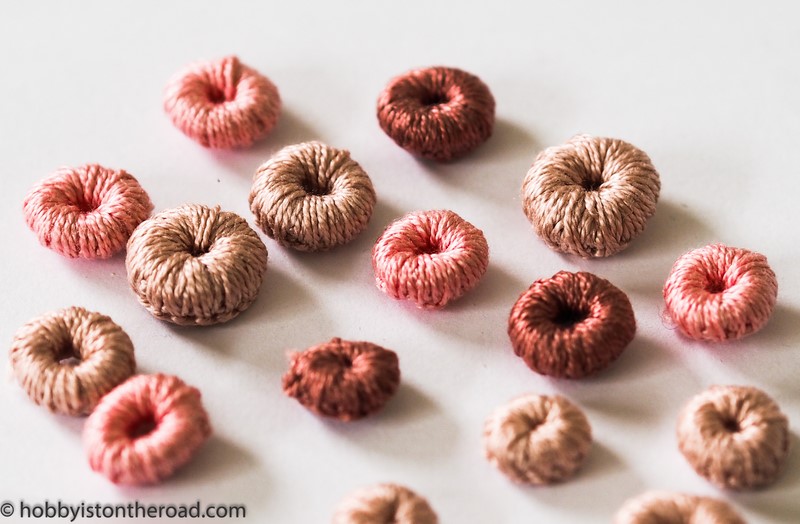
30 small ‘buttons’.
These are one of the basic elements of Irish crochet technique. As I was crocheting them, I thought they can easily be used to liven up a piece of clothing or even summer shoes.
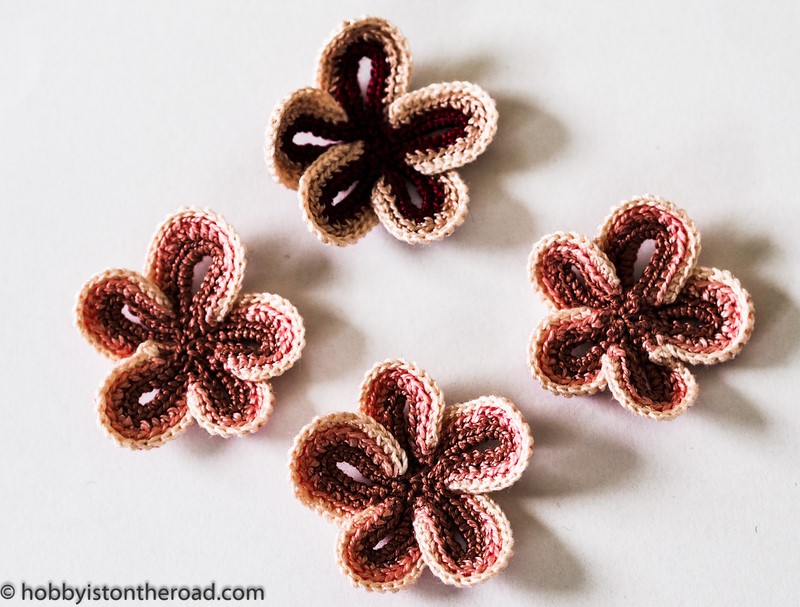
8 Small flowers.
27 scrolls.
15 little ‘bushes’.
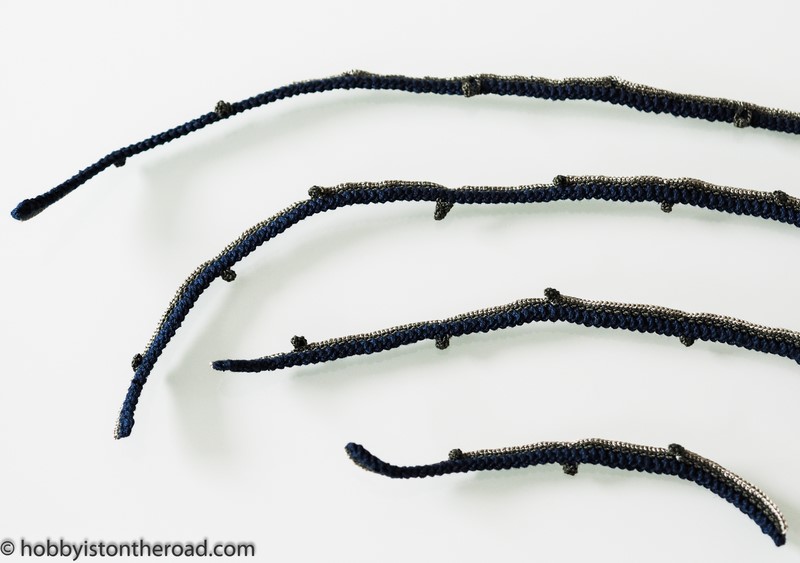
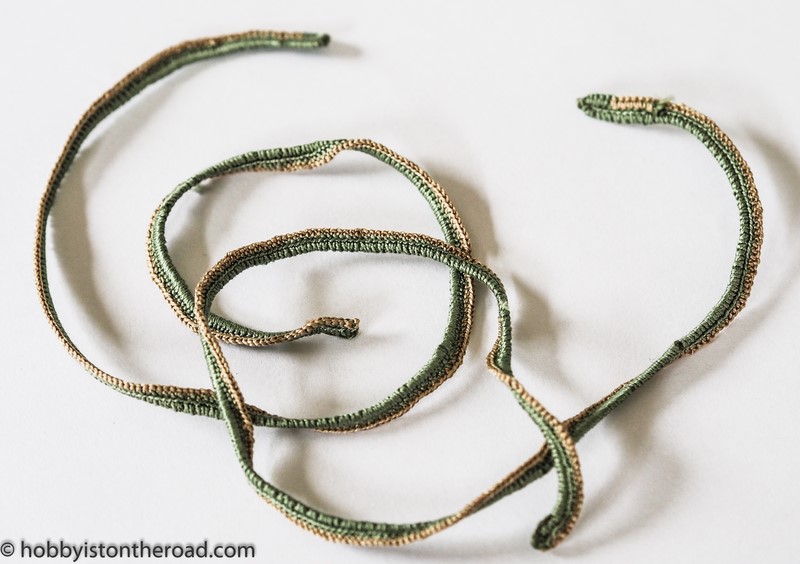
40 Cords.
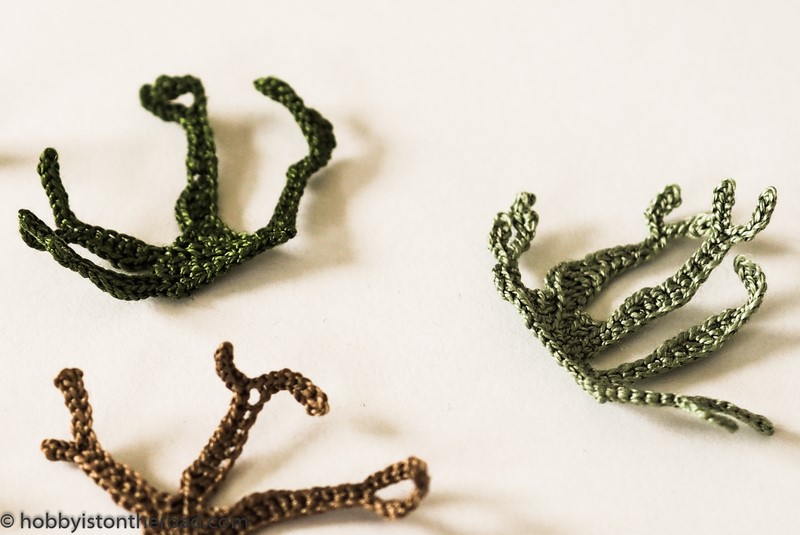
29 stems and branches of various lengths.
So here I am at the final (and most likely most complicated) step of my project – assembling the dress and making sure it looks right. 😀
It feels a bit daunting, but I keep reminding myself that every single element I made seemed daunting at first…
This means I don’t have to create the design of each dress element from scratch.
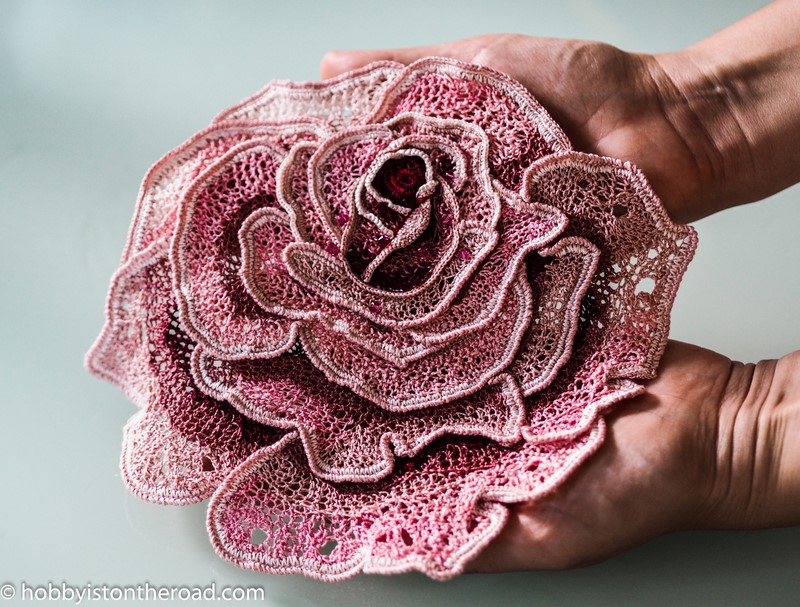
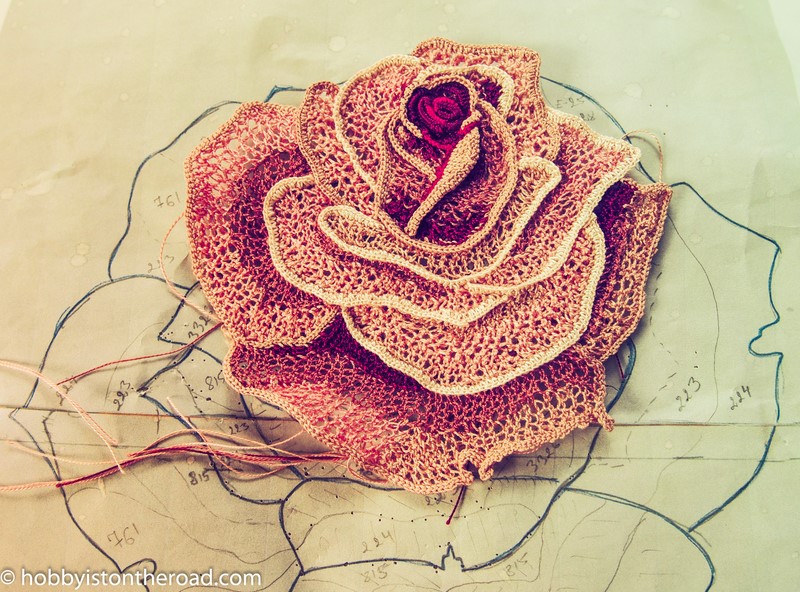
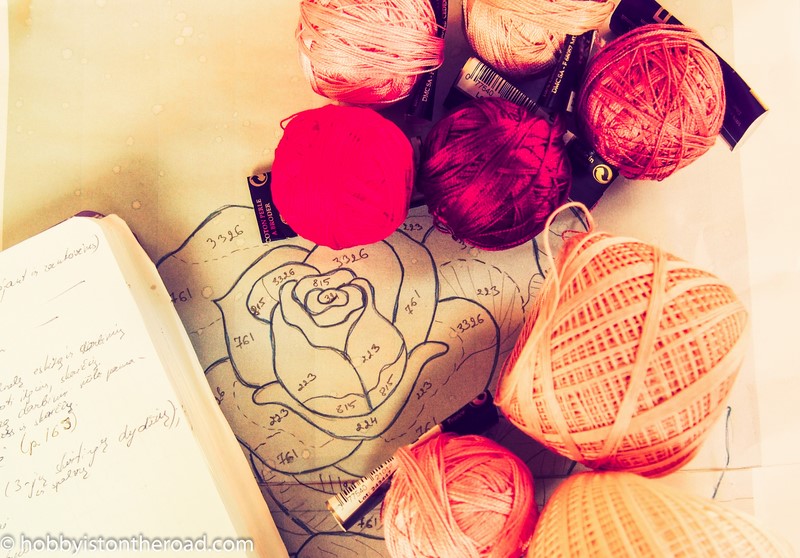
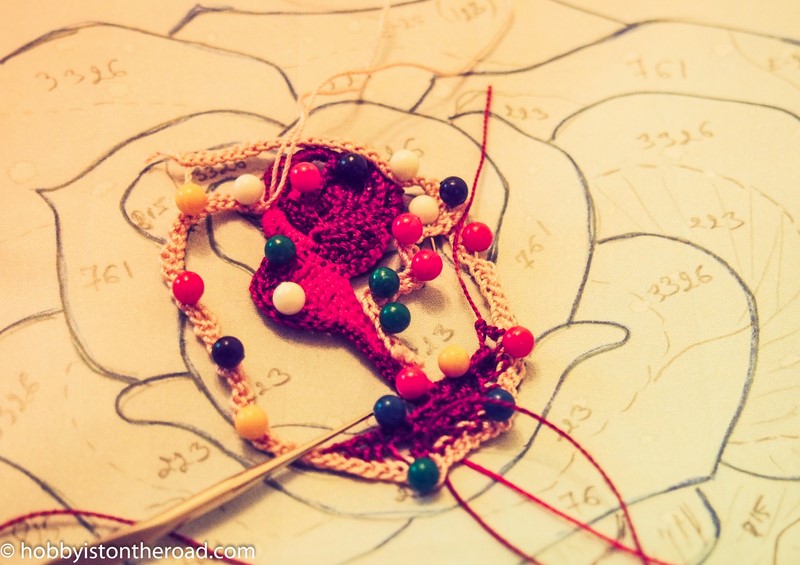
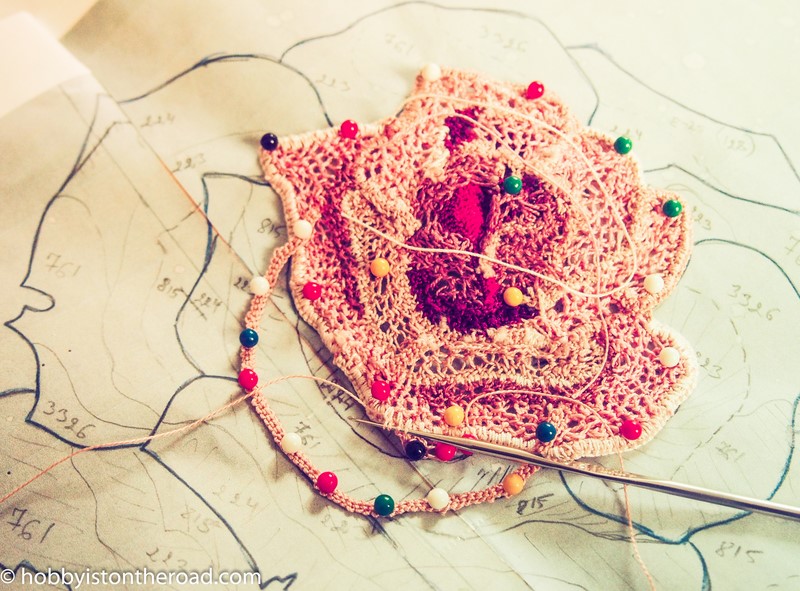
Unlike with other elements of this dress, the main Irish Crochet rose came with a color map in the instructions which I had to print off and simply use as a guide.
It was really helpful to have the color map on the Irish Crochet rose image itself, since this reduced the time spent planning the work.
The yarn for this project came from an online crafts shop Casa CeninaThreads and Yarn Section. I found Casa Cenina one of the few places where I could get the right colors and yarn thickness.
Before starting, I also had to find a sort of flat cushion ( I ended up using one of those chair cushions) and a lot of pins to secure the work in order to follow the picture map.
The whole experience is slightly uncomfortable since you have to crochet on a flat surface, keeping your hands very close to the work.
I found that the best place to work on this Irish Crochet rose is at my standing desk since the work is close enough for me to see what I am doing without having to strain and bend my neck too much.
A fun gift for a crocheter 🙂
It’s a slow process since there are lots little steps involved:
starting from the centre of the flower, I have to mark each petal
section with a string, secure it with pins, then fill in the space.
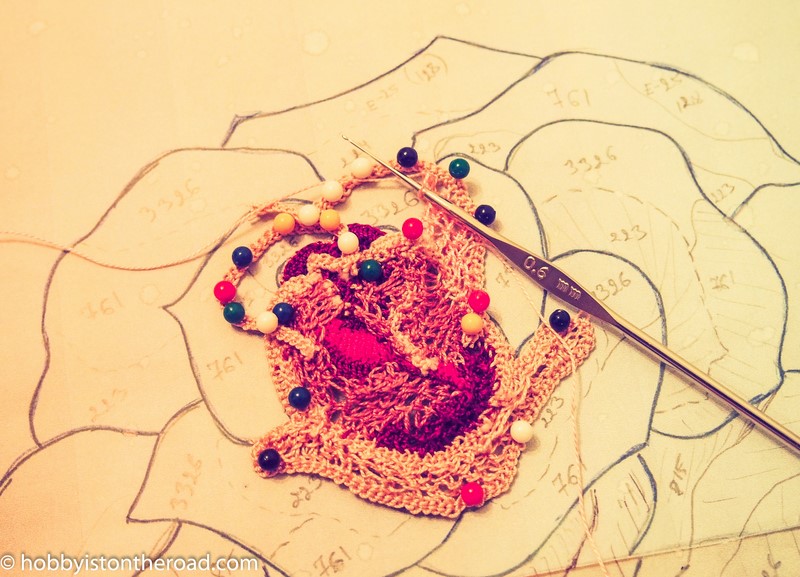
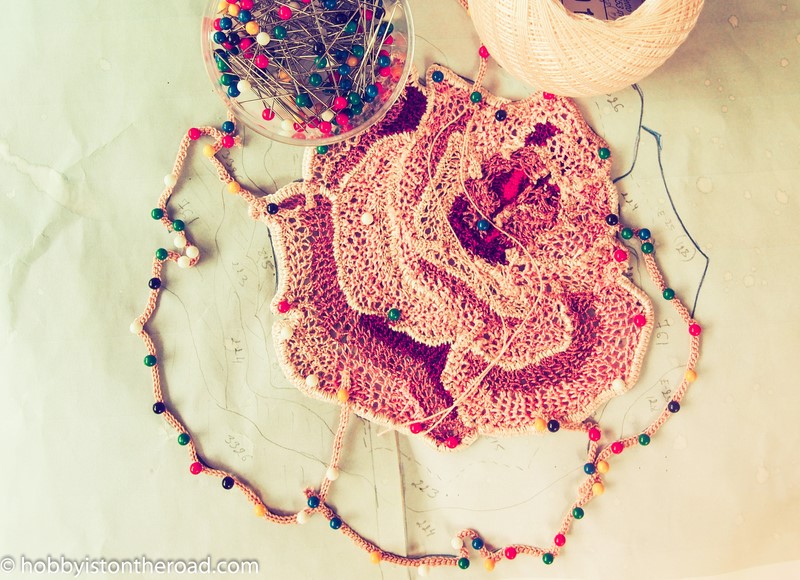
When working on this Irish Crochet rose you are looking at the ‘bad’ side
of the picture, which means you don’t know how the flower is coming
together until you’ve finished a little section, unpinned the work and
turned it around.
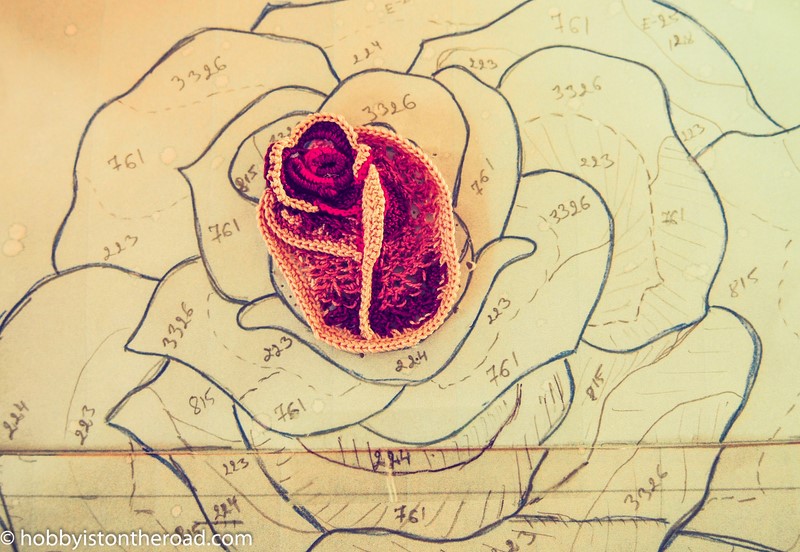
Since this is an element I am only going to do once, every time I
finish a couple of petals, I unpin the work from the cushion and turn it
around to see how it looks.
I think if I make a mistake, at least I’ll have to redo just one section, and not have to start over from scratch 🙂
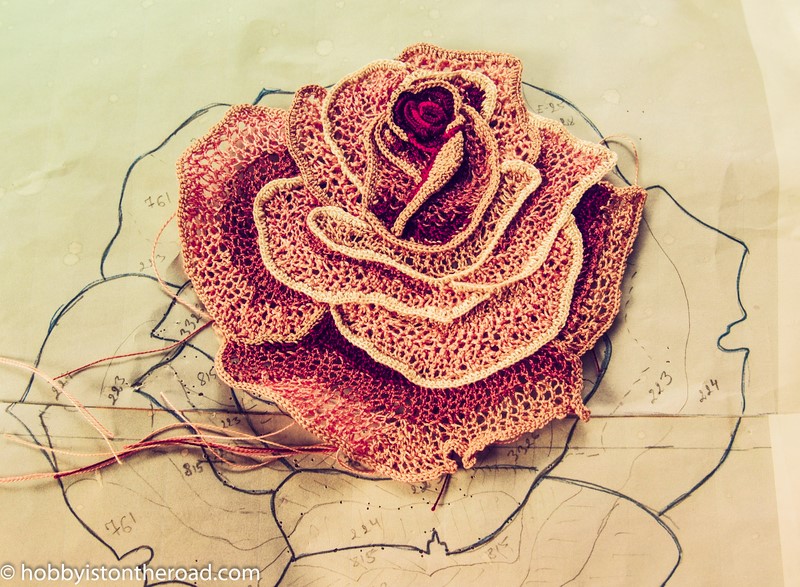
When I started working on the centre of this Irish Crochet rose, I
was almost sure I’ll have to redo it, since I made a couple of mistakes.
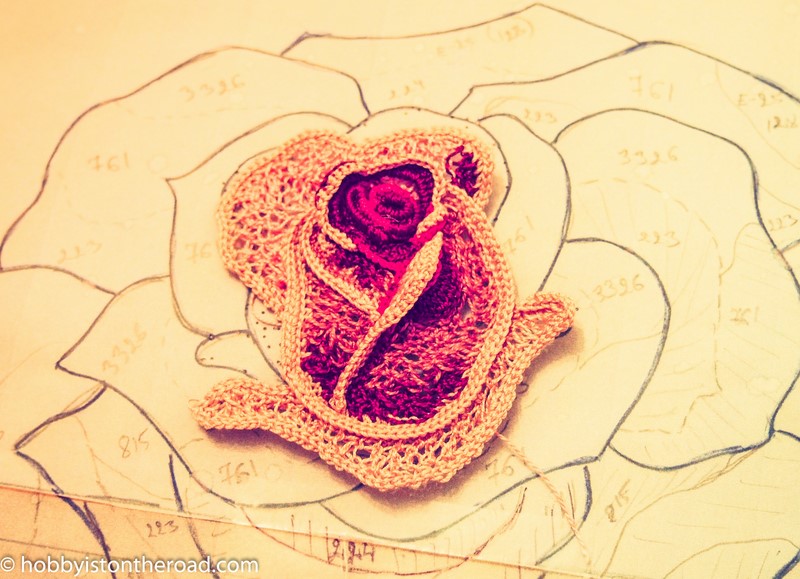
However, with this being a sort of freeform crochet, I managed to hide those little imperfections and could continue the work without going back to the beginning, yay!
Here’s the stage I am leaving this Irish crochet lace rose today, since I won’t be able to touch it for the next two weeks…
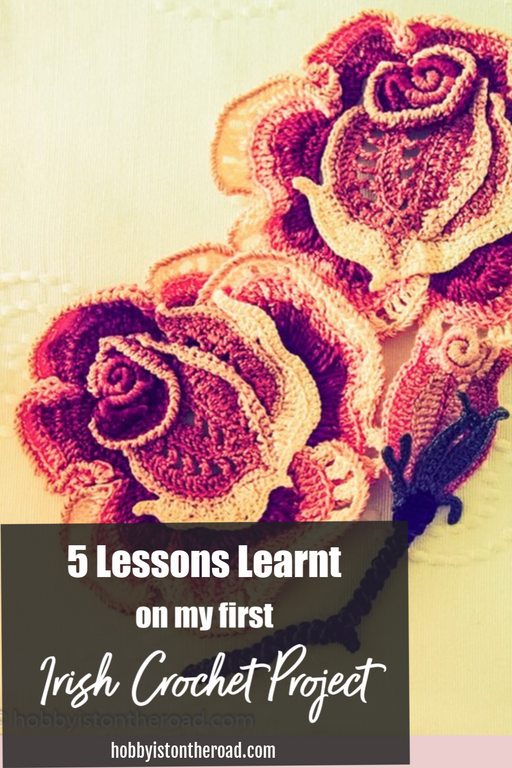
I’ve been working on a dress using Irish crochet technique for a while now. Although I haven’t finished it yet, I certainly have learned some important Irish crochet lessons.
I’d like to pass on these lessons to crocheters who are thinking of starting a larger project using Irish crochet technique for the first time.
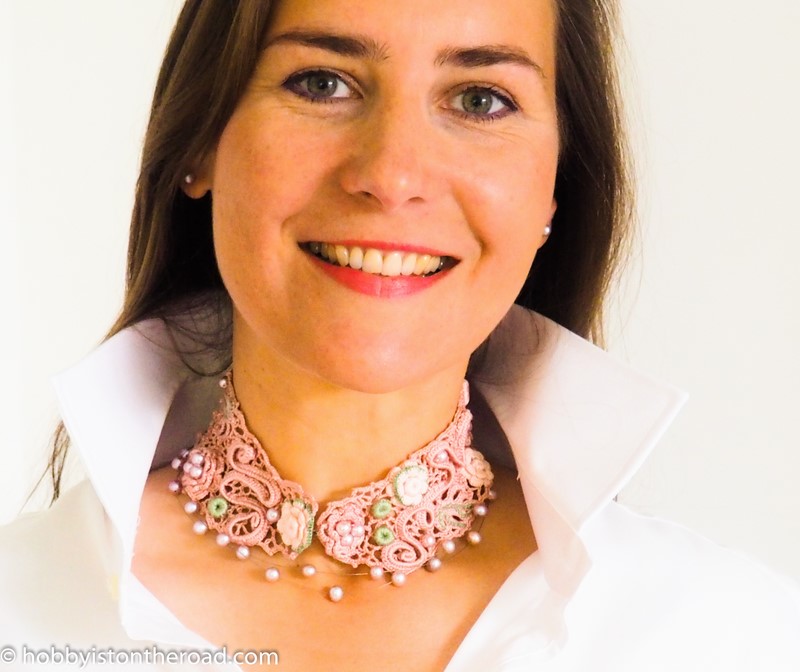
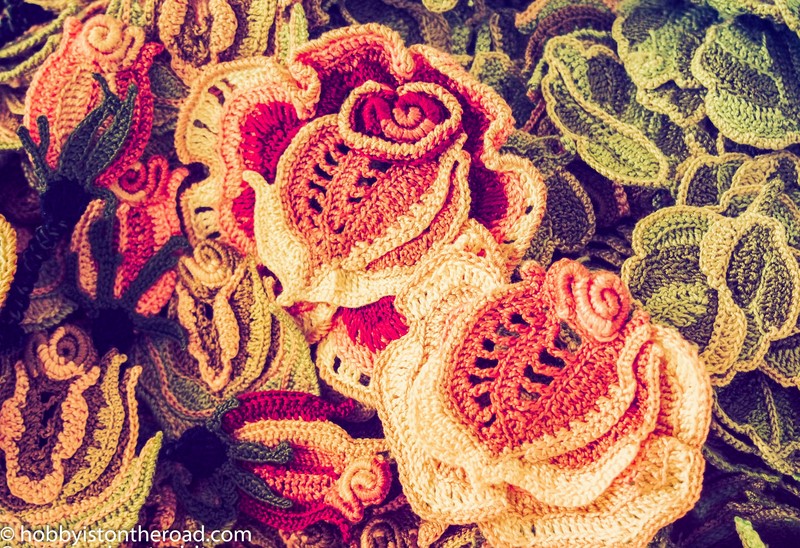
Irish crochet, for me, is really the most beautiful crochet technique there is. Clothes and accessories fulfilled in this technique can look truly spectacular.
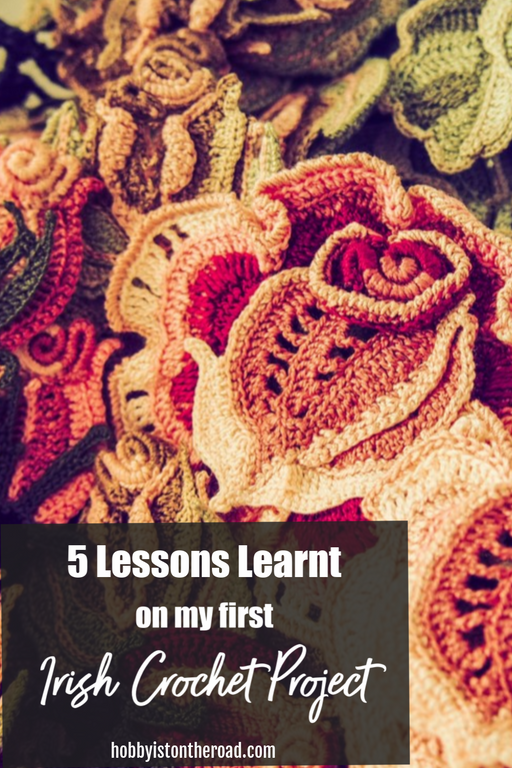
5 Irish Crochet Lessons for First-Timers
EXCELLENT QUALITY CROCHET YARN IS EVERYTHING.
I bought the design/instructions of this dress in Irish crochet style HERE and, of course, the first thing I needed to do was to buy the yarn.
This particular Irish crochet dress is a colorful one so I needed to make sure I got the right colors and shades. I bought most of required yarn from Casa CeninaHERE.
The yarn I had to buy according to the author’s recommendations turned out to be quite expensive…
…I don’t even dare to quote how much it ended up costing me…
…but now I see that the cost will be justified.
Why?
The bottom line is that no matter how brilliant your technique is if your yarn is some cheap synthetic product, your final item will not look as beautiful as it would when made from higher quality material.
I hope to wear my dress to some special occasions, therefore, I had to get the highest quality yarn possible.
I think this also applies to other knitting, sewing or crochet projects – if your primary material is excellent quality, the finished product will look good too.
2. PRACTICE WITH CHEAPER YARN AND SIMPLER IRISH CROCHET ELEMENTS FIRST.
If you’ve never tried Irish crochet before, it’s best to get some cheaper yarn and learn to crochet those separate elements (roses, leaves, cords, etc.) before you start working on your main project.
Here’s a great video where you can learn to crochet some basic Irish Crochet lace elements.
You could, for example, crochet a smaller item such as a cushion cover, or a small dress for a little girl.
This will give you an opportunity to develop the skills in creating small fiddly items, as well as the understanding of how the process works.
3. START WITH LESS PROMINENT BACKGROUND ELEMENTS FIRST.
When I started this dress in Irish crochet technique, I made the mistake of starting with the most colorful elements first.
I reckoned there were fewer of them so I will see the result faster.
This, unfortunately, turned out to be a bit of a disaster…
I had to stop and start again, this time creating simpler background elements first.
Background leavesSimple cords.Background roses.
This is a good idea because, if your background leaves and flowers don’t turn out to be as perfect as you pictured them, they will still work well on a finished dress simply because they are not the elements your attention will be drawn to.
4. TAKE CARE OF YOUR EYES.
Irish crochet technique is often fulfilled using fine yarn and small size crochet hook, which means your eyes will get tired quite quickly since you’ll be constantly looking at minute details.
So make sure you take breaks when working on your project and if at all possible, work in daylight. If not, switch on all the lights in the room to avoid extra strain on your eyes.
Your fingers will also get tired, especially at first, when you are still learning. So take breaks, do some exercises for your fingers…
…no need to become crippled by the time you finish your spectacular project!
5. BE PATIENT, IT’S NOT A SPRINT, IT’S A MARATHON.
If you are one of those lucky people, who can afford to do nothing else but crochet all day, then you might finish the project quickly enough.
It seems it takes a few months to complete a dress in Irish Crochet technique for a professional.
… but if you are like me and apart from your crochet you have a life with family, work and other commitments, then chances are, you will be lucky if you can devote 2 hours a day to your Irish Crochet project.
For the purposes of entertainment, I timed myself when making different elements for this dress.
For example, it takes me 50 minutes to crochet a background rose for this project (the green ones above). I had to crochet 70 of them.
Another example, the large rose above from start to finish takes me 3 hours. I needed 6 of those…
…you can do the maths yourself…
…the time adds up.
Therefore simple advice is: don’t be over-ambitious.
A fun gift for a crocheter 🙂
The last thing you want to do is buy some expensive yarn, start the project and abandon it half-way through just because that party you were going to wear your new dress to is over a long-time ago but you are still sitting here with a hook in your hand…
TIP. I keep my project close to me as much as possible, so as I could crochet a line or two every time I have a free minute. I even take it on picnics for those downtimes when everyone is happily asleep on the grass after a hearty meal and I can get on with my crochet. It’s my way of making sure I keep going forward with this project.
It’s a somewhat messy process in my life 🙂
I hope these simple lessons above will help those who want to take up a larger Irish crochet project.
The most important thing is to keep your eyes on the finish line – you will reach it if you keep going!