Posted on 1 Comment

Ways to Wear the Lavender Fields Lace Dress

Ways to Wear Lavender Fields Dress

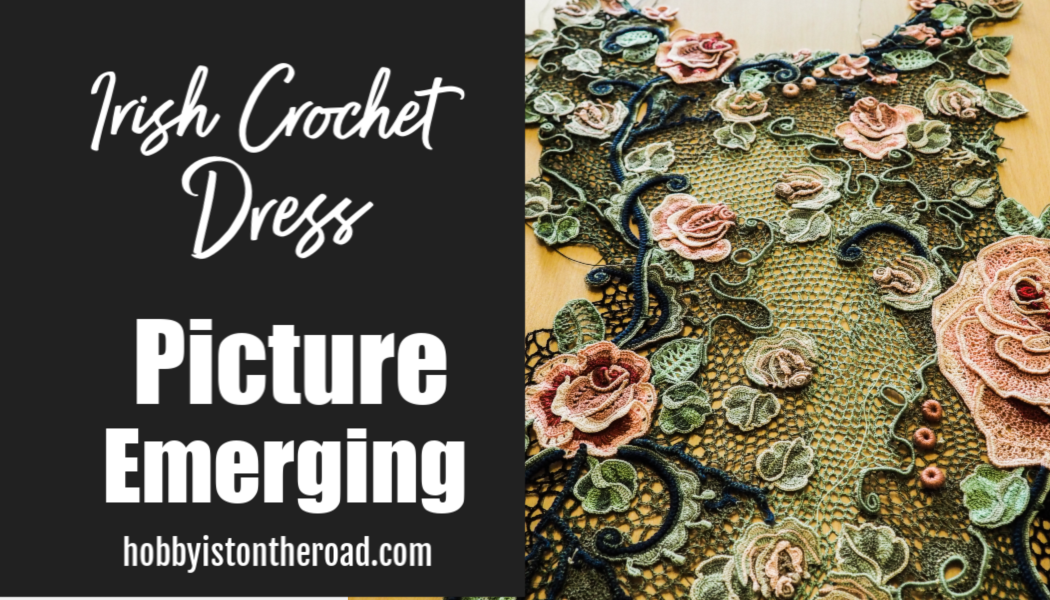
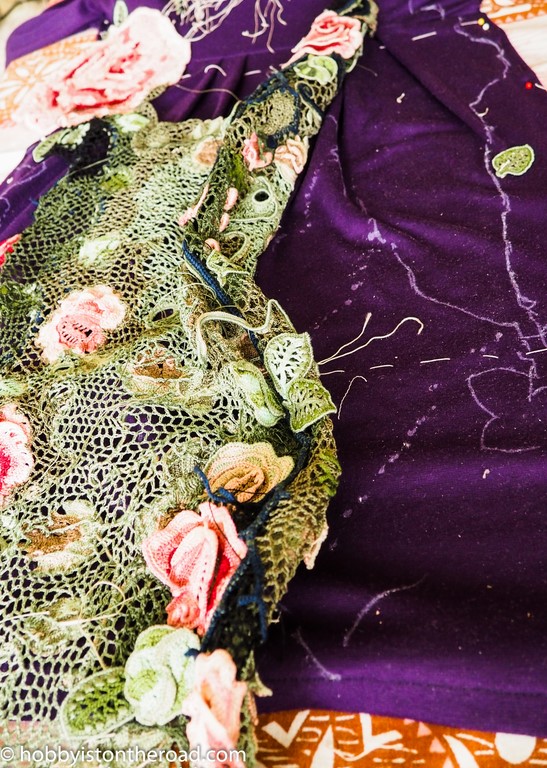
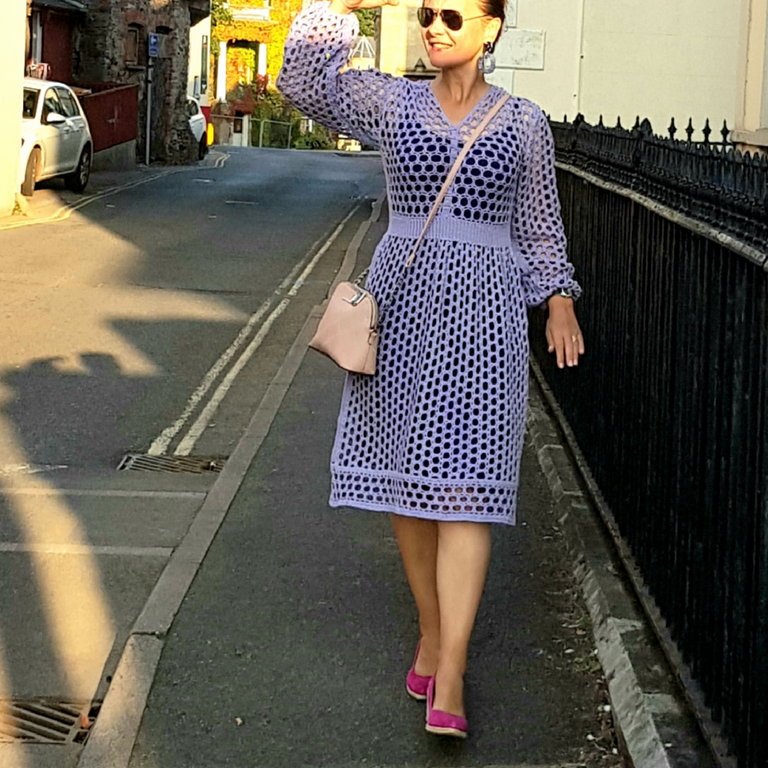
Ways to Wear my Lavender Fields Lace Dress.

After the recent launch of my Lavender Fields Lace Dress crochet pattern, I ran into a dilemma.

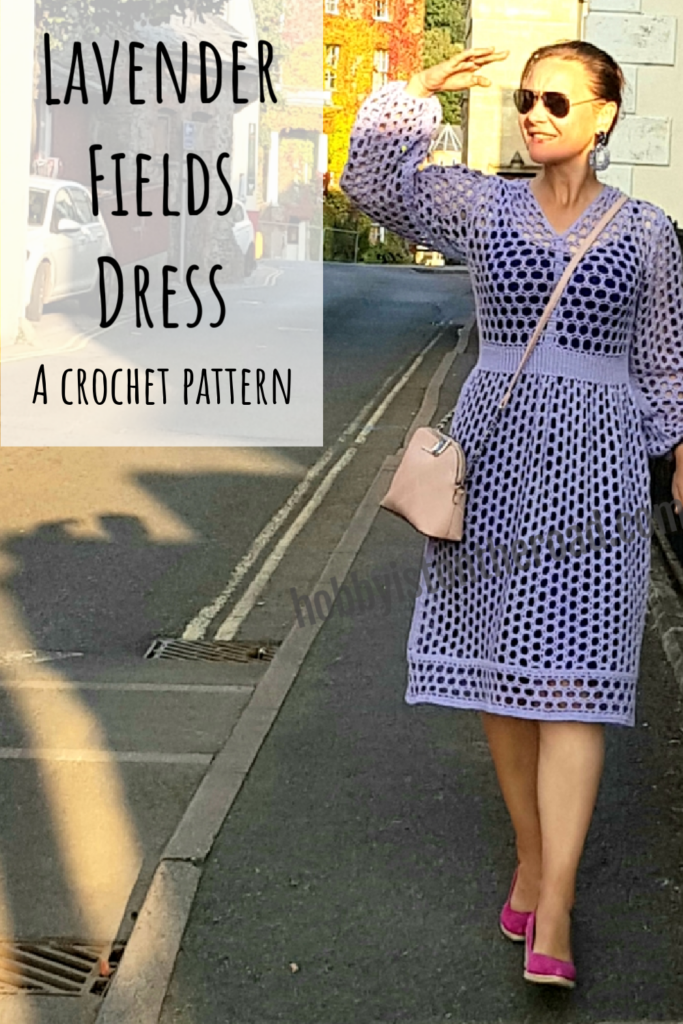
I completed the dress in the summertime, and it made a perfect outfit for those balmy late August and early September evenings.

But by the time my lovely team of testers finished testing the pattern, October has arrived.

You can get the pattern on ETSY | RAVELRY |THIS WEBSITE | RIBBLR (coming soon)

Hence the dilemma:

How can I wear my lace dress in autumn and even later into the cold season? Is it even possible? Is this dress just for warm season or can it be realistically worn during the chilly months of the year?

So to answer these questions, I grabbed my Lavender Fields Dress and headed for the shops.

My plan was to find at least two warm undergarments that I could easily pair with my lace dress.

So here are the results of my little ‘Ways to Wear’ experiment in the changing rooms:

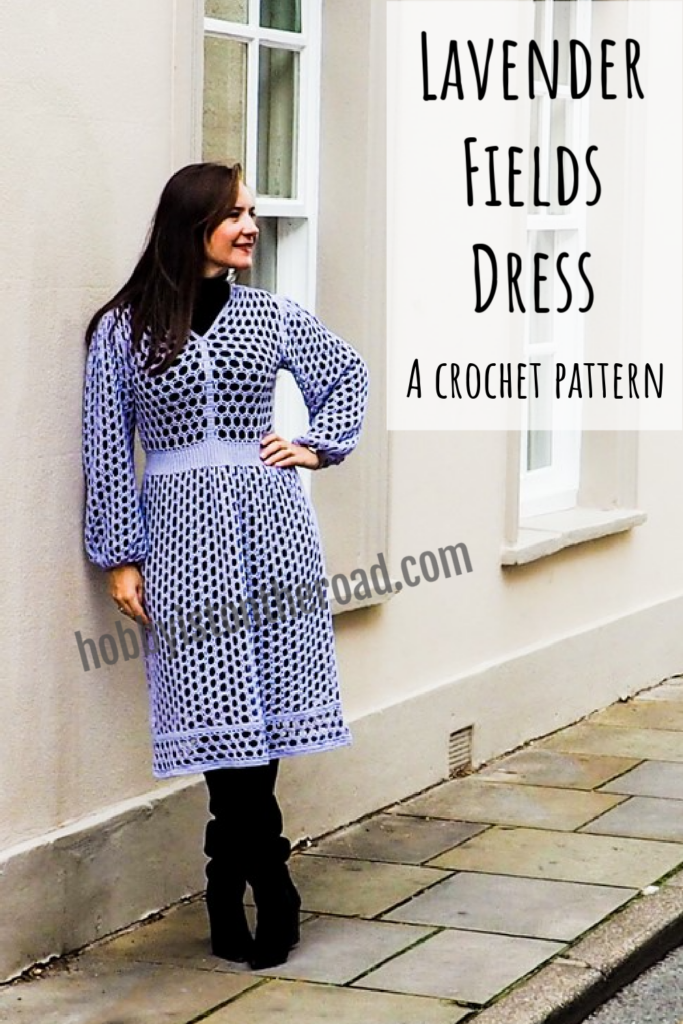
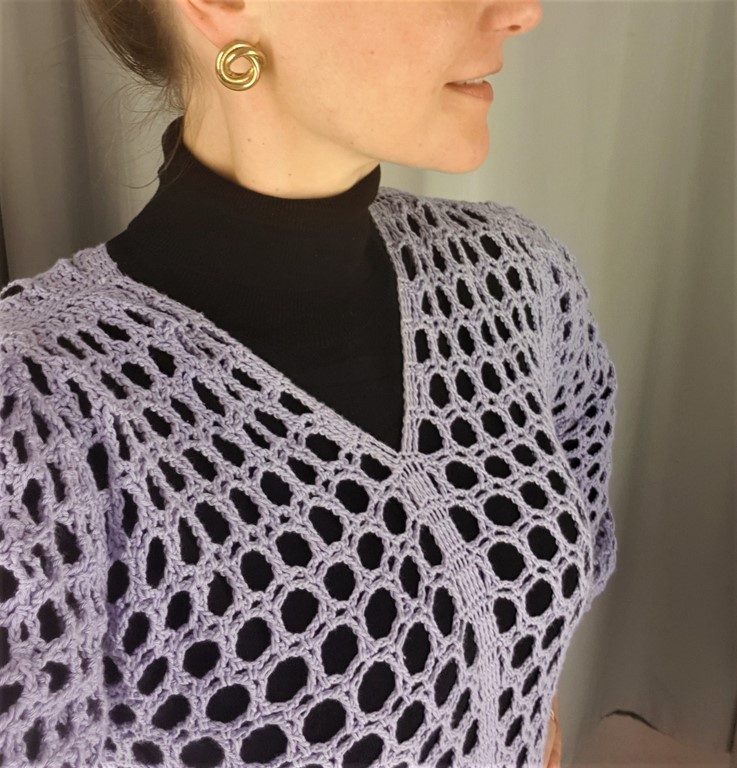
  1. Black knit pullover and a black slip paired with black suede boots.
Ways to Wear Lavender Fields Dress Black Background

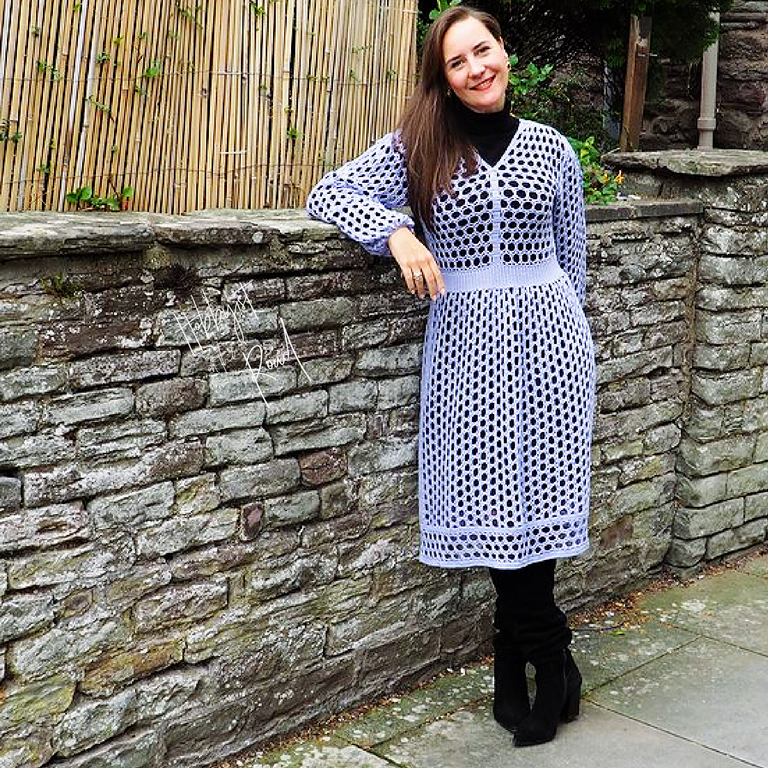
I really love this look where black background makes the lace texture stand out.

The turtleneck keeps me warm and cozy, and I do not have to think whether or not it sits well. Yes, am keeping this set, it’s a winner!

Other dark monochrome colours would also work very well, and they would be really effective, if you could keep the footwear in the same colour.

Ways to wear Lavender Fields Dress

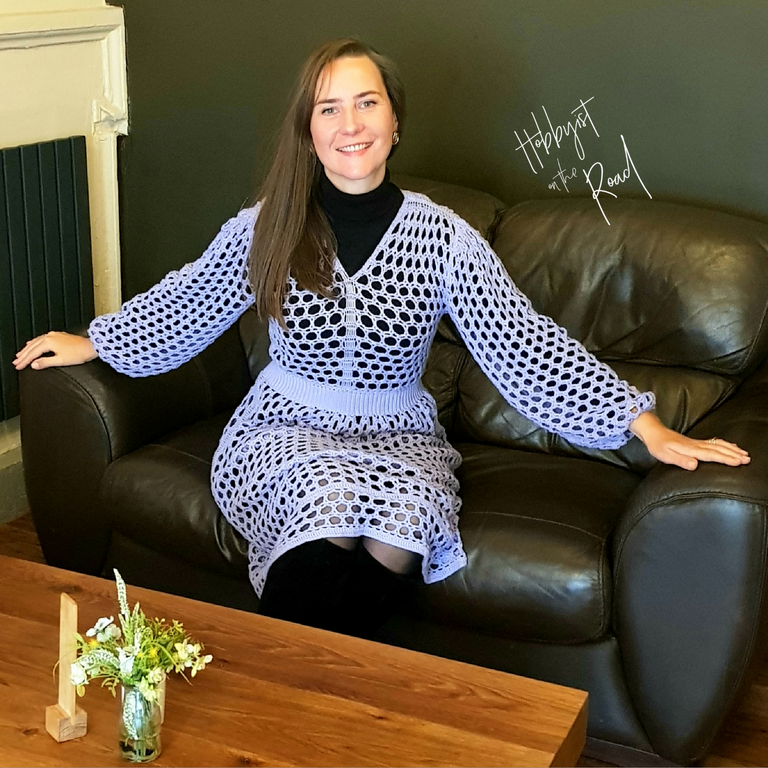
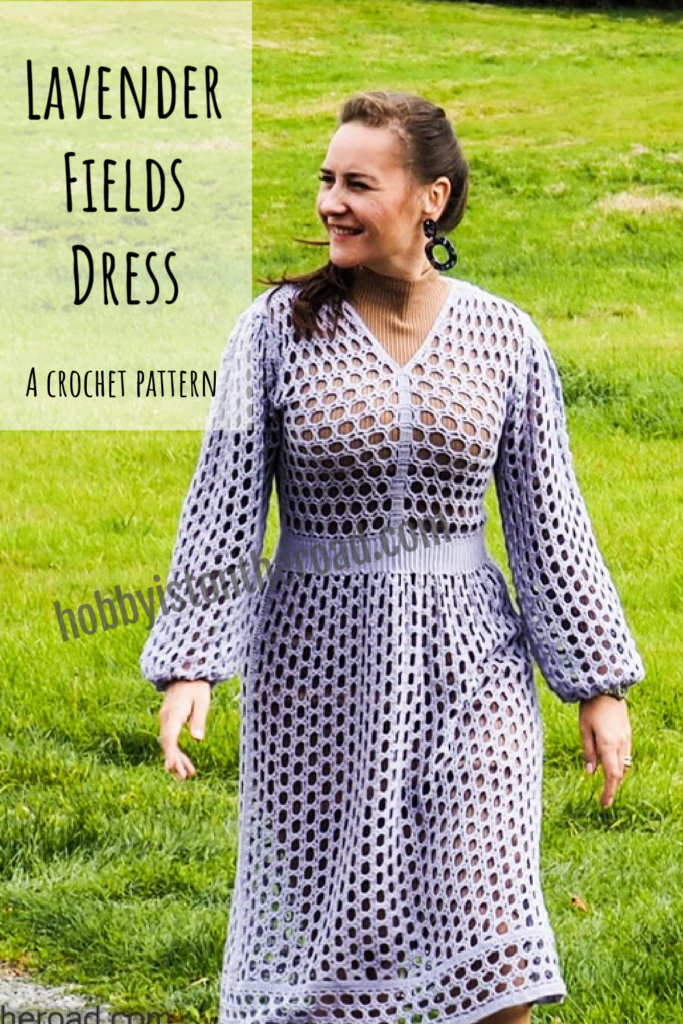
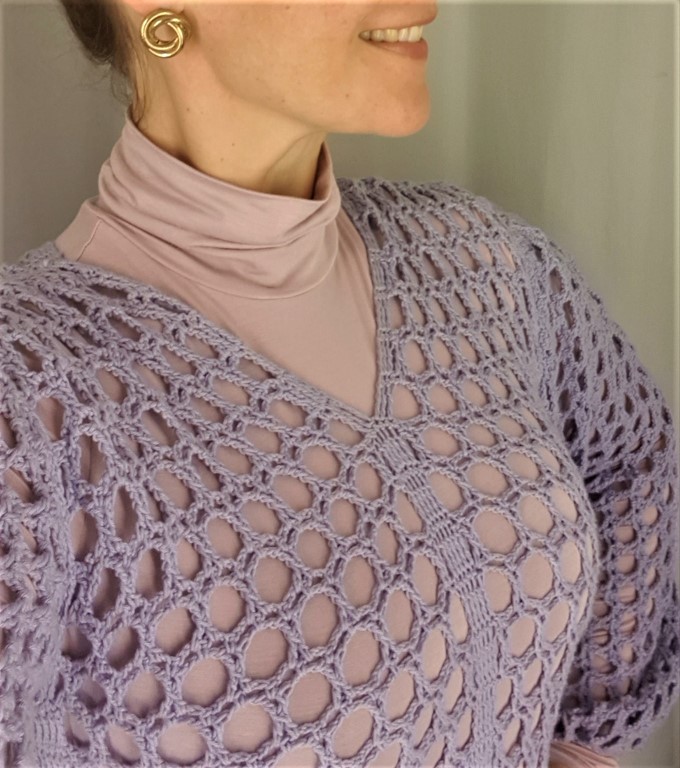
2. Ribbed jumper dress in nude colour and brown suede boots.

Before going into the shops, I actually thought I will simply buy a few knit jumper dresses in different colours and be done with my experiment. Turns out, they are not so easy to find!

I found this dress in nude colour, a size smaller than what I would normally wear, but it doesn’t really matter, because the material stretches and my intention is to only wear it as an undergarment.

Ways to Wear Lavender Fields Dress nude ribbed Background

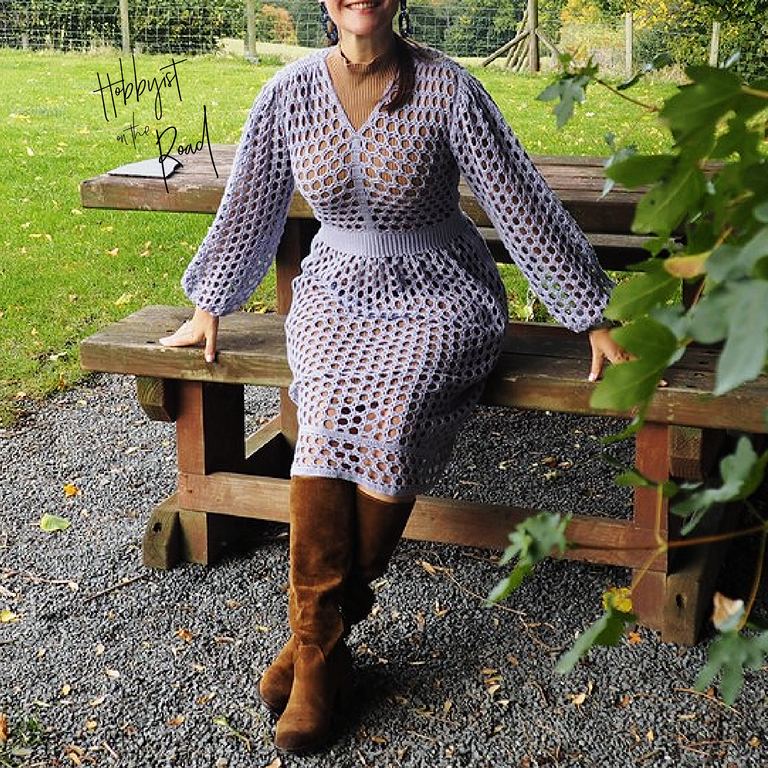
As you can see, a simple swap of colours, lends the lace dress a totally different look and feel.

This time, the dress seems more toned down, definitely a casual daytime outfit.

As you can see from a close-up picture below, the nude colour dress has a basic ribbed pattern, which is not ideal for wearing it with my lace dress. The reason, I think, I can just get away with it because of the totally neutral colour which does not draw attention to itself. 

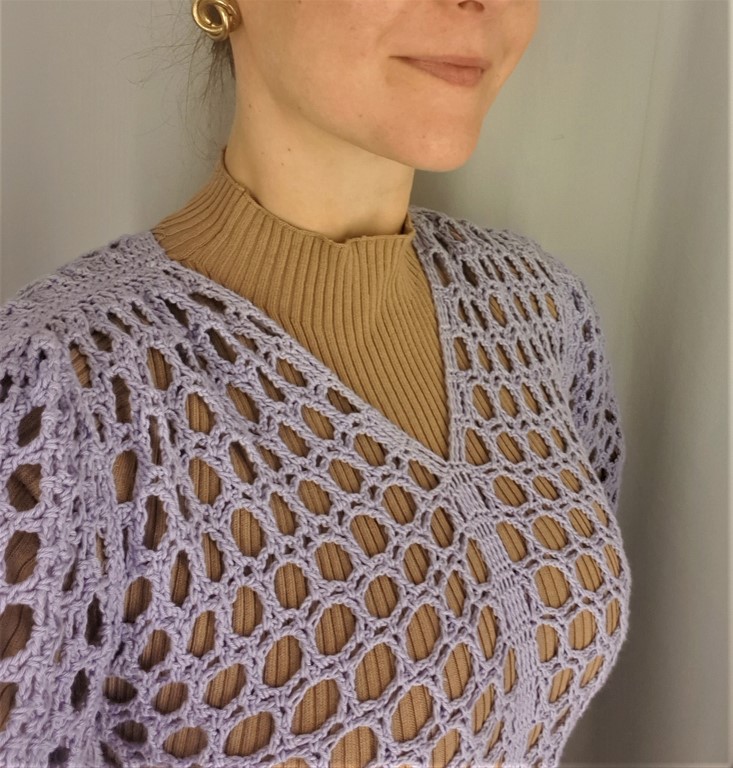
Another aspect to keep in mind if choosing a nude fabric as an undergarment for this dress, the first impression can be that you are not wearing anything underneath. So you may sometimes get some startled looks…

Apart from the two variations above which I’ve decided to keep, I tried on a number of different tops and dresses and took some close-up pictures to see how different fabrics, textures, colours and knits work with the lace of Lavender Fields Dress.

Here are some more pictures and conclusions from my fitting rooms adventures.

One important conclusion – my black knit pullover works the best, because the knit is very fine and plain, there isn’t any pattern on it.

The minute a garment has some sort of pattern, even a simple ribbed one, it starts clashing with the lace. Sometimes, like with my nude coloured dress, one can make it work, but very often, it’s not the best option.

Another discovery is the choice of fabric. This jersey pullover (picture below), for example, seemed like a good option while it was on a hanger. The minute I put it on, I realized it was not. It has strange, messy folds around the neck and in the chest area. So it was a NO from me.

A maroon T-shirt dress (below) seemed like an option while I was in the lovely fitting room with dimmed lights.

Ways to Wear Lavender Fields Dress synthetic marron background

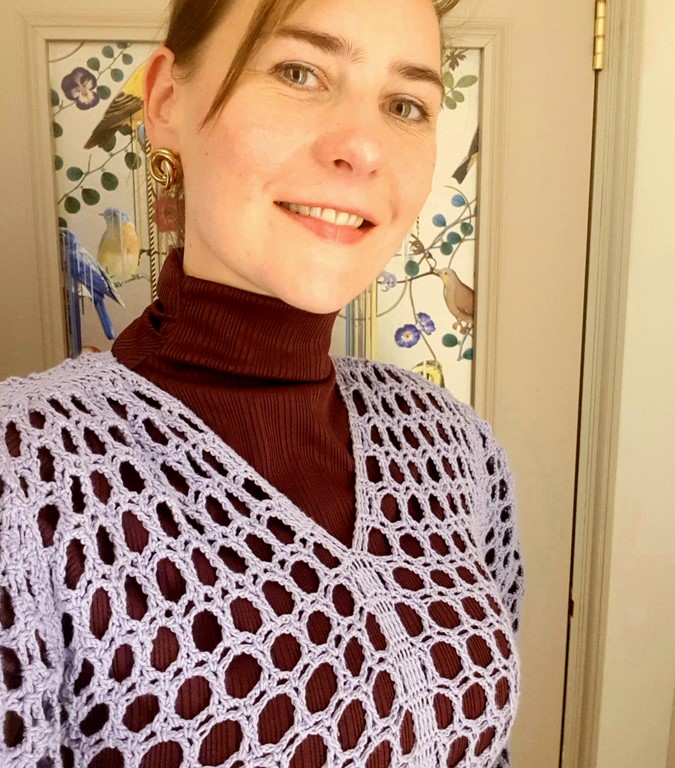
When I got into the daylight though, I changed my mind. This is because the shade of the dress looked totally different and the synthetic material seemed very cheap.

So another lesson learnt – always check an item in the daylight. Especially, if it is something you will be wearing during the day.

Another discovery I’ve made is about the shape of the neckline.

So for example, I thought it would be a good idea to layer my warm tailored vest on top of the dress, just to have a different option for chillier days.

Ways to Wear Lavender Fields Dress neckline

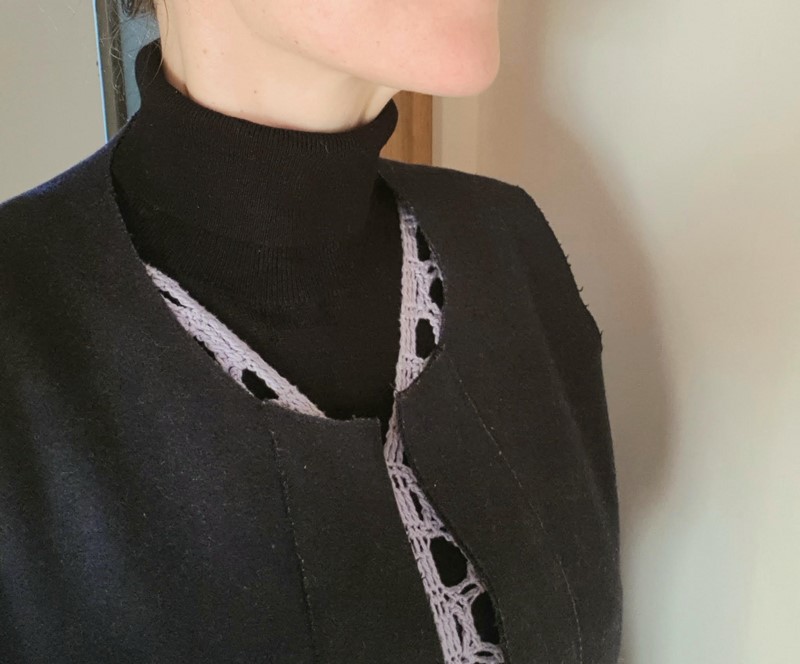
You can judge for yourself, but to my mind, having a pullover, a V-shaped and a round neck line on the same neck at once, does not look like the best option out there. So I am not going down this road either.

So there you have it, my ‘Ways to Wear’ adventures 🙂

I hope that my little experiment will give you some ideas of how you could wear your Lavender Fields Lace Dress (or any other lace item) during the colder months.

Get instantly downloadable Lavender Fields Lace Dress pattern here:

Get it on Etsy

Get it on Ravelry

Get it on this Website

Liked this post? Pin it for later!

Posted on 1 Comment

Crochet Monstera Leaves

Crochet Monstera Leaves

Three Crochet Monstera Leaves – the newest addition to my collection of Irish Crochet patterns (available HERE).

Originally, I planned to crochet a set of Monstera Leaf coasters, like this one:

Crochet monstera leaves coaster

But, somehow, this project just grew the legs of its own and took off in a completely different direction than I originally planned!

So I ended up with a pair of earrings for a day

Crochet Monstera leaves earrings

… a crochet Monstera leaves canvas…

Crochet Monstera Leaves canvas

…and no coasters at all…

I am glad to report though that the crochet Monstera Leaves picture has survived the creative process and is actually on my wall now.

Himself also likes it, and even uploaded the image as his smartphone screen background – I feel really flattered 🙂

I crocheted these Monstera Leaves using irregular Tunisian lace, a process I described before when creating a Rose for my Irish Crochet Dress.

Materials and Tools used for Monstera Leaves project:

  1. The yarn is 100% mercerized cotton 100g/460m approx. 

2. 1mm hook for two larger leaves and 0.75mm hook for the smallest leaf.

You could potentially go up to 1.5mm hook, but anything larger than that, will make the process very difficult as you will be crocheting on a flat surface.

3. Soft worktop or a flat cushion.

4. Pins, scissors, needle.

5. Printer to print out Monstera Leaves drawings.

The way the process works is:

You attach your drawing of a Monstera Leaf to a flat soft worktop (or a cushion).

You crochet irregular Tunisian lace looking at the wrong side of your crochet Monstera leaves. This is the same procedure as in any Irish crochet project when you are working on the lace. Keep attaching your lace to the surface as you go along.

Monstera Leaf Process

After you have filled the space with the lace, remove your crochet Monstera leaves, turn them around and see the real picture. Finish off the edges, sew in the thread ends. And now repeat the process with two smaller leaves.

Medium Monstera Leaf process

crochet monstera leaves - small

Remember to block your Monstera leaves with a steam iron, otherwise your leaves will not be completely flat.

Embroider leaf veins with a contrasting thread using simple running stitch.

Voila!

You’ve got three beautiful crochet Monstera Leaves!

You can make the larger leaves into coasters, use the smaller ones for accessories, such as earrings, or do what I did – create a crochet canvas!

A crochet canvas picture was the first for me. I only bought the canvas in order to have a white background for taking pictures…

But a week later it ended up on the wall!

You never really know which direction your crochet project will take you!

For Step-by-step instructions downloadable PDF pattern:

Get it on Ravelry

Get it on Etsy

Get it on this Website

Remember to drop me a line asking for a 30%OFF coupon for this pattern at: hobbyistontheroad@gmail.com

Create beauty one stitch at a time!

Liked this post?

Pin it for later!

Crochet Monstera leaves pinterest
Crochet Monstera Leaves process 
 - pinterest

Posted on Leave a comment

Irish Crochet Dress: the Annoying Bit

Annoying bit finishing Irish Crochet dress

Hello my crochet friend!

So my Irish crochet dress is finished…

well…

kind of…

I’m at that stage where I’ve completed the crochet part – sleeves and all…

…but I can’t really call the dress finished, hence the title – ‘the annoying bit’.

So yes, I’ve completed the sides and the sleeves, tried the dress on only to realise that when I finished the dress, it wasn’t really finished.

There was another mountain to climb!

The lace at the bottom of the dress and sleeves had to be evened out and completed with a simple single crochet line and a little picot here and there.

Irish Crochet Dress the Annoying Bit

That finishing single crochet line was, thankfully, very easy and quick.

But the ‘evening out of the lace’ bit was quite tricky.

While the bottom of the dress doesn’t have to be as even as in sewing, it still has to look somewhat even, which I’m still not sure about.

It’s just that on a flat table the bottom looks even, but when you wear the dress because of different elements on different sides, there seems to be an illusion of one side being slightly shorter…

I’m still thinking whether or not I should do something about it.

Another very time-consuming bit is the weaving in and hiding of yarn ends – there are hundreds of them!

And although I’ve been working on them for the last number of days now, I’m still nowhere near to being finished…aargh…

The dress has many overlapping elements like this rose and leaf.

As I was crocheting the lace, I didn’t realise I had to crochet some lace to join the overlapping sides of the elements to avoid holes like this:

The Annoying bit of Irish crochet dress

I actually thought I had finished fixing the overlapping elements, but as I was taking photos for this post, I discovered a few more that have to be corrected…

When the sleeves were finished and I tried on the dress, I realised that the neckline will have to be adjusted.

All of a sudden, because of the weight of the sleeves, the neckline became too wide which meant I had to add another layer of leaves-flowers-branches on the shoulders and the back in order to adjust the way the dress sits.

The last elements I’ll be working on when all the above are finished is the little Swarowski beads.

I’ll sew them on in the centre of each bigger rose and some leaves around the neck. The beads will add some sparkle, especially when I wear the dress in the evening with artificial lighting.

So this is where I am at. I consider all of the above such an annoying bit of the whole process!

My original plan was to have the dress finished-completed-done-and-dusted a week after I completed the sleeves…

…but here I am, a month later, I’m still working on the annoying bit 😀

Create beauty one stitch at a time!

Previous posts in this series:

  1. 5 Irish Crochet Lessons for First-Timers

2. Irish Crochet Dress: Main Rose

3. Irish Crochet Rose Finished

4. Irish Crochet Dress: Elements Completed

5. Irish Crochet Dress: Design

6. Irish Crochet Dress: Lace

7. Irish Crochet Dress: Picture Emerging

8. Irish Crochet Dress: A Quick Update

9. Irish Crochet Dress: Trying It On for the First Time

10. Irish Crochet Dress: Working On Sleeves

Posted on Leave a comment

Irish Crochet Dress: Working on Sleeves

Irish Crochet Dress Working on Sleeves

After a few days of feeling happy to have finally tried on my half-finished Irish crochet dress, I am now working on sleeves.

Irish crochet professionals, most likely, wouldn’t agree with my way of approaching this tricky part of the dress.

Working on sleeves Irish crochet dress

I have stuffed my dress sleeves (you might remember from earlier posts that I’m using an old dress for modelling) and am pinning the details straight onto the stuffed sleeve.

This way I find it much easier to picture how a finished sleeve will look like.

My biggest worry with the sleeves is the area where the chest meets the underarm. I’ve seen quite a number of crochet dresses with a lot of tension in that area, which doesn’t look very nice.

So my solution was to stuff the upper part of my modeling dress to replicate the shape of the body.

I ended up with a weird looking ‘mannequin’ 🙂

Sleeves for Irish crochet dress

Most of the time when I wasn’t working on it, my mannequin spent wrapped up in an old sheet, looking like this:

I had to make sure the lace in the underarm region doesn’t have any tension. Therefore I added extra rows of lace in that area.

As I’m looking at the sleeves, I’m relieved to remember that the two won’t have to be identical. They have to look only somewhat similar.

As I was completing the second sleeve, I rushed to take this picture of the ‘final'(or so I thought) moment…

Finishing sleeves for Irish crochet dress

Far from being the ‘final moment’ of crocheting this Irish lace dress, this was only the beginning of the final stage…

Create beauty one stitch at a time!

Previous posts in this series:

  1. 5 Irish Crochet Lessons for First-Timers

2. Irish Crochet Dress: Main Rose

3. Irish Crochet Rose Finished

4. Irish Crochet Dress: Elements Completed

5. Irish Crochet Dress: Design

6. Irish Crochet Dress: Lace

7. Irish Crochet Dress: Picture Emerging

8. Irish Crochet Dress: A Quick Update

9. Irish Crochet Dress: Trying it on for the First Time

Liked this post?

Then pin it for later!


Posted on Leave a comment

Irish Crochet Dress: Picture Emerging

Picture Emerging Irish Crochet Dress

Many late nights, early mornings and numerous stolen moments later a clearer picture emerging…

…my Irish Crochet dress seems to be actually coming together!

Here’s a little update of that emerging picture:

As I wrote in my previous posts about this dress, the process is really slow and tedious…

To be perfectly honest, I’ve had some very VERY dark moments of despair, when it seemed that no matter how many hours I was working on it, I was stuck in one place unable to move forward…

And yet I was wrong…

…as one quiet evening, I finally unpinned the lace from the work table, turned it around and finally saw a fuller picture.

So here’s where I am at at the moment:

Picture Emerging Irish Crochet Dress

And here’s a full-length image:

Picture Emerging - Irish Crochet dress

Below are a few process images, just to give you a fuller picture:

As mentioned before, after crocheting all separate elements separately, you then lay them out on a flat surface to form a desirable shape and picture.

It is a time-consuming step as you have total freedom in terms of design. I wrote about this step more extensively HERE

As you can see in the picture, I used an old purple dress in order to achieve the right size/shape/length.

Normally, Irish crochet tutorials tell you to do your measurements from scratch and cut out front/back/sleeves of a dress from a separate material and then model the dress on that. But I see no harm in using something that’s readily available and saving some time and energy 🙂

This old dress you see in the pictures is only here for modeling. It won’t be part of the finished dress.

After you are happy with the picture you’ve laid out, you then have to attach the elements to your surface by stitching. You then start crocheting lace to gather all the elements together.

As mentioned in other posts, when crocheting the lace, you are looking at the ‘bad’ side of the dress. This means you can only see the emerging picture, after you finish a section, unpin your work from the surface and turn it around…

…always an exciting and scary moment in equal measures…

Here are a few close-ups, enjoy!

Picture emerging Irish lace

After this epic journey, which isn’t even half done, I needed a little rest.

And now I feel the dress is calling again and I must go… 🙂

Create beauty one stitch at a time!

Previous posts in this series:

5 Irish Crochet Lessons for First-Timers

Irish Crochet Dress: Main Rose

Irish Crochet Rose Finished

Irish Crochet Dress: Elements Completed

Irish Crochet Dress: Design

Irish Crochet Dress: Lace

Liked this post?

Then pin it for later!

Picture Emerging Irish crochet dress
Facebook Group Weekly Crochet Focus
Click HERE to join!